If you own a laptop with DUAL GPUs and you want to force a program or game to use the dedicated Graphics adapter and not the Integrated Graphics adapter, then this tutorial is for you.
On Windows 10/11 devices with multiple graphics processing units (GPUs), the system automatically decides which GPU to use in applications to improve system performance and battery life. However, if you have problems running a particular application or game, you can choose which graphics adapter to use by following the instructions below.
In this guide you’ll learn how to set the preferred graphics adapter for a specific game or application in Windows 10/11.
How to Specify the Preferred GPU Adapter for a Game or Program on Windows 10/11.
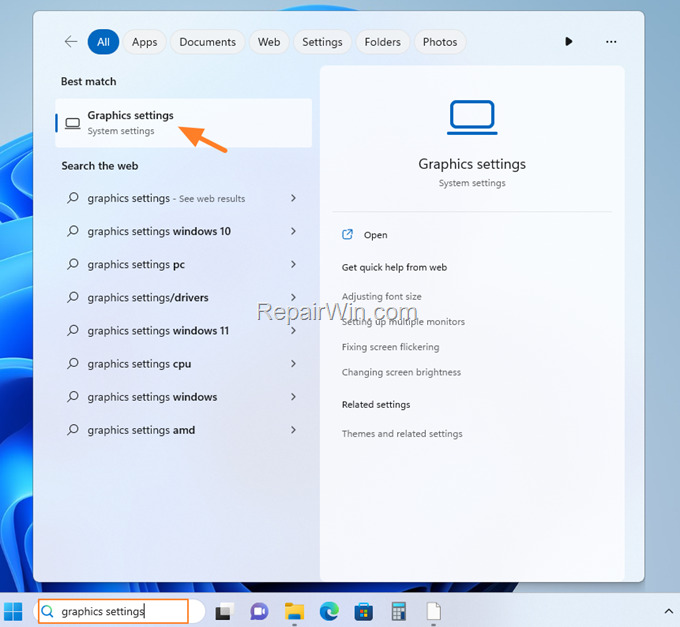
1. In the Search box, type Graphics settings, and then click the relevant result, or go to Start > Settings > Display > Graphics Settings.

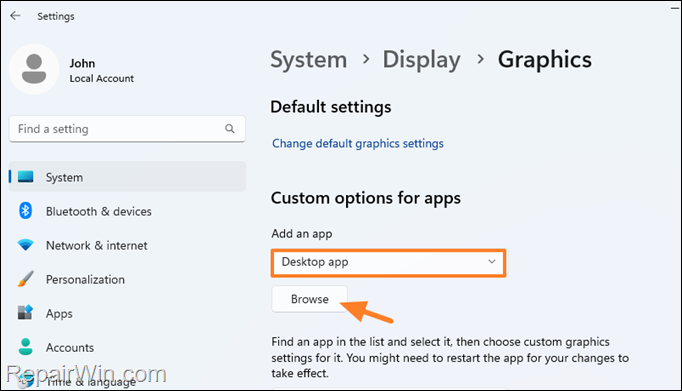
2. Under “Add an app” (or “Select an app to set a preference” in Windows 10), click the drop-down menu and select the type of app for which you want to change the preferred GPU: Desktop app or Microsoft Store app and then click the Browse button.

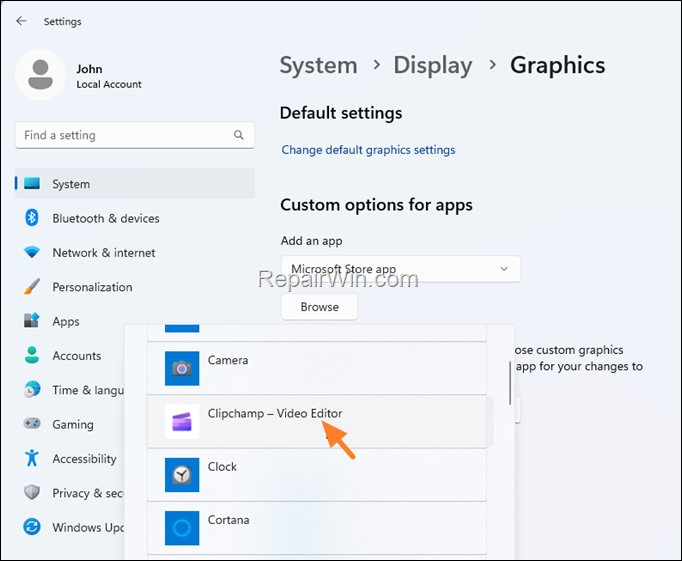
3. Now, depending on the type of application you have chosen, in the previous step (“desktop app” or “Microsoft store app:), do the following:
- If you have selected “Microsoft Store app” select from the list of Windows Store apps the app you want to change the graphics adapter.

- If you have selected “Desktop app” select the executable file (.EXE) of the application/game you want to change the graphics adapter and click Add. (Usually the .EXE files of desktop apps can be found under “C:Programs Files” or “C:Program Files (x86)” folders.*
* Tip: To easily find the location of an application’s executable file (also known as an “EXE” file), right-click on the application’s shortcut and select Open file location.


4. After adding the app you want click the Options button next to it, to change which graphics adapter to use when running it.
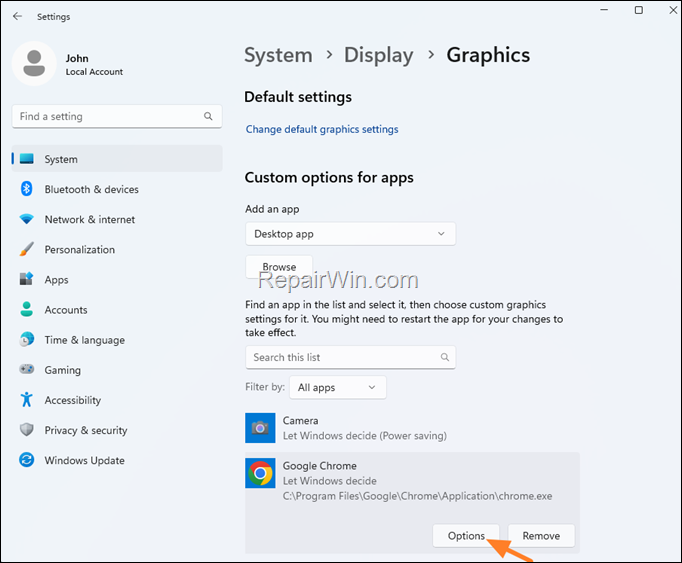

5. At Graphics preference options, select the one you want and click Save.
- Let Windows decide: This is the default option.
- Power saving: This option reduces power consumption by using the built-in (aka “integrated”) graphics adapter, especially if you’re running on battery power.
- High performance: This option will use the GPU with the most performance, which is usually is the dedicated/external graphics adapter. (This is the preferred option for games, design or video editing programs, etc.)
e.g. To force a game to use the dedicated NVIDIA GPU check the “High performance” option.


6. That’s it. The next time you open the selected application it will use the selected graphics adapter.*
* Please note that some applications have special settings for which graphics adapter to use. So if you have changed the graphics adapter in your Windows settings and it is still not used by the application, then change the graphics adapter in the app settings.
That’s all folks! Did it work for you?
Please leave a comment in the comment section below or even better: like and share this blog post in the social networks to help spread the word about this problem.


