This tutorial contains instructions on how to Microsoft install Windows 11 in VirtualBox, even without a TPM chip and with an unsupported processor. With these instructions you will also be able to bypass the error “This PC can’t run Windows 11” when trying to install the new OS in VirtualBox.Officially, Microsoft does not allow the installation of Windows 11 on virtual machines that do not meet the minimum hardware requirements. But, even in systems that owns a supported Windows 11 processor and a TPM v2.0 module, users experiences the following error when trying to install the new operating system on Oracle VirtualBox virtualization platform:
“This PC can’t run Windows 11.
This PC doesn’t meet the minimum system requirements to run this version of Windows”
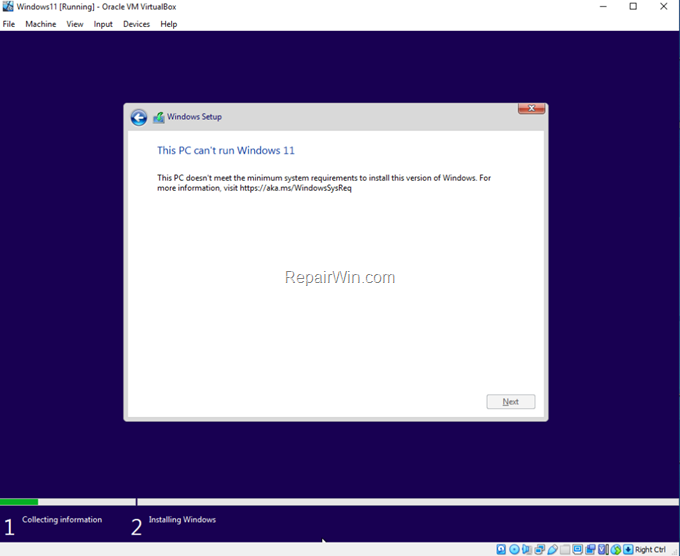
This guide contains step-by-step instructions on how to install Microsoft Windows 11 on Oracle VM Virtualbox.
How to Install Windows 11 on Oracle VirtualBox.
To install Microsoft Windows 11 on Oracle VirtualBox Windows 11 and to bypass the TPM requirement error “The computer cannot run this version of Windows”, follow the steps below.*
* Note: Skip steps 1 and 2 and go to Step 3 if you already have a Windows 11 ISO file and have already created a VM machine for Windows 11.
Step 1. Download Windows 11 on a ISO file.
1. Download the Windows 11 Media Creation Tool. (Source).
2. Run the downloaded file and when prompted Accept the license terms.
3. Choose the Windows 11 language and click Next.
4. Choose which ISO File and click Next.
![image_thumb[12] image_thumb[12]](https://qnet88.com/wp-content/uploads/2021/12/image_thumb12_thumb.png)
4. Save the Windows11.ISO file to your disk.
Step 2. Create a New Virtual Machine for Windows 11 in VirtualBox.*
* Note: If you haven’t Oracle VirtualBox installed, then downlead and install it from here. After the installation, proceed to download and install from the same location the “Oracle VM VirtualBox Extension Pack”.
To create an new VM Machine for Windows 11 in VirtualBox:
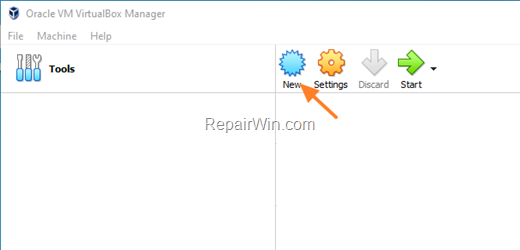
1. Open Oracle VM VirtualBox VirtualBox Manager and click New.
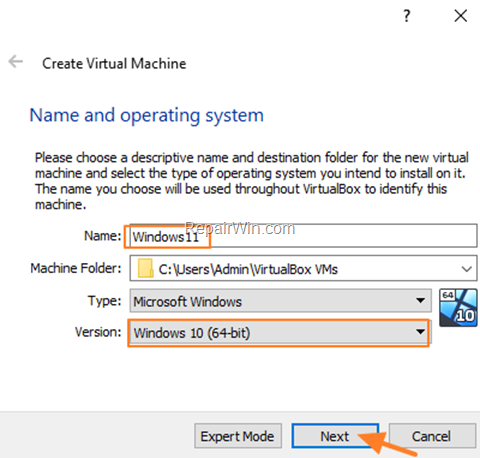
2. Type a name for the VM machine (e.g. “Windows11”), choose Windows 10 (64-bit) version and click Next.
3. Set the Memory size to 4GB (4096MB) and click Next.

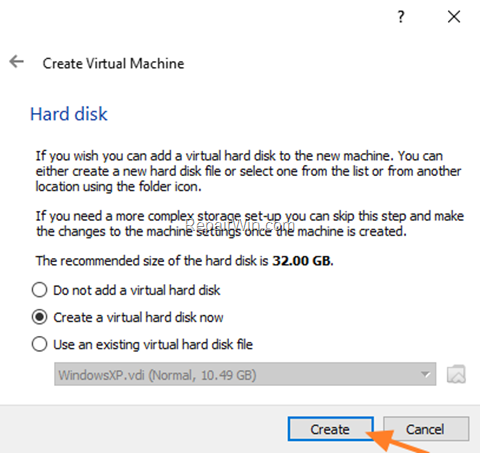
4. Press Create to Create a virtual hard disk now.
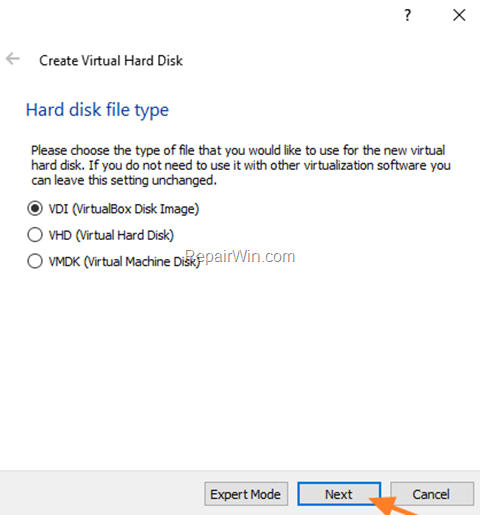
5. Choose VDI (VirtualBox Disk Image) for disk file type and click Next.
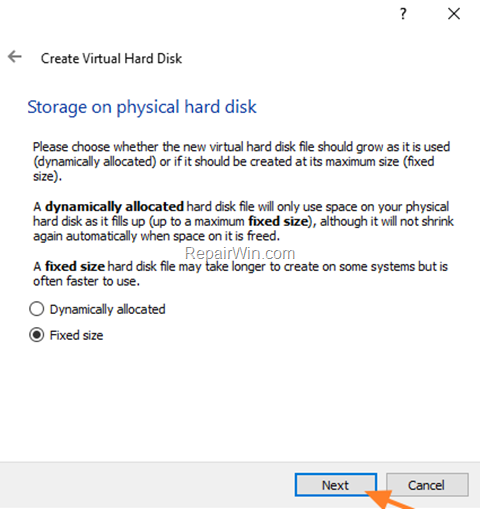
5. Choose to create a Fixed size hard disk file and click Next.
6. Specify the “File location” to save the disk file (or leave the default), and set its size to over 64GB. When done, click Create.
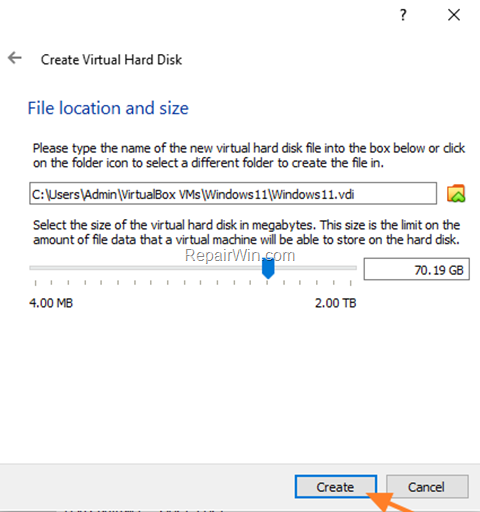
7. Wait until the new virtual disk file is created, and when this done…
8. Open the Virtual Machine’s Settings.
9a. Select Storage on the left and click Add Optical Drive.
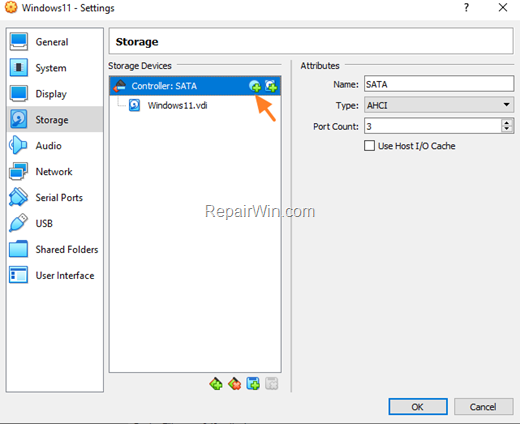
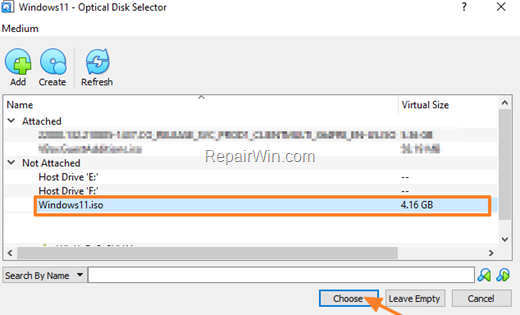
9b. Select the Windows11.ISO file you downloaded at step-1 and click Choose.
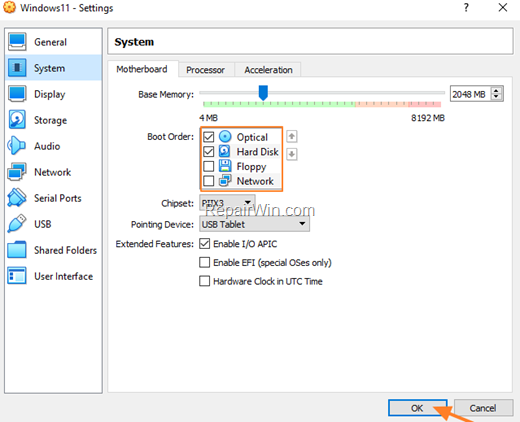
10. Now select System at the left and ensure that the Optical drive is the first boot device in Boot Order. Click OK to apply the changes.
11. Start the VM machine and continue to step-3 to install Windows 11.
Step 3. Install Windows 11 on VirtualBox.
1. At the below screen press the SHIFT + F10 keys to launch command prompt.
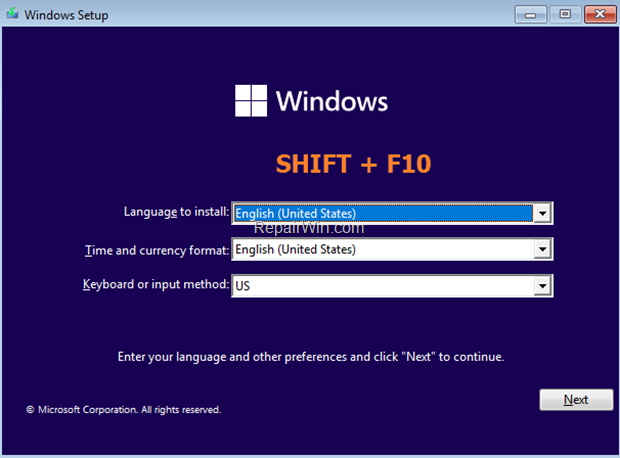
2. At command prompt, type regedit

3. In Registry Editor, navigate to this key:
- HKEY_LOCAL_MACHINESYSTEMSetup
4. Right-click on Setup key and choose New -> Key.
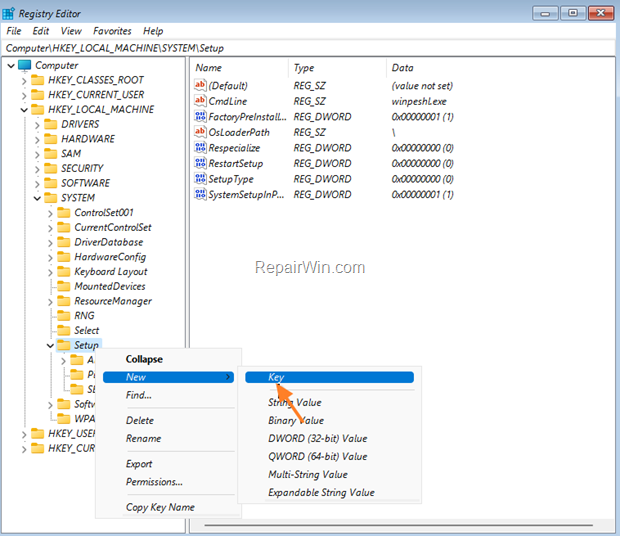
5. Name the new key LabConfig and hit Enter.
6a. Right-click on an empty space at right pane and choose New > DWORD (32-bit) Value.
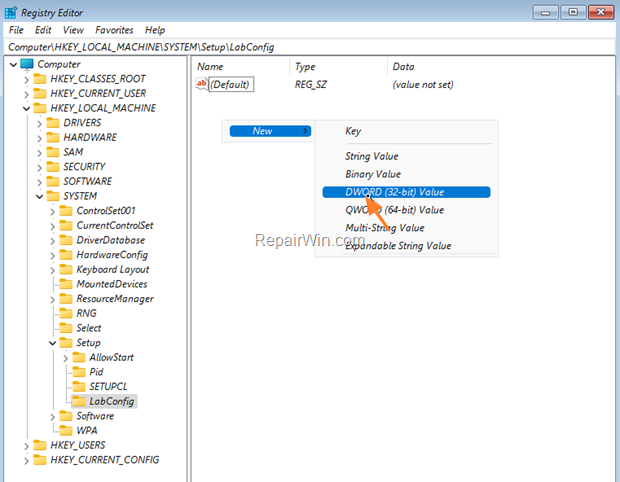
6b. Name the new value: BypassRAMCheck and hit Enter.
7. Repeat steps 6a & 6b and create two more values with names:
- BypassSecureBootCheck
- BypassTPMCheck
8. Now open one-by-one the newly created DWORD values, type 1 at Value Data box and click OK.
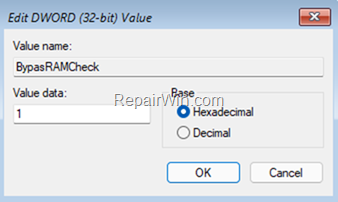
9. At the end you should see the follow image in your screen.

10. Close the Registry Editor and the command prompt windows.
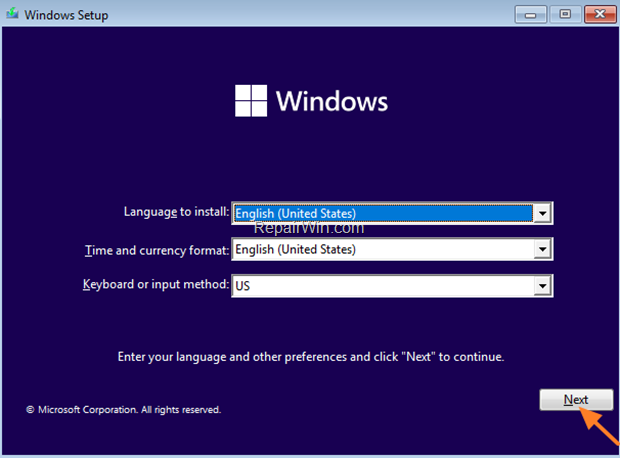
11. Click Next to start the installation of Microsoft Windows 11.
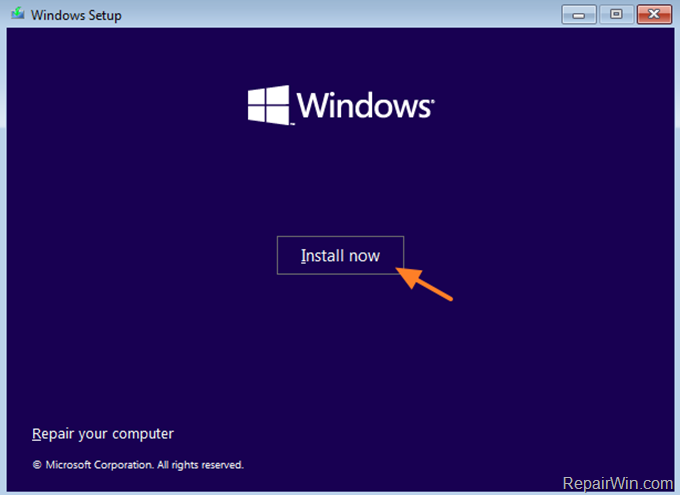
12. Click Install now.
13. At next screen choose I don’t a product key. *
* Notes:
1. If you are installing Windows 11 for the first time on this computer, you will be prompted to enter the Windows 11 product key after installation to activate Windows.
2. If you previously installed and activated Windows 11 or Windows 10 on the same machine, Windows 11 will automatically activate after the machine connects to Microsoft servers.

14. Select the Windows 11 edition you want to install and click Next.

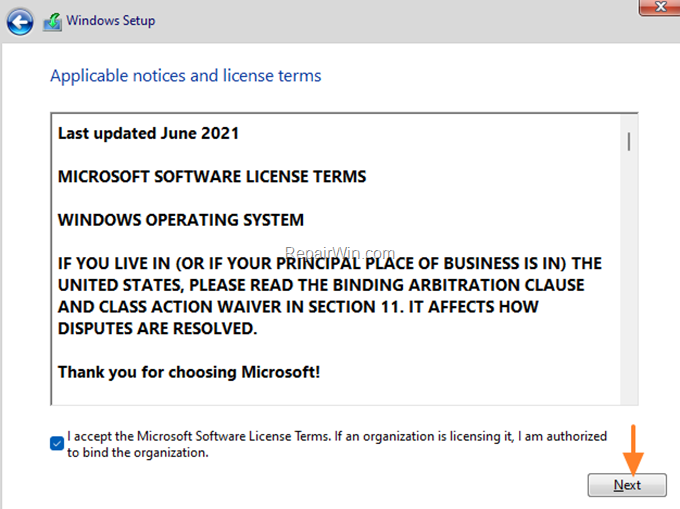
15. Accept the license terms and click Next.
16. Choose Custom: Install Windows only (Advanced) to perform a clean installation of Windows 11.

17. At next screen, select the drive with Unallocated space and click Next.

18. At this point the Windows 11 installation will start and the system will reboot 2-3 times during the process. Wait while Windows is being installed and do not turn off your computer.

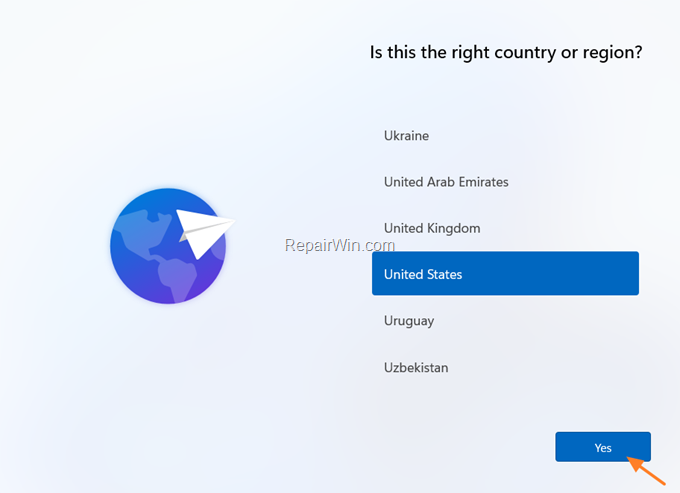
19. When prompted, choose your Country or Region and click Yes. *
* Note: Before you click “Yes” in the country/region options, and if you do not want to sign in to Windows 11 using a Microsoft account, disconnect the network cable from your computer (if connected), and do not connect to a wireless network during the setup process (until Windows installation has completed and until you see the Windows 11 desktop).
20. Chose you Keyboard layout (input method) and click Yes.
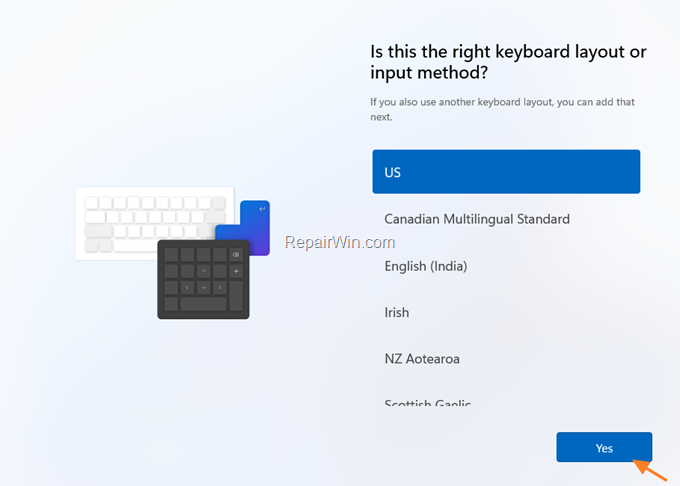
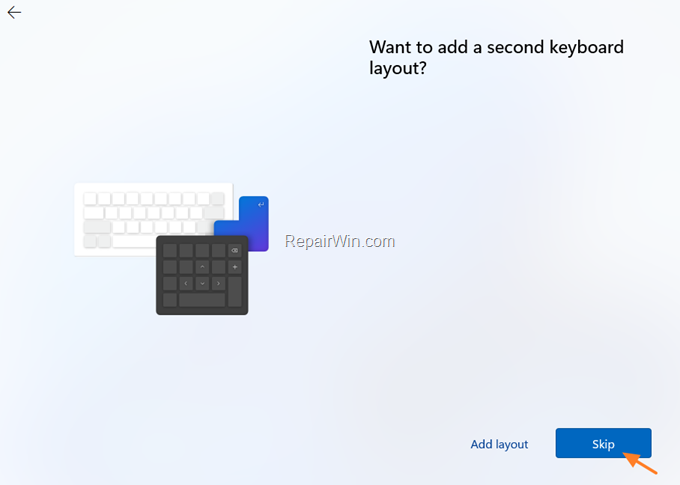
21. If you want to add a second keyboard layout select “Add layout” to add it now, or click Skip to add it later.
22. At the next screen, type an account name or a Microsoft Account to connect to Windows 11. (If you don’t want to sign-in to Windows 11 with an MS account disable the Network in Windows 11 VM Machine Settings).
* Note: In this tutorial we demonstrate how to login with a local account to Windows 11.
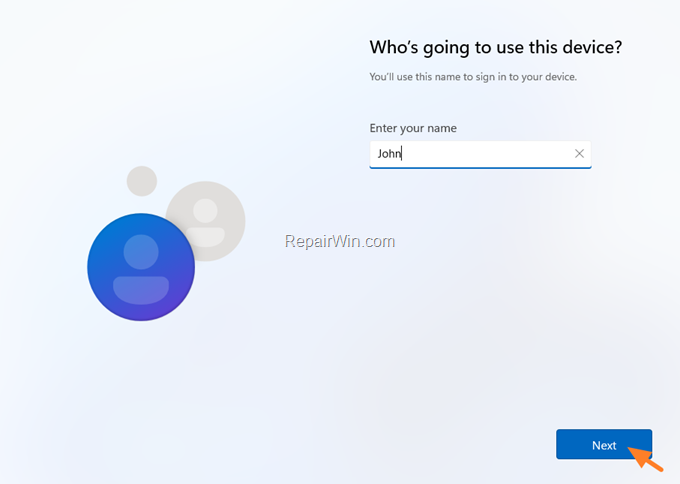
23. Type a password for the created account (or the password for the MS account), and click Next.
24. Choose carefully your privacy settings and click Next.

25. Now wait a few minutes for your device to configure and complete the Windows 11 installation.
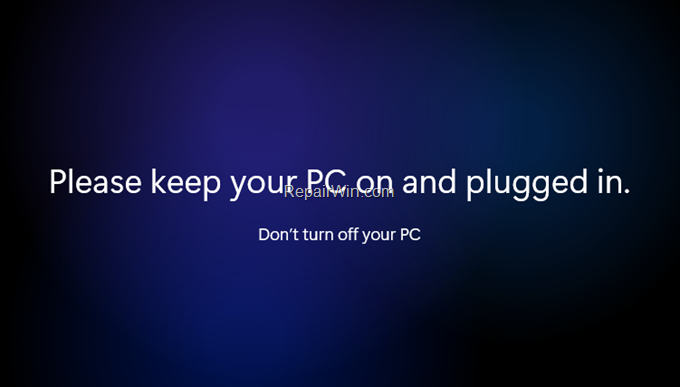
26. When the installation is complete, the Windows 11 desktop will appear on your screen.

27. Finally, proceed and install VirtualBox Guest additions, by doing the following:
1. From VM Machine’s menu, go to Devices > Install Guest Additions CD Image.
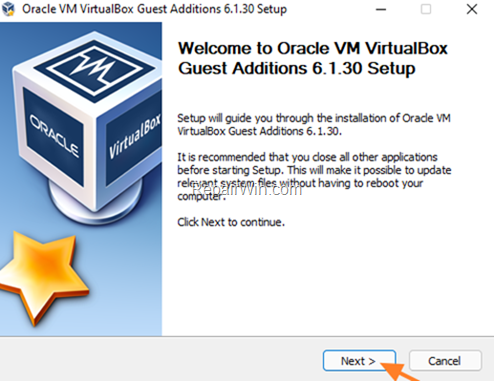
2. Click Next to install VirtualBox VM Guest additions and then restart your computer. *
* Note: If the installer does not start automatically, open Windows Explorer, and run the “VBox WindowsAdditions” application from the CD Image.
That’s all folks! Did it work for you?
Please leave a comment in the comment section below or even better: like and share this blog post in the social networks to help spread the word about this.

