If you have a video and want to cut a part of it, then continue reading below.
Sometimes when recording a video, something can interrupt us or something can go wrong for a while. In such a case, the typical action is to continue recording the video and then remove the unwanted parts of the video. For such cases we can use the free PHOTOS tool offered in Windows 10 to cut the video part(s) that we do not want.
In this tutorial you’ll find step-by-steps instructions on how split a video in two or more parts and how to delete a video part with Windows 10 Photos app. *
* Note: Video cutting is the process of removing a part within the video that you do not want. If you want to remove a part of the beginning or end of a video, then read this tutorial: How to Trim Video in Windows 10/11.
How to Split Video or Delete Unwanted Video Parts with Photos app on Windows 10/11.
1. Open the Photos app and click Video Editor.
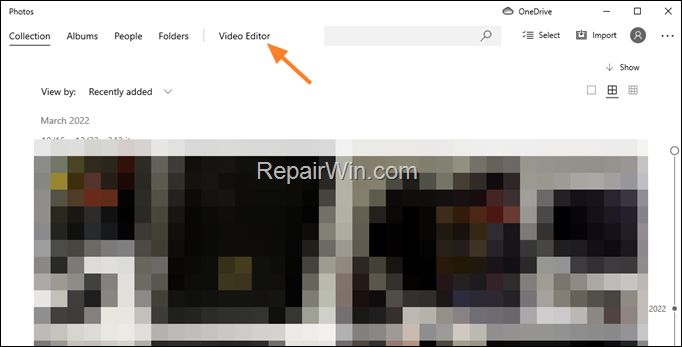

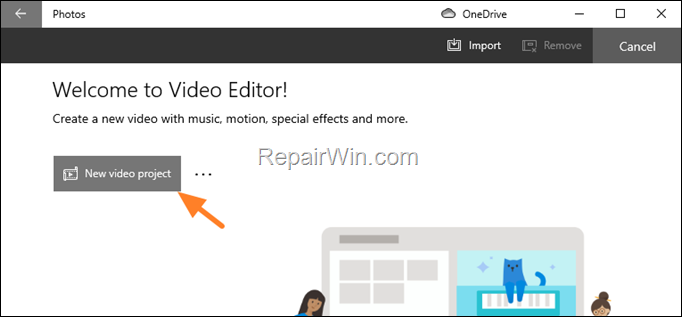
2. Click New video project.

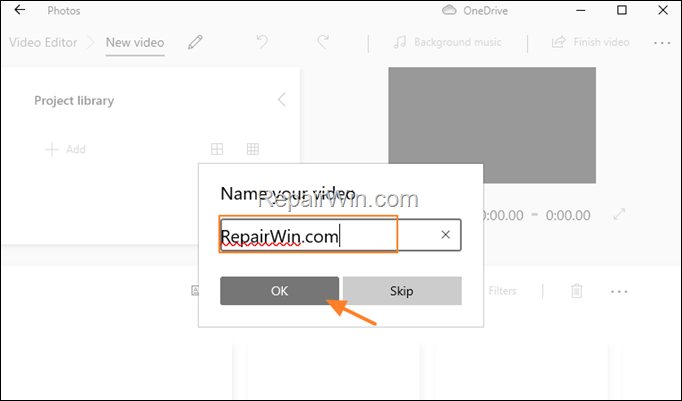
3. Type a name for the new video and click OK.

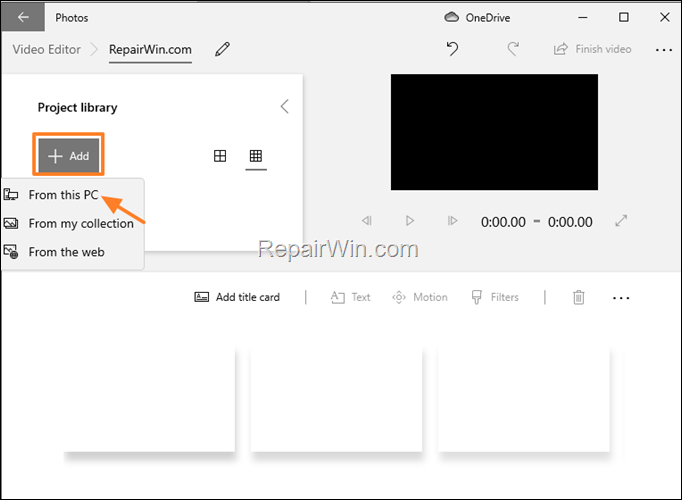
4. Click the +Add button and select From this PC. Then choose the video that you want to cut parts of it.

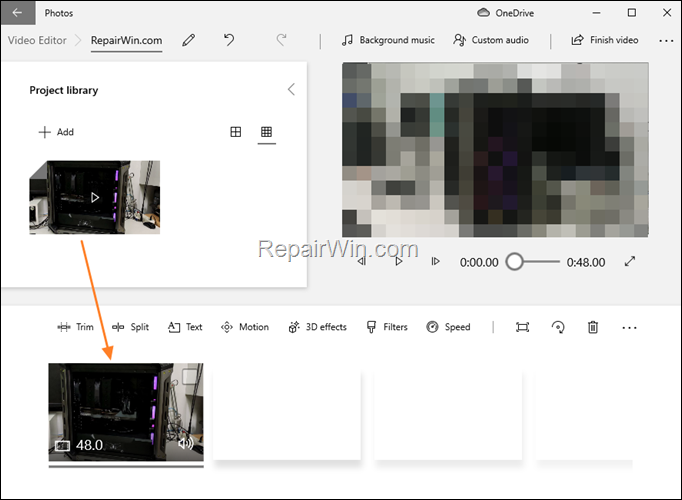
5. Drag the added video to the Storyline below.

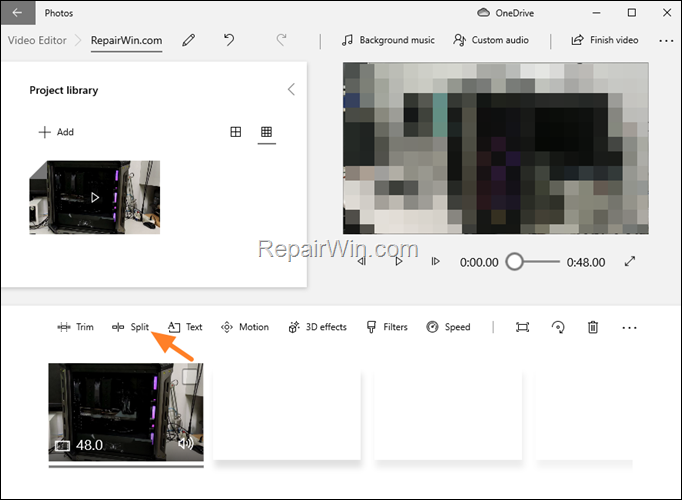
6. Now click the Split button.

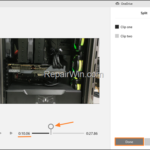
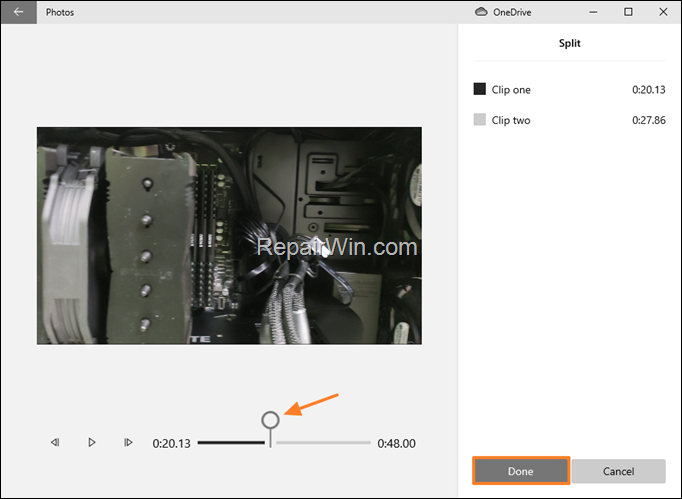
7. In the new window that opens, drag the slider to the right to select the part of the beginning of the video you want to keep. When done click the Done button. *
e.g. If you want to keep the first 20 seconds of the video, move the slider to the corresponding position.

8. As you will now see, the Photos app has split the original video into two (2) parts. Select the second part in the Storyline (the one on the right) and click Split again.
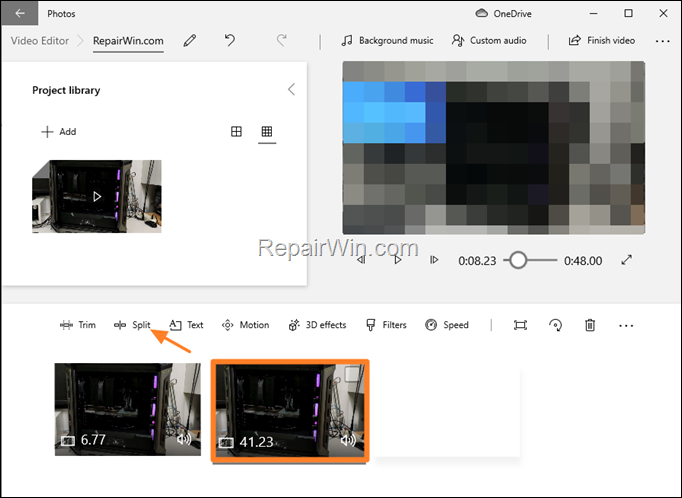

9. Use the slider again but now select the part from the begging that you want to remove from the final video. (e.g. the first “10,06” seconds in this example). Click Done.
![image_thumb[43] image_thumb[43]](https://qnet88.com/wp-content/uploads/2023/04/image_thumb43_thumb.png)
![image_thumb[43] image_thumb[43]](https://qnet88.com/wp-content/uploads/2023/04/image_thumb43_thumb.png)
10. Now at the storyline you should have your original video divided in three parts. The first and the third part is the video that you want to keep and the middle is the video part that you want to remove. So, select the middle video in Storyline and click the Delete button.
![image_thumb[45] image_thumb[45]](https://qnet88.com/wp-content/uploads/2023/04/image_thumb45_thumb.png)
![image_thumb[45] image_thumb[45]](https://qnet88.com/wp-content/uploads/2023/04/image_thumb45_thumb.png)
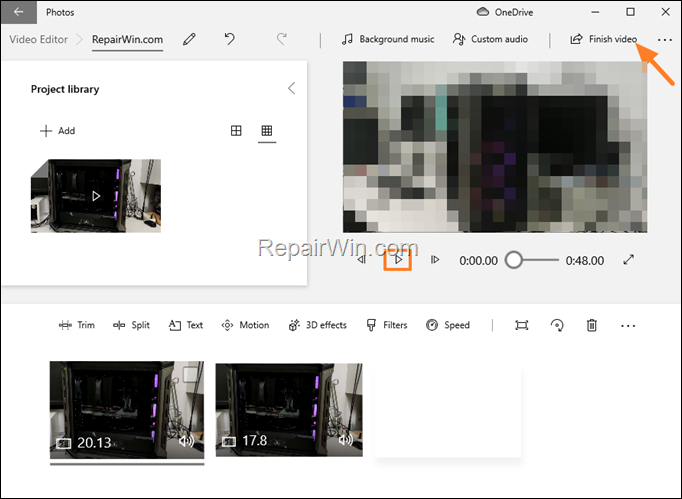
11. Play the video to see the final result and repeat the same steps if you want to remove other unwanted video parts. When done, click the Export video button to save the new video.

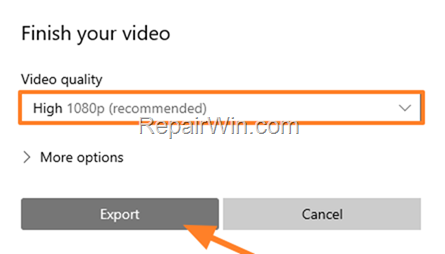
12. Choose the video quality or leave the default and click Export.

13. Type a new filename for the video file and click Export.


14. After exporting, Photos will automatically play the new video to see the result of the cutting.
That’s all folks! Did it work for you?
Please leave a comment in the comment section below or even better: like and share this blog post in the social networks to help spread the word about this solution.


