If you ‘re using a Windows 10/8 or 7 personal computer (not part of a Domain) and you want to rename the user account name and the related User Profile folder name then this tutorial may be useful for you.As you may know when you change the username of a user in Windows, the related user folder remain unchanged and you must perform some additional steps to accomplish this. In this tutorial you ‘ll learn how to rename a user in Windows and how to rename the user folder in order to match the name of the user.
How to Rename User and User Profile Folder in Windows 10/8/7 *
Nội dung
* Important: To apply the steps below you must sign into Windows, by using an account with Administrative privileges.
Assumption: Let’s suppose that the current username and the related profile folder is named “Josh” and you want to change the account name and the profile folder name to “Joshua”.
Step 1. Rename the User from User Account Properties.
To change the username of a local account in Windows:
1. Press simultaneously the Windows ![]() + R keys to open the run command box.
+ R keys to open the run command box.
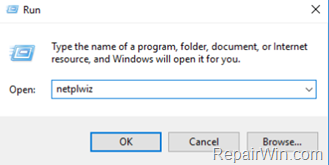
2. Type netplwiz & Press Enter.
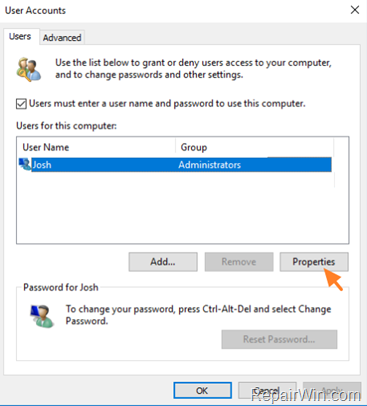
3. Highlight the user that you want to rename and select Properties.
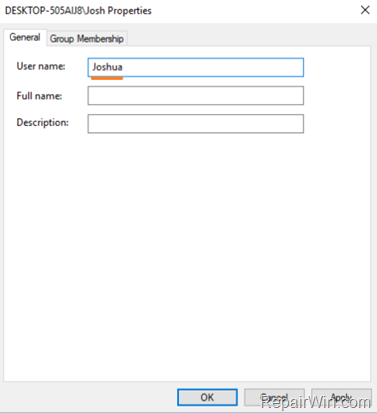
4. Then change the current User name (e.g. “Josh) with the new one (e.g “Joshua”)
5. When done click Apply and OK twice to close all open windows.
Step 2. Change the User Profile Folder Path in Registry.
1. Open Registry Editor: To do that:
- Press simultaneously the Windows
 + R keys to open the run command box.
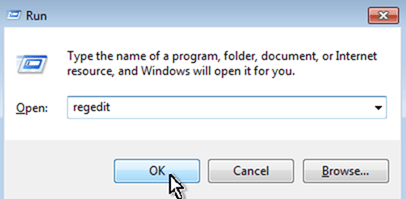
 - Type regedit & Press Enter.
- Press simultaneously the Windows
2. Navigate to the following key at the left pane:
- HKEY_LOCAL_MACHINESOFTWAREMicrosoftWindows NTCurrentVersionProfileList
3. Click at any “S-1-5-21-xxx…” registry key, until you find which one contains the path for your profile folder at the “ProfileImagePath” REG_DWORD value.
* e.g. If your Username is “Josh” then see which S-1-5-21-xxx…” registry key, contains the “C:UsersJosh” value at ProfileImagePath.
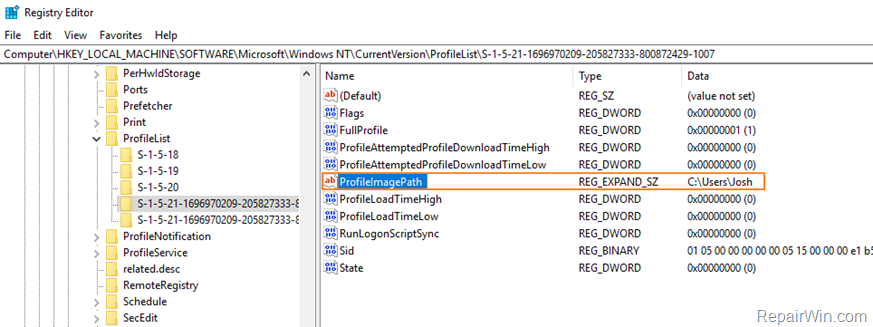
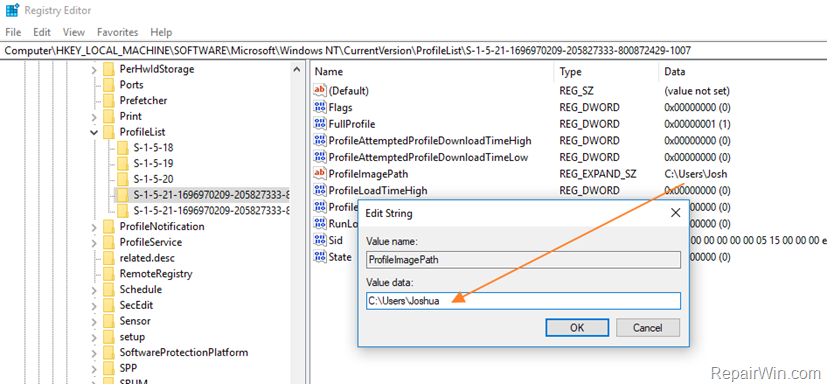
4. When you find that key, double click at ProfileImagePath and rename the current path (profile folder name) to the new one. *
* e.g. At this example we proceed to change the “C:UsersJosh” folder name, with the new folder name “C:UsersJoshua”.
5. When done, click OK.
6. Close Registry Editor and Restart your computer.
Step 3. Rename the User Profile Folder.
1. After restart you ‘ll be sign to a temporary profile (empty profile) with the message “We can’t sign in to your account”. (Click Close at this message and continue below).

2. Open Windows Explorer and explore the contents of the “C:Users” folder.
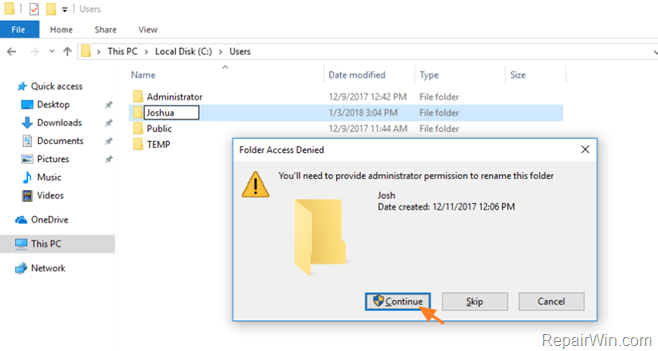
3. Right click on the user profile folder (e.g. “Josh” in this example) and choose Rename.
4. Type the new name for the profile folder (e.g. “Joshua” in this example) and press Enter.
5. Click Continue when asked to provide administrator permission to rename the folder. *
* Note: If you receive an “Access denied” error, when you try to rename the user folder, then try to rename the folder in Safe Mode or try the following:
1. Open Command Prompt as Administrator.
2. Type the following command and press enter: net user administrator /active:yes
3. Restart the computer and login as Administrator
4. Rename the user profile folder.
5. Restart again and login to the (renamed) user.
6. If everything is OK, then disable the administrator account by typing this command (in Command Prompt Admin): net user administrator /active:no
6. Restart your computer to login to your profile with all files and settings untouched!
Step 4. FIX Invalid Registry References.
The next step, is to fix in the Registry, the references to the old profile folder. To do that:
1. Download the Registry Finder utility in an archive format, according your Windows version (32 or 64Bit) and extract the download file (RegistryFinder.zip).
2. From the extracted folder, double click to run the RegistryFinder application.
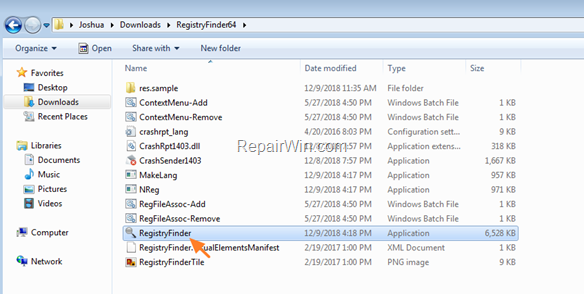
3. In Registry Finder, click the Edit menu and choose Find.
4. Type the old folder name (e.g. Josh”) and click Find.
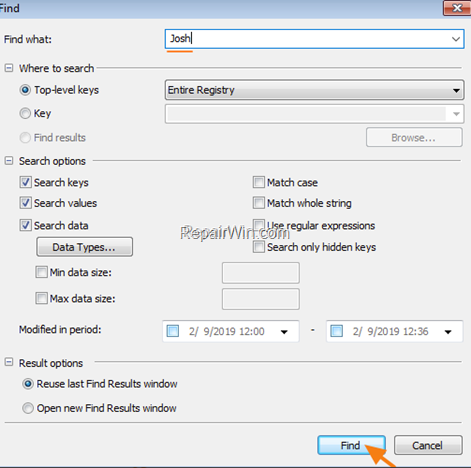
5. When the search is completed, click Edit and choose Replace in Find Results.
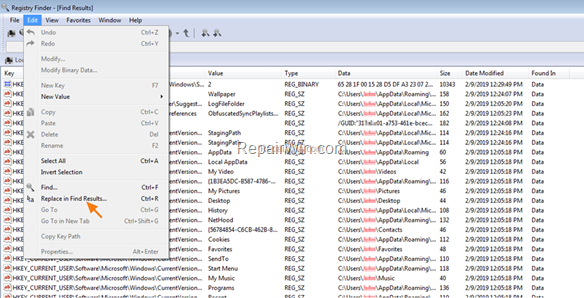
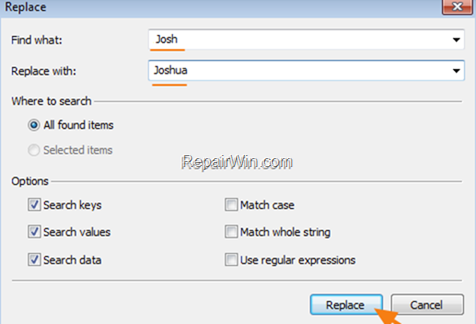
6. At ‘Find what’ field type the old name (e.g. Josh”) and in the ‘Replace with’ field type the new name (e.g. Joshua). When done, click Replace.
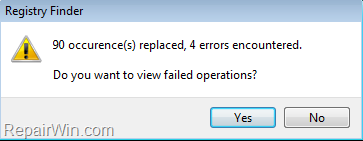
7. When the operation is completed, you should receive an error message that says “error encountered”. Just ignore the error message and click No to close the window.
8. Close the Registry Finder and restart your PC.
Step 5. Rebuild the Search Index.
The final step is to rebuild the search index. To do that:
1. Navigate to Windows Control Panel and open Indexing Options.*
* If you don’t see the Indexing Options, set the View (View by) to Small icons.
2. At Indexing Options click Advanced.
3. At Troubleshooting section, click the Rebuild button.
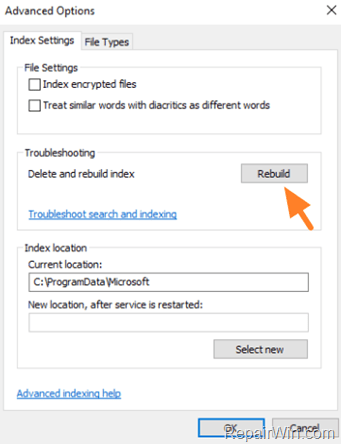
4. Press OK to rebuild the Index.
5. Wait until the index rebuilding is completed and then restart your computer again.
That’s all folks! Did it work for you?
Please leave a comment in the comment section below or even better: like and share this blog post in the social networks to help spread the word about this problem.
Bài liên quan
- FIX: Error 0x81000203 in System Restore. (Solved)
- Cannot Access Shared folder. User has not been granted the requested logon type at this computer. (Solved)
- FIX: Cannot clear TPM – 0x80284001, 0x80290300 or 0x80290304.
- Unable to Schedule Teams Meeting in 15 or 10 minutes slots (Solved)
- How to Share Folder without Username/Password on Windows 10/11.
- FIX: Thunderbird High CPU or Memory Usage issues.