.single .post-author, .post-date {
text-transform: none;
}
,
Last updated: September 3rd, 2024
In some cases, there is a need to resize Recovery Partition in Windows 10/11 and in this tutorial you will find step by step instructions to do that.
The Windows Recovery Partition (aka “Windows RE Partition”), is a hidden partition on your disk where all the necessary files for the Windows Recovery Environment (aka “WinRE”) are stored.
Starting June 27, 2023, Microsoft started updating WinRE using the monthly cumulative update, but on some computers the update may fail with error 0x80070643 if the recovery partition is not large enough to complete the update.
To help users to fix problems in Windows Update related to the insufficient size of the recovery partition, this article provides instructions to manually resize the recovery partition without using a third party partition resize tool.
- Relate Article: FIX: KB5034441 Update error 0x80070643 on Windows 10 22H2.
How to Increase the Size of the Recovery Partition on Windows 10/11.
Step 1. Disable the Windows Recovery Environment.
In order to resize or re-create the Recovery Partition you must first disable the Windows Recovery Environment (WinRE). To do this:
1. Open Command Prompt as Administrator and give the following command to check if the Windows Recovery Environment (WinRE) is enabled on the machine:
- reagentc /info
2. Now according the WinRE status proceed as follows:
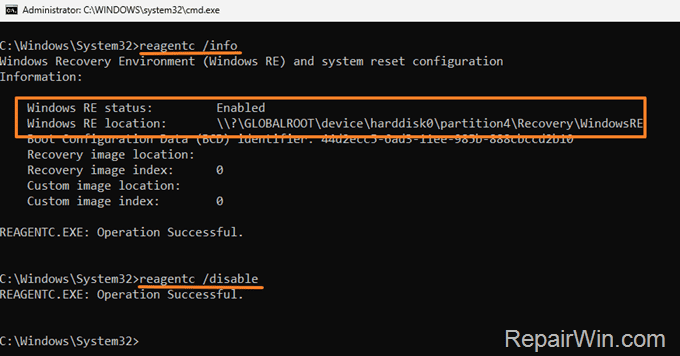
A. If the Windows RE Status is Enabled* (like in screenshot below), give the following command to disable the WinRE and continue to Step-2:
- reagentc /disable
* Note: When the WinRE is enabled (active), you should see in “Windows RE status: Enabled” and in “Windows RE location” the path of the WinRE files on the Recovery partition . (eg.” \?GLOBALROOTdeviceharddisk0partition4RecoveryWindowsRE“).

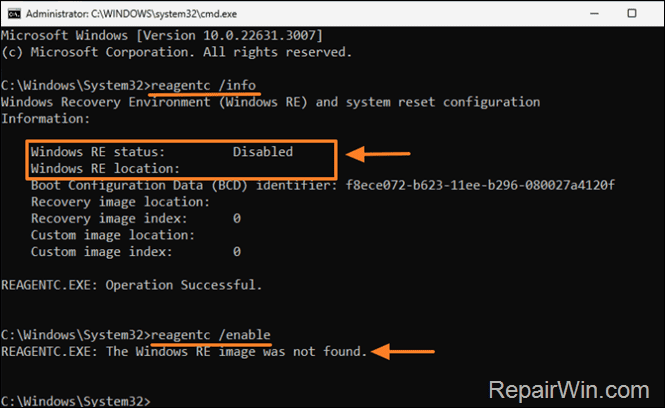
B. If the Windows RE Status is Disabled (like in screenshot below), give the following command to see if you can enable the WinRE:*
- reagentc /enable
* IMPORTANT NOTE: If after executing the above command you receive the message “REAGENTC.EXE: The Windows RE image was not found“, SKIP the rest instructions and Repair Windows with an In-place upgrade to create the Recovery Partition and the WinRE environment before continuing below.

Step 2. Delete Windows Recovery Partition.
After disabling WinRE, proceed and delete the Recovery Partition, using DISKPART utility:
1. In Administrator: Command Prompt window give the following commands in order:
- diskpart
- list disk
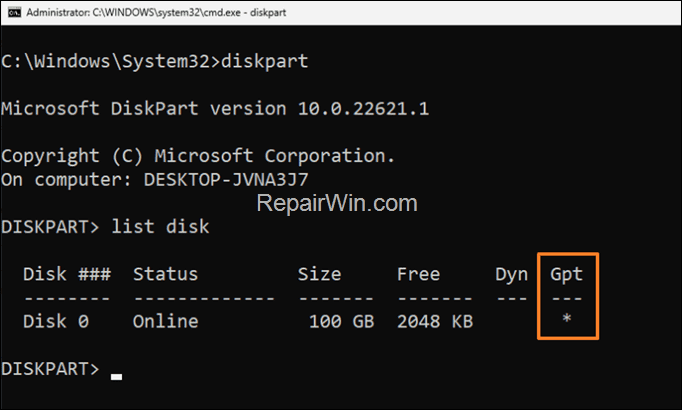
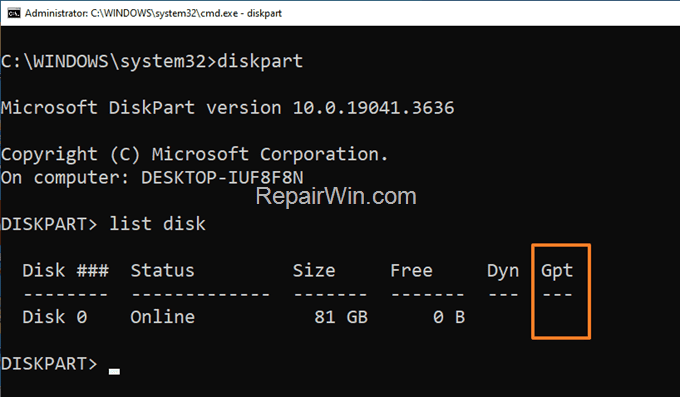
2. Now check next to “Disk 0“, if there is an asterisk character (*) in the “Gpt” column (or not), to find out the partition style of the disk (GPT or MBR).
- Example1: If there is an asterisk (*) under Gpt (like in the screenshot below), then the partition style on the drive is GPT.

- Example2: If there is not an asterisk character (*) under Gpt (like in the screenshot below), then the partition style on the drive is MBR

3. After finding the partition style, give the following commands to list all partitions on “Disk 0”.
- select disk 0
- list partition
4. Notice the number of the Recovery partition (eg “4” in this example).
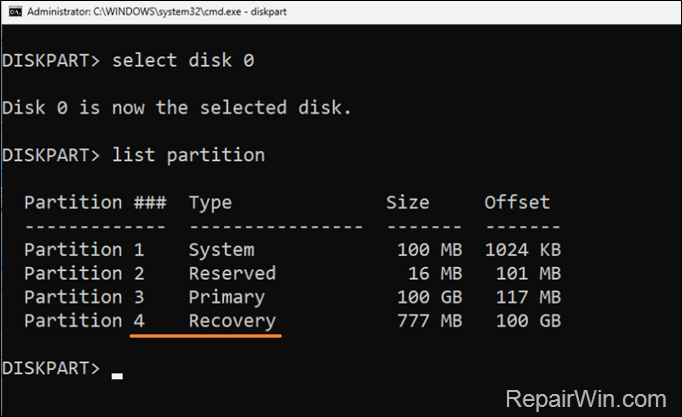

5. Now select (using its number) the Recovery partition and delete it with these commands:
- select partition <number> *
- delete partition override
* eg. “select partition 4” in this example.
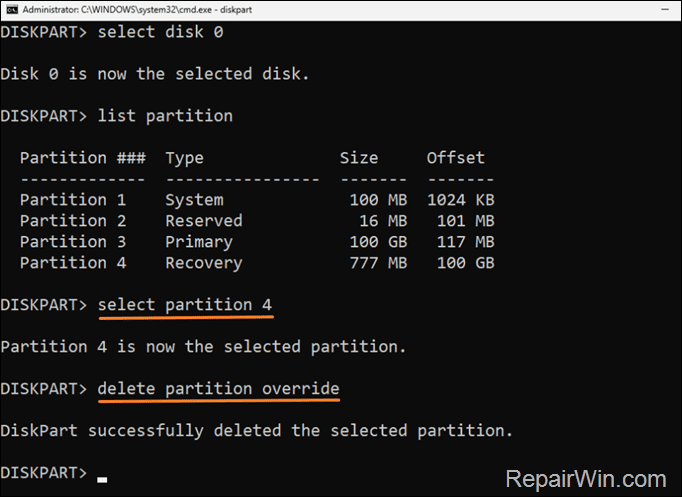

6. Without closing the ‘Administrator: Command Prompt‘ window, continue to next step.
Step 3. Shrink the OS Partition (Drive C:) by 250 MB.
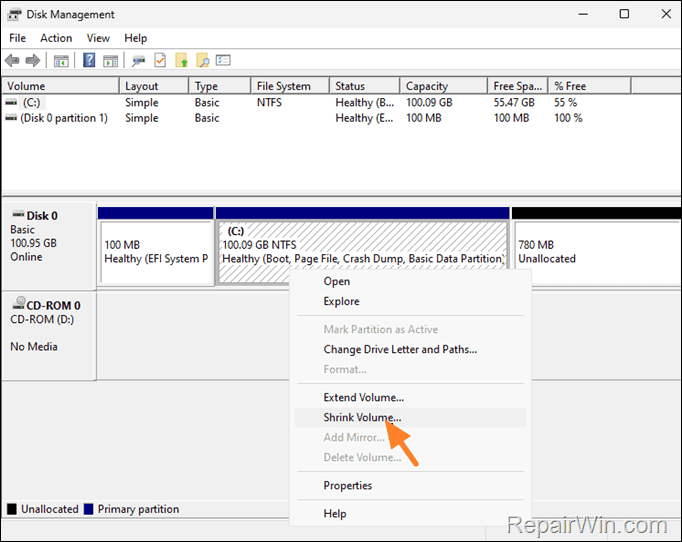
Now, using ‘Disk Management’ utility, proceed to shrink the OS partition by 250MB (at least). To do this:
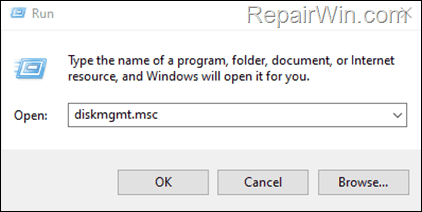
- Press Windows

 + R keys to open the run command box.
 - In the Open box, type: diskmgmt.msc & click OK to open Disk Management.

3. In Disk Management, right-click on drive (C:) and choose Shrink Volume.

4. In Enter the amount of space to shrink in MB, type: 250 and then click Shrink
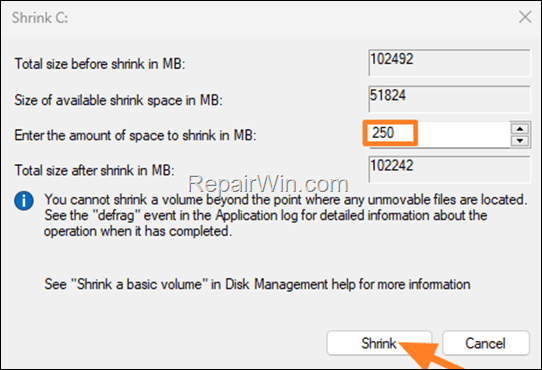

5. When the Shrink is completed, continue to next step.
Step 4. Create a New Volume for the Recovery Partition.
Now, using the “Unallocated” disk space, create a new volume to set it as the recovery partition.
1. Right-click on the Unallocated space and select New Simple Volume.
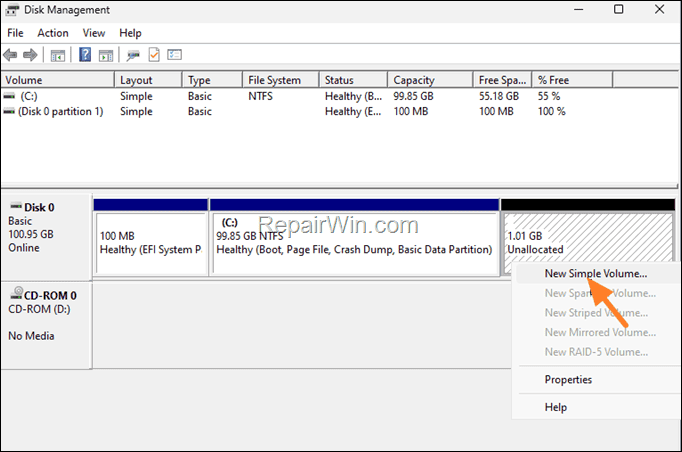

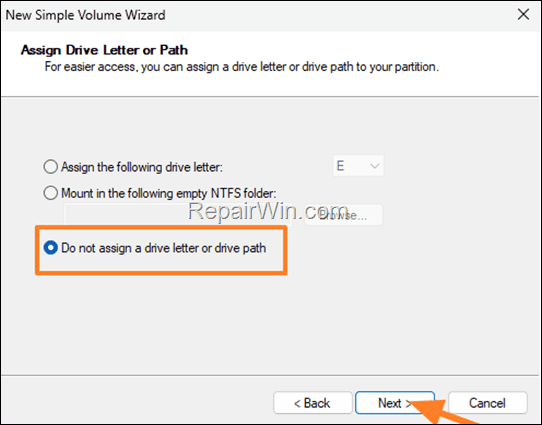
2. Click Next at the first two (2) screens of the “New Simple Volume Wizard” and at the 3rd screen select Do not assign a drive letter or drive path and then click Next again.

3. Leave the default selected settings on the next screen and then click Next and Finish to create and format the new partition.
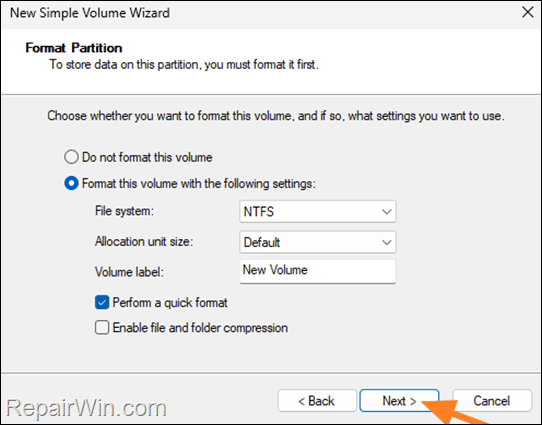

4. When the creation and format of the “New Volume” is completed, notice its size in MB (or GB) and continue to next step. (eg “~1GB” in this example)
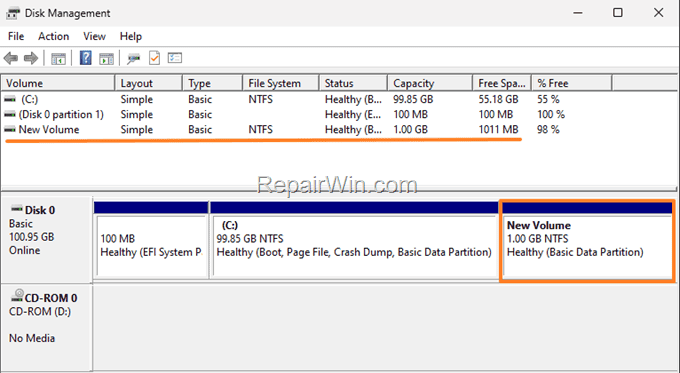

Step 5. Set the New Volume as the Recovery Partition using DISKPART.
1. Open again the ‘Administrator: Command Prompt’ window and give the following command in DISKPART:
- list partition
2. Now, select the partition that has the same size as the “New Volume” you created in previous step with this command:
- select partition <number> *
* eg. “select partition 4” in this example.
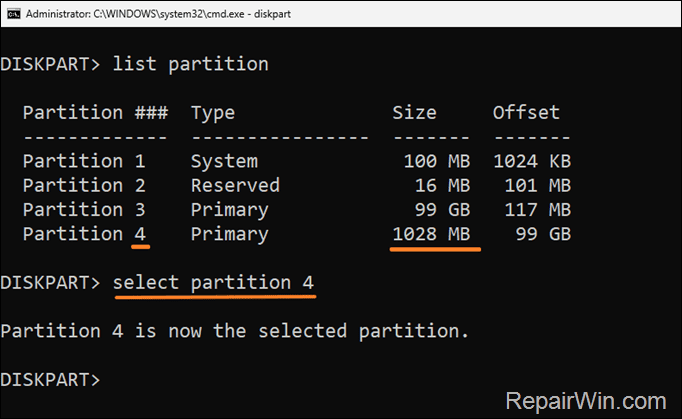

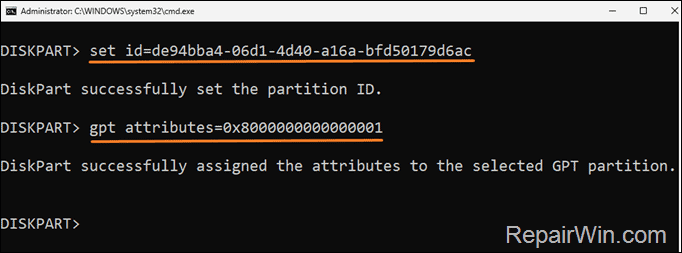
3. Then, according to the partition style on the disk that you observed in step-2 (GPT or MBR), set the selected partition as the “Recovery Partition” using the command(s) below.
– If your disk Partition style is GPT (like in this example), issue these two (2) commands:
- set id=de94bba4-06d1-4d40-a16a-bfd50179d6ac
- gpt attributes=0x8000000000000001

– If your disk Partition style is MBR issue this command:
- set id=27 override
4. Type exit to close DISKPART utility and continue to next step.
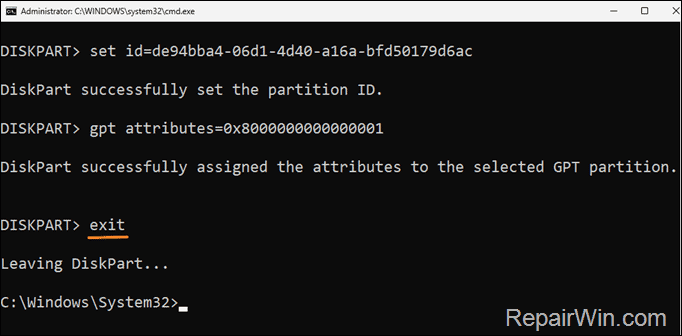

Step 6. Enable the Windows Recovery Environment.
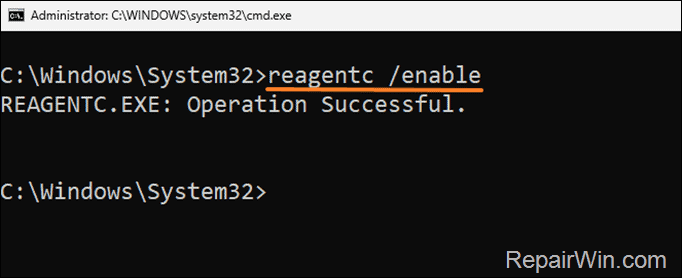
1. Finally proceed and activate the Windows Recovery Environment, by giving the following command in ‘Administrator: Command Prompt’ window:
- reagentc /enable

That’s all folks! Did it work for you?
Please leave a comment in the comment section below or even better: like and share this blog post in the social networks to help spread the word about this solution.

- Author
- Recent Posts
- How to Resize Recovery Partition on Windows 10/11. – September 3, 2024
- FIX: 0x80780119 – System Image Backup failed. There is not enough space to create the volume shadow copy (Solved) – July 31, 2024
- Windows failed to apply the {F312195E-3D9D-447A-A3F5-08DFFA24735E} settings in gpupdate /force command (Solved) – July 23, 2024


