If you have already setup Windows 11 with a Microsoft Account but you to want to use Windows 11 with a Local Account continue reading below.
Windows 11 has become very aggressive about using a Microsoft Account. As a result of this, when setting up Windows 11 for the first time or after a clean install, it is impossible to setup a local account if you make the mistake of connecting your computer to the network before.
Despite the fact that connecting Windows 11 with a Microsoft account helps to keep your computer more secure and take advantage of Microsoft’s cloud services (e.g. OneDrive, Office’s online apps, etc.), many users prefer to use a local account instead.
In this tutorial you will find detailed instructions on how to switch to a Local Account in Windows 11 after you have set them up with a Microsoft Account. *
* Note: If you want to set up a local account during a clean install of Windows 11, read this tutorial.
How to Switch to a Local Account in Windows 11 Home. *
* Note: The instructions below applies to Windows 11 Home Editions. In Windows 11 Pro edition, you have to go to Control PanelAll Control Panel ItemsBitLocker Drive Encryption and turn off the BitLocker on drive C:
Step 1. Turn off Device Encryption.*
When you open a pre-installed Windows 11 laptop and set up a Microsoft account, the encryption of your device and data is automatically enabled and the decryption key is stored to your Microsoft Account. Because many users are not even aware that such a key exists, it is recommended that you turn off your device encryption to avoid problems with your files in the future.
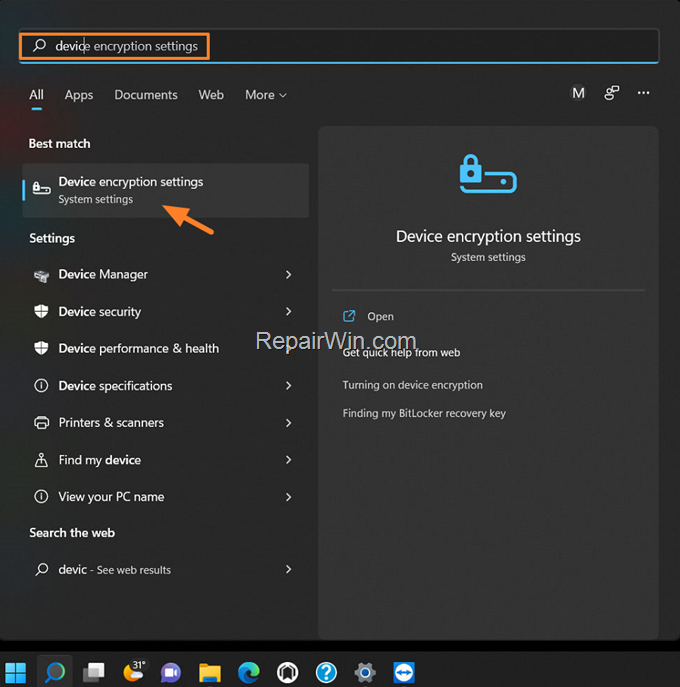
1. On the search, type “device encryption settings” and then Open them. *
* Note: If you couldn’t find the ‘device encryption settings’ then your system doesn’t support encryption. At this case skip to to step-2.

2. Toggle the Device encryption switch to OFF. *
* Note: If the device encryption is already Off skip to step-2.
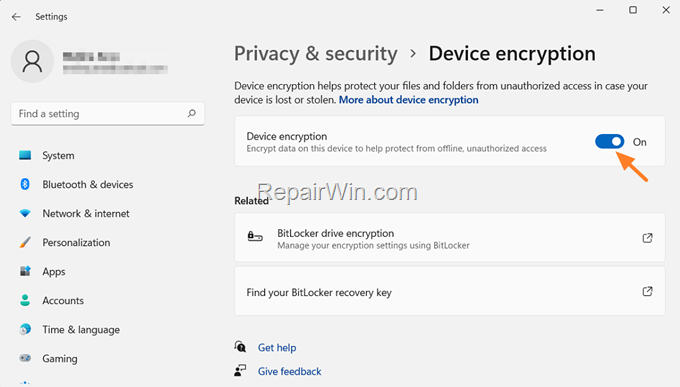

3. Click Turn off to remove the device encryption.


4. Wait until the decryption progress is completed.
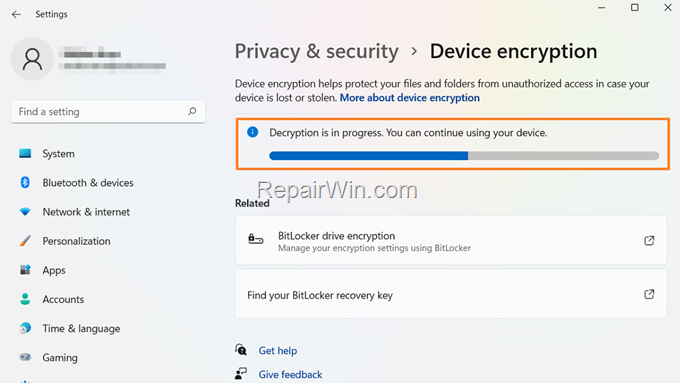

5. When this done, continue to next step.


Step 2. Switch to a Local Account in Windows 11.
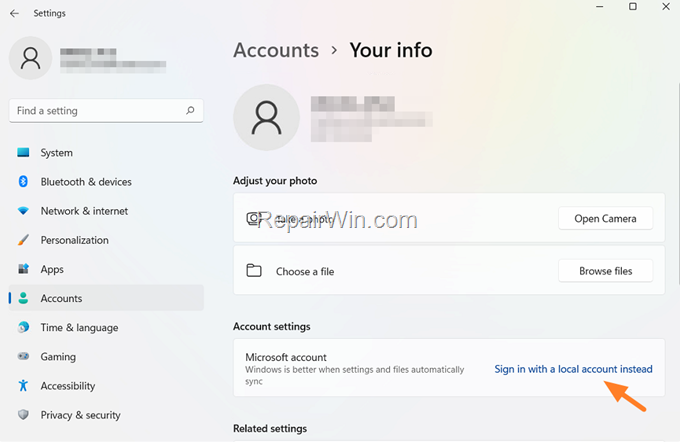
1. Go to Start > Settings > Accounts and click Your info.
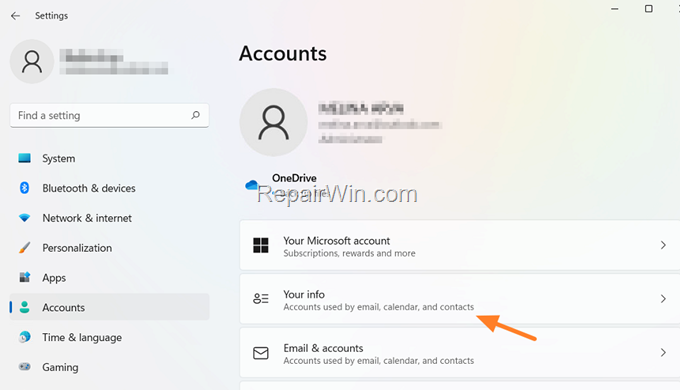

2. Click Sign in with a local account instead.

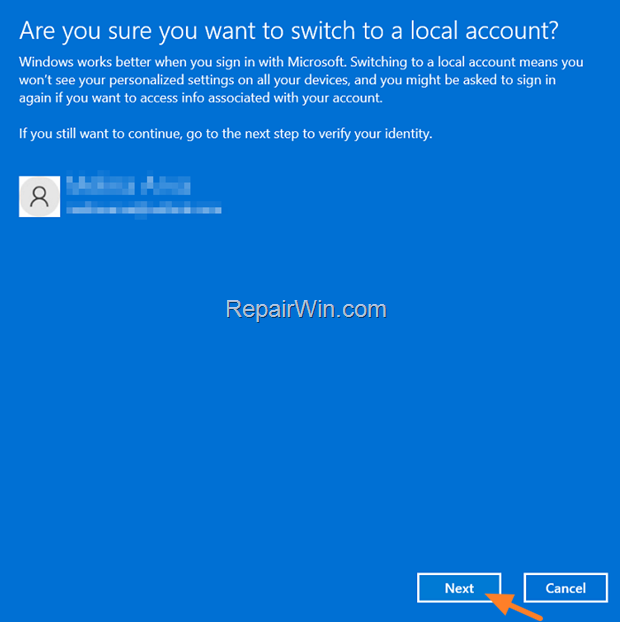
3. Choose Next when prompted if you are sure to switch to a local account.

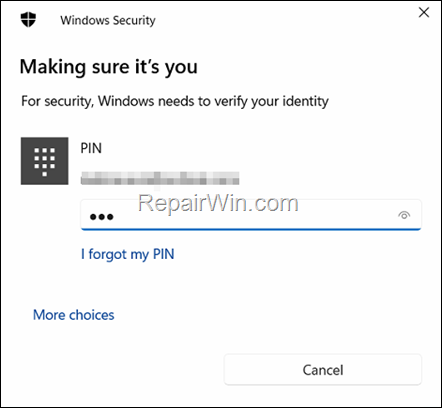
4. Type you PIN to authenticate.

5. Type a username and then give a password (twice) and type a hint. When done click Next.


6. Finally click Sign out and finish and you’re done!
.

That’s all folks! Did it work for you?
Please leave a comment in the comment section below or even better: like and share this blog post in the social networks to help spread the word about this.
