.single .post-author, .post-date {
text-transform: none;
}
,
Last updated: December 18th, 2023
Microsoft’s Snipping Tool is an easy-to-use utility for capturing, annotating, and sharing screenshots. However, users using 2 monitors have reported the problem that Windows 11 Snipping Tool does not cover the entire screen as expected.
Since I have encountered this problem with some of my customers, I have noticed that the Snipping tool does not cover the entire screen after upgrading Windows 10 to 11 or when the monitors are not scaled the same. For example, when you have configured the main screen at 100% scale and the secondary display at 125% then Snipping Tool does not cover the entire screen area.
How to FIX: Windows 11 Snipping Tool does not cover the entire screen.
Method 1. Reset & Repair Snipping Tool.
If you noticed that Snipping Tool doesn’t cover the full screen after upgrading from Windows 10 to Windows 11, or after installing Windows Updates, try to Reset and Repair the Snipping Tool app.
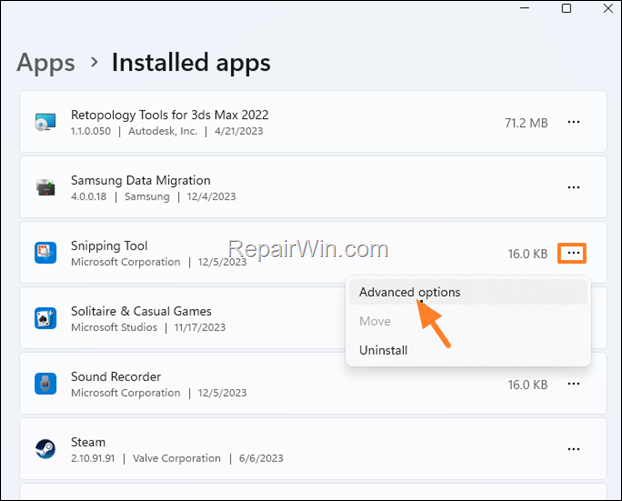
1. Go to Start > Settings > Apps > Installed Apps.


2. Scroll down to locate the Snipping Tool and then click on the tree dots next to it and click Advanced options.


3. Scroll down, click the Reset button and wait for the operation to complete. When this done, click the Repair button above.


4. Now open Snipping Tool and check if its cover the full screen.
Method 2. Adjust Scale to 100%
The second method to fix the mentioned issue, is to adjust the scale in both monitors to 100%.
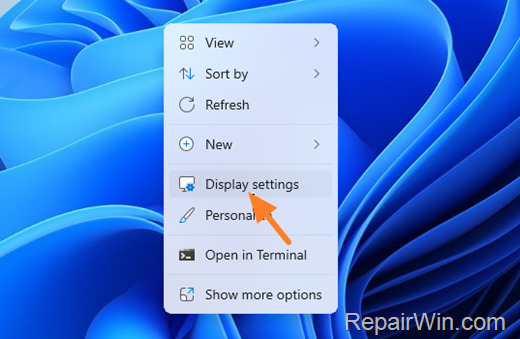
1. Right-click on an empty area on your desktop and choose Display settings. Alternatively, go to Start > Settings > Display.


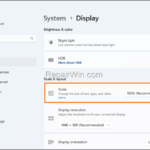
2. Here set the Scale to 100% (Recommended).


3. Now, restart you PC and then check if the Snipping Tool covers the entire screen.
Method 3. Install latest version of Snipping Tool.
If the above methods did not help, proceed to uninstall and reinstall Snipping Tool on your computer.
1. Go to Start > Settings > Apps > Installed Apps.
2. Click on the tree dots next to Snipping Tool app and click Uninstall.


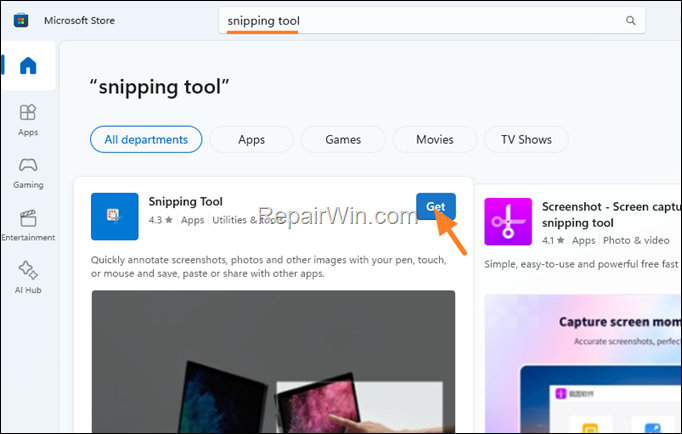
3. After uninstalling, open Microsoft Store and in search type “Snipping Tool”.
4. Then click on Get button to install the latest version of Snipping tool app on Windows 11.


Other things to try:
1. If you’re using a laptop, set your laptop’s monitor as the Primary display in Display Settings.
2. Set the same resolution in both monitors.
- Read next: Eight Different Ways To Take Screenshots In Windows 11/10.
That’s all! Which method worked for you?
Please leave a comment in the comment section below or even better: like and share this blog post in the social networks to help spread the word about this solution.

- Author
- Recent Posts
- Snipping Tool tool doesn’t cover the whole screen in Windows 11. (Solved) – December 18, 2023
- How to View All Devices Connected to your Network (Wi-Fi or Wired). – December 13, 2023
- How to Disable Laptop’s Keyboard in Windows 10/11. – December 11, 2023
- Read next: Eight Different Ways To Take Screenshots In Windows 11/10.


