Windows Update error 8024402C (Windows could not search for new updates – Errors found 8024402C) while checking for updates is commonly caused by invalid network settings or invalid update settings. The problem also occurs if your computer was connected to a local network (LAN) and managed by a Windows Server Update Services (WSUS).
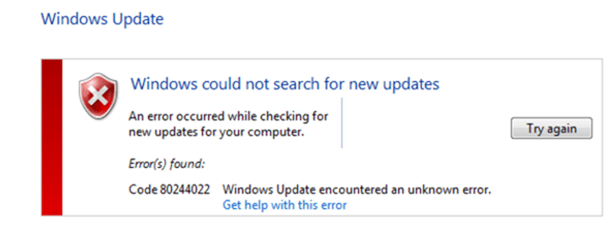
This tutorial contains detailed instructions on how to resolve In order to fix the Windows Update error 0x8024402C in Windows 8, 7 or Vista.
How to fix Error code 0x8024402C in Windows Update.
Solution 1. Run the Windows Update Troubleshooter.
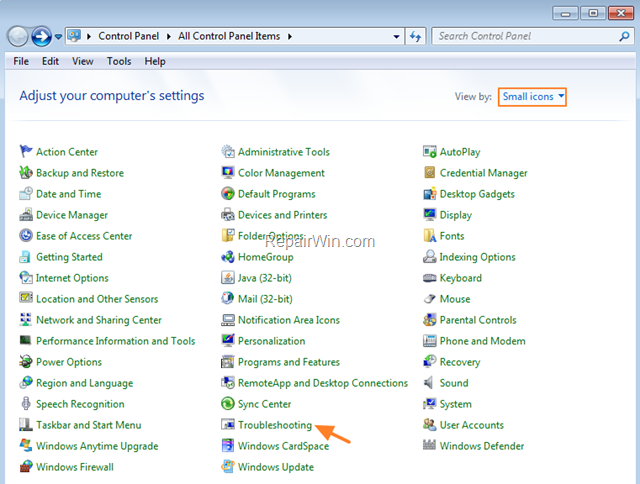
1. Navigate to Windows Control Panel, set the ‘View By’ to Small icons and open Troubleshooting.
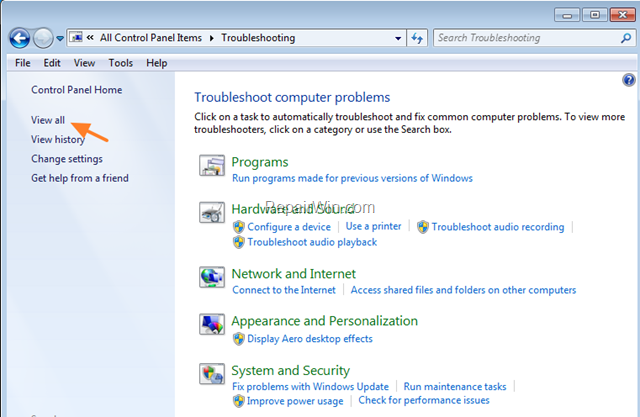
2. In Troubleshooting options, click View all.
3. Open the Windows Update.
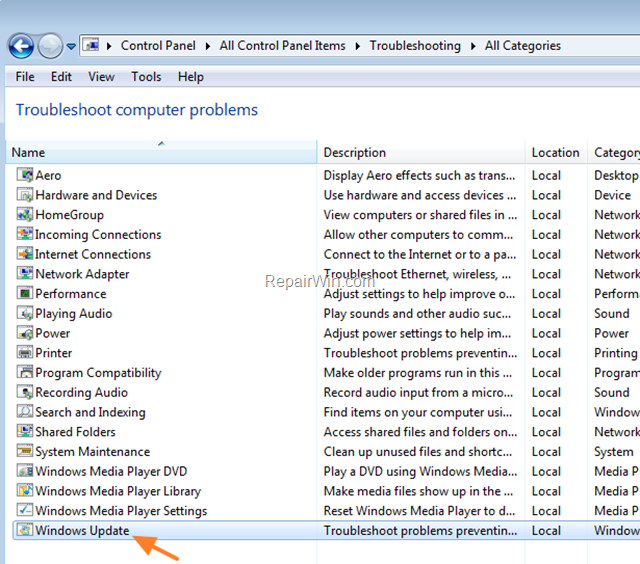
4. Click Next to troubleshoot Windows update problems.
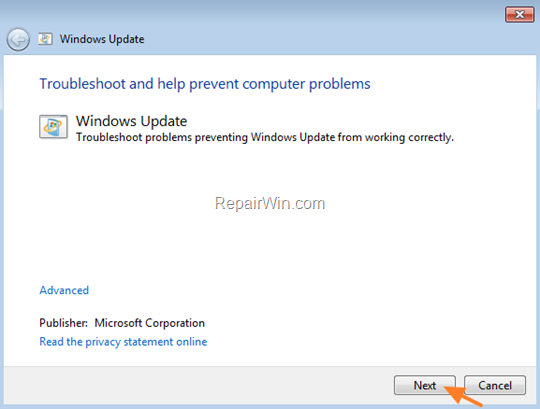
5. When the troubleshooting process is complete, close the troubleshooter.
6. Restart your computer and see if the Error code 8024402C is resolved.
Solution 2. Change the DNS servers.
Some IPS causes errors with Windows Update. So try to manually add a public DNS server (e.g. Google DNS) on your network connection.
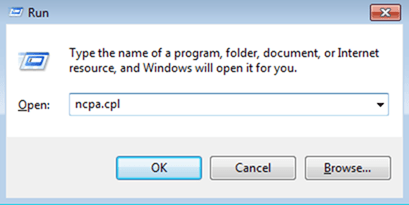
1. Press Windows ![]() + R keys to open the run command box.
+ R keys to open the run command box.
2. Type ncpa.cpl and press Enter.
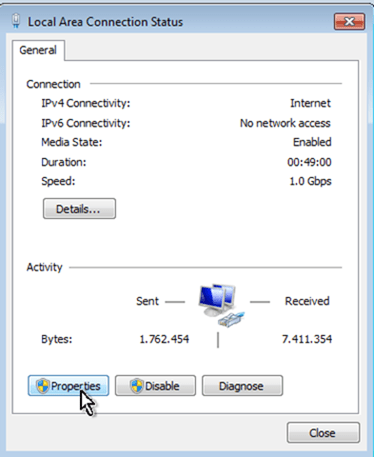
3. Double click at your active Network Adapter.
4. Click Properties.
5. Open ‘Internet Protocol Version 4 (TCP/IPv4)’ Properties.
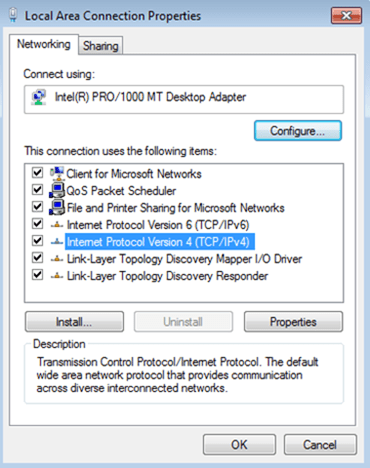
6. Select “Use the following DNS server addresses:” and type the following Google’s public DNS server addresses:
- 8.8.8.8
- 8.8.4.4
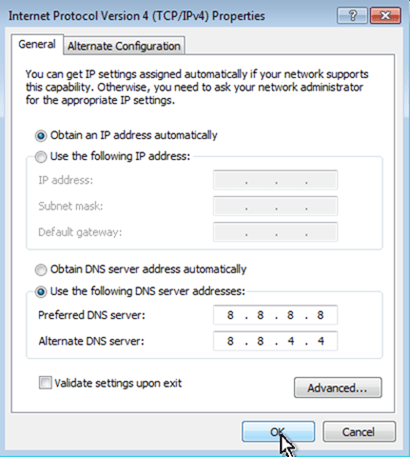
7. Press OK twice to exit Network settings.
8. Restart your computer and check for updates again.
Solution 3. Configure Automatic Updates client to connect directly to the Windows Update site on the Internet.
1. Press Windows ![]() + R keys to open the run command box.
+ R keys to open the run command box.
2. Type regedit and press Enter.
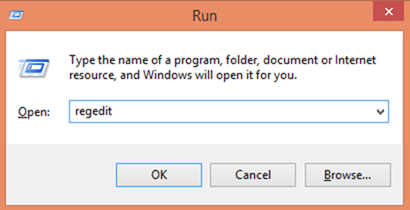
3. In Windows registry editor locate the following key:
HKEY_LOCAL_MACHINESOFTWAREPoliciesMicrosoftWindowsWindowsUpdateAU
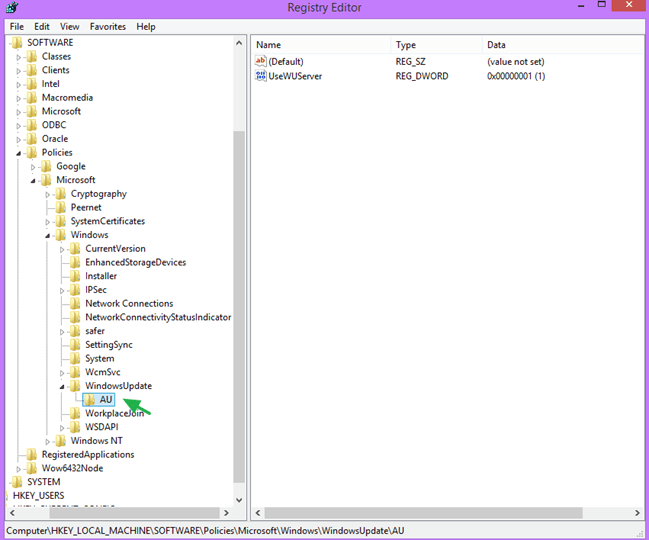
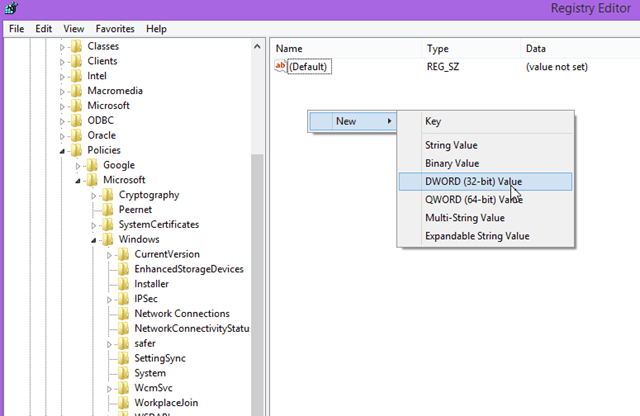
Note: If you don’t find the WindowsUpdate key you have to create it: Right click on Windows key (on the left pane) and select New > Key. Give the name: WindowsUpdate. Then right click at “WindowsUpdate’ & perform the same operation to create the AU key.

4. At the right double click to open the UseWUServer value and change the Value data from 1 to 0.
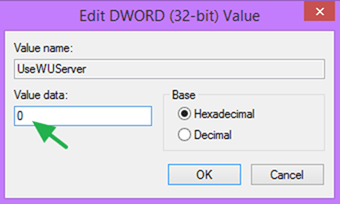
Note: If you don’t find the UseWUServer value you have to create it: Right click on the right pane and select New > DWORD (32-bit) Value. Give the name: UseWUServer.
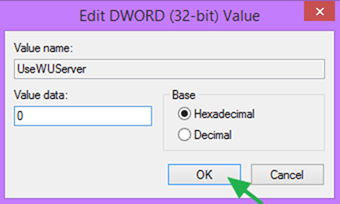
5. Press OK to apply changes and exit from Registry Editor.
That’s all folks! Did it work for you?
Please leave a comment in the comment section below or even better: like and share this blog post in the social networks to help spread the word about this solution.

