WsAppService.exe is a process that causes very high Memory usage and can make your computer to run very slow. WsAppService.exe is part of Wondershare Application Framework service (WondershareAppService), developed by Wondershare company. The WsAppService.exe file is commonly located at ‘C:Program Files (x86)WondershareWAF…’ folder and is not an essential file for Windows OS.
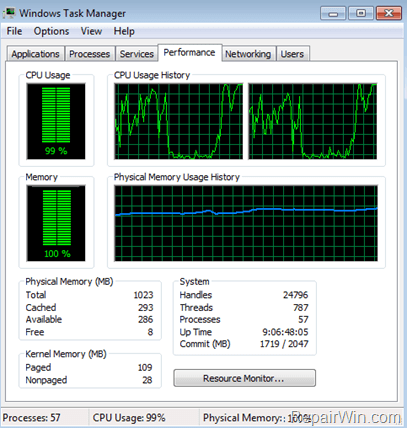
WsAppService.exe is categorized as a suspicious program, because it cannot be removed easily by using the “Uninstall” button from “Programs and Features” (in many cases the program is not listed there) and because it can be installed on your computer without your permission or knowledge.
This guide contains instructions to remove the WsAppService.exe (Wondershare AppService), from your system and resolve the high memory usage issue.
Nội dung
- Step 1. Start Windows in Safe Mode with Networking support
- Step 2. Remove Unwanted Programs from Windows Startup with CCleaner
- Step 3: Uninstall WonderShare Application(s).
- Step 4. Disable WonderShare Services
- Step 5. Scan your computer for Adware with AdwCleaner.
- Step 6: Remove Junk ware files with by using JRT.
- Step 7: Remove Malware infections with MalwareBytes Antimalware.
- Step 8: Scan your computer with your Antivirus program.
Step 1. Start your computer in Safe Mode with Networking.
First of all you have to boot your computer into safe mode to prevent WsAppService.exe from running. To do that:
- Windows 7, Vista & XP:
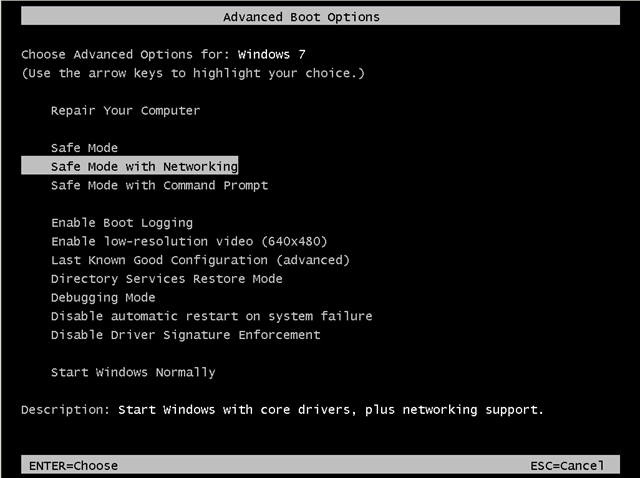
- Restart your computer and hit the “F8” key while your computer is starting up (before the appearance of Windows Logo).
- When “Advanced options” menu appears on your screen, navigate to “Safe Mode With Networking” option (using your keyboard arrow keys) option and hit Enter.
- Windows 10, 8.1/8:
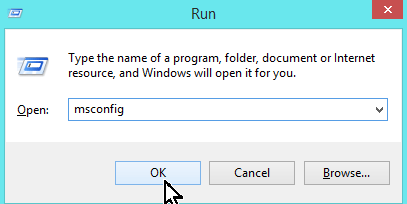
- Press “Windows” + “R” keys to open the RUN window.
- Type msconfig & press OK.
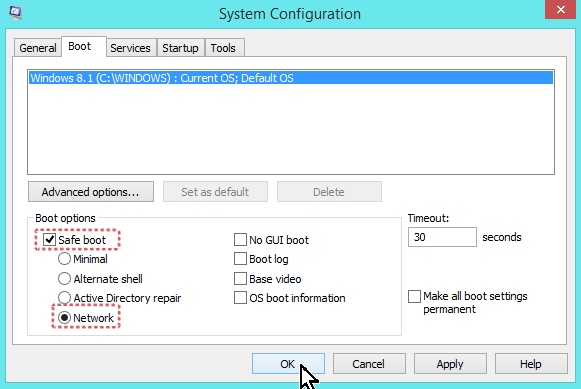
- Click the Boot tab.
- Select the Safe Boot & Network options & click OK.
- Restart your computer.
Step 2: Remove Unwanted Programs from Windows Startup.
- Download and install CCleaner.
- Run CCleaner utility & select “Tools” from the left pane.
- Press the “Startup” button.
- Choose the “Windows” tab.
- Finally select and delete any suspicious entry that is listed there.
- Close CCleaner.
Open Programs and Features and uninstall all WonderShare Applications. In case you don’t know how to do that, here is what you have to do:
1. Press Windows ![]() + R keys to open the run command box.
+ R keys to open the run command box.
2. Type control appwiz.cpl and press Enter. (Accept the UAC warning if appears).
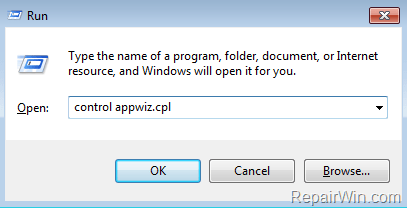
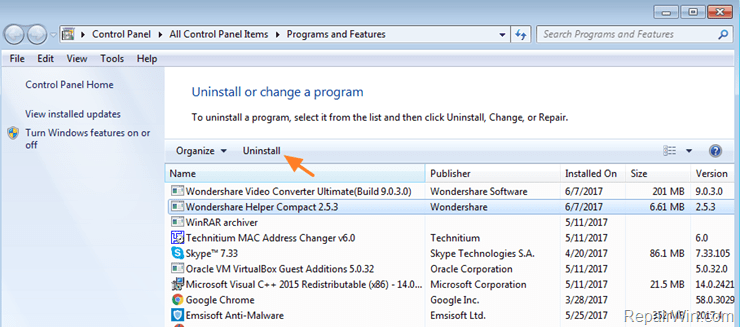
3. From the programs list, select any application from WonderShare and click Uninstall.
* If you cannot find any application from WonderShare, then sort the installed programs by Installed On date and remove any other unknown program that was recently installed on your computer.
4. Close Programs and Features and navigate to “C:Program Files (x86)WondershareWAF” folder (or to ‘C:Program FilesWondershareWAF” folder if you ‘re using 32bit Windows) and double click at uninstall.exe application.
5. Follow the on screen prompts to remove WonderSahre Application.
1. Press Windows ![]() + R keys to open the run command box.
+ R keys to open the run command box.
2. Type: services.msc and press Enter. (Accept the UAC warning if appears).
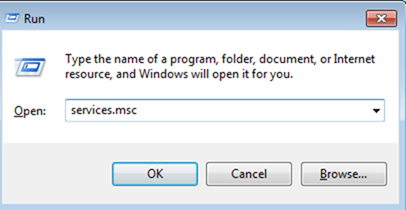
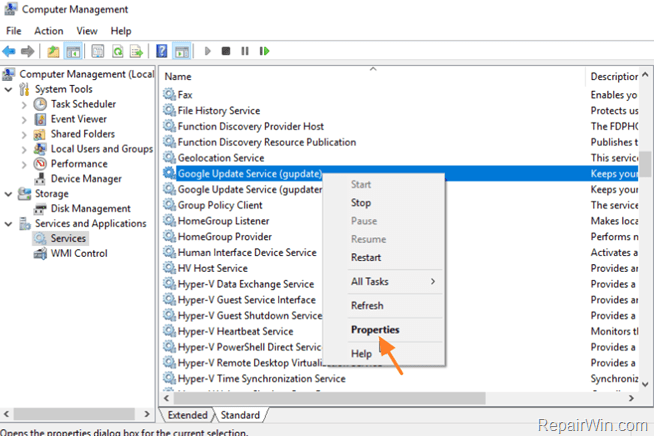
3. Right click at any WonderShare service listed there and choose Properties.
- WsAppService
- Wondershare AppService
- Wondershare Application Framework Service
4. Set the Startup Type to Disabled and click OK.
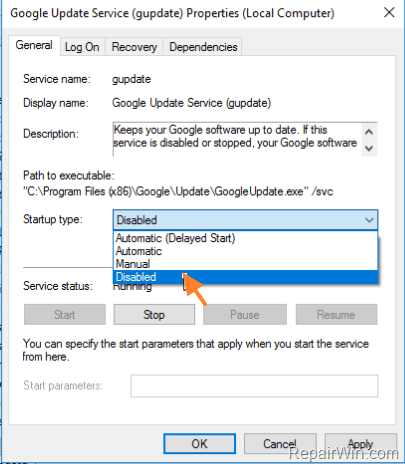
5. Perform the same action and set to Disabled any other service from WonderShare.
6. Restart your computer.
7. After restart, delete the “Wondershare” folder under “C:Program Files (x86)” directory.
Step 5. Remove Adware programs with AdwCleaner.
– AdwCleaner is a freeware utility that can clean your computer from adware programs.
1. Download AdwCleaner utility to your desktop.
2. Close all open programs and run AdwCleaner.exe.
3. At the main window, press the “Scan” button and wait until the scan is completed.
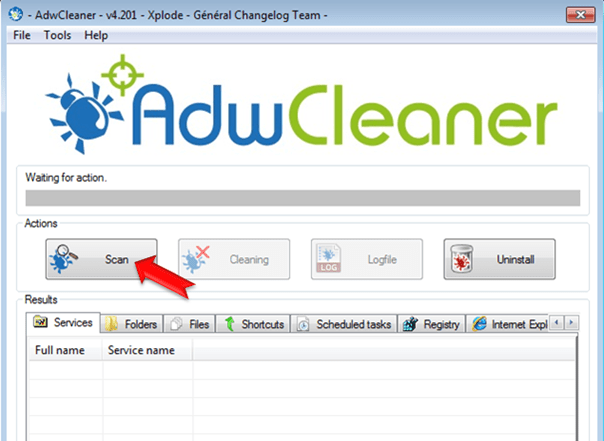
5. When the scan process is completed, press the Cleaning button to remove all adware programs detected.
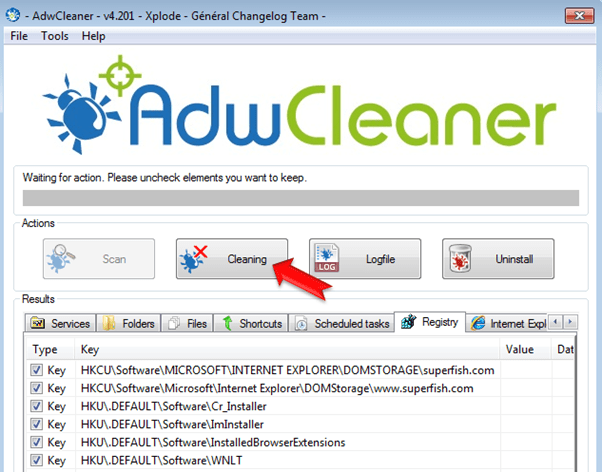
6. When prompted, press OK to restart your computer.
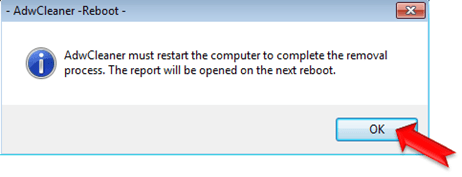
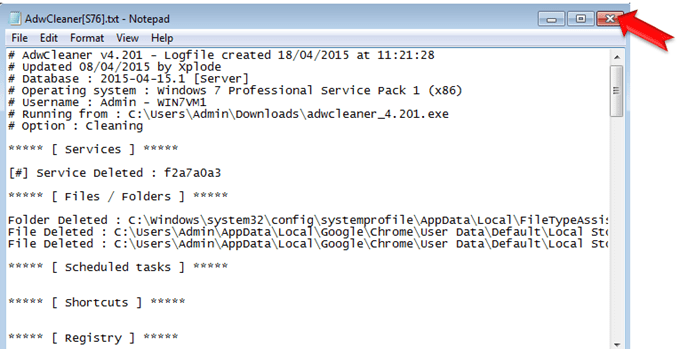
* Note: After restart, close the AdwCleaner report. The report contains the adware programs, registry keys and files that removed by AdWCleaner. If you want to examine its contents later, you can find the logfile at AdWCleaner’s folder on the root drive (e.g. “C:AdwCleanerAdwCleaner.txt)
Step 6: Remove Junkware files with JRT.
1. Download and save JRT-Junkware Removal Tool on your desktop.
2. Run JRT and press a key to start the scan.
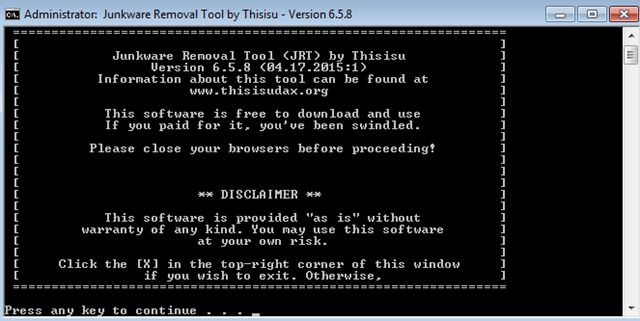
3. Be patient until JRT scans and cleans your system from Junkware.
4. When the Junkware Removal Tool scan is completed, close the JRT log file and then reboot your computer again.
Step 7: Remove Malware programs with MalwareBytes Antimalware.
1. Download and install Malwarebytes 3.0 Free. *
* Note: Keep in mind that after the 14-day trial period, Malwarebytes reverts to a free version but without the full real-time protection.
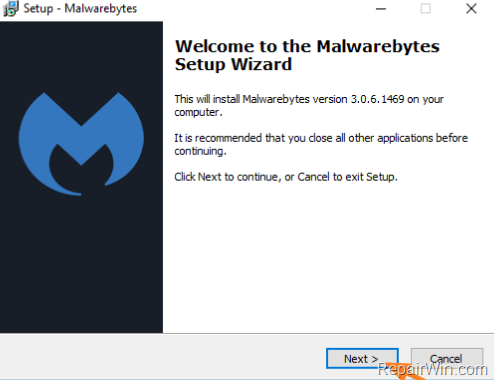
2. Run Malwarebytes Anti-Malware and wait until the program updates its Malware Database.
3. Press the Scan Now button and then wait until the scan process is finished.
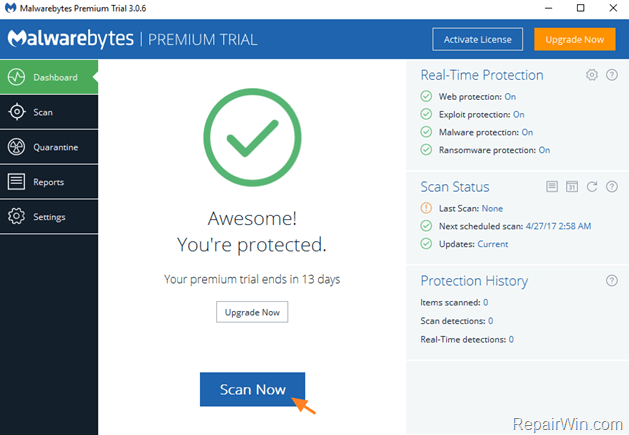
4. When the scan is completed select all items found and then press Quarantine All.
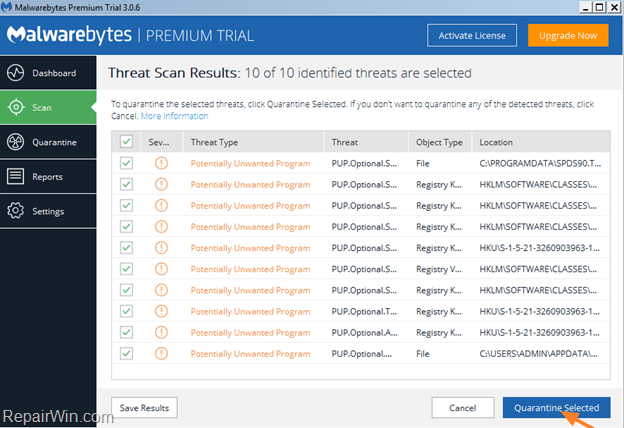
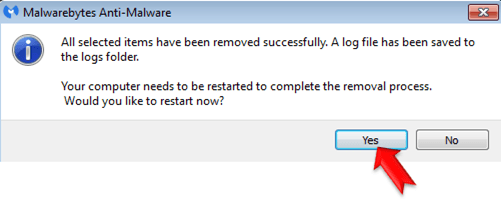
5. Restart your computer if needed and you ‘re done.
Step 8: Remove Virus(es) with your Antivirus Program.
After restart, start you Antivirus program and scan your computer for viruses.
- Related article: Best Free Antivirus to protect your computer.
That’s all! Did it work for you?
Please leave a comment in the comment section below or even better: like and share this blog post in the social networks to help spread the word about this solution.
Bài liên quan
- FIX: Error 0x81000203 in System Restore. (Solved)
- Cannot Access Shared folder. User has not been granted the requested logon type at this computer. (Solved)
- FIX: Cannot clear TPM – 0x80284001, 0x80290300 or 0x80290304.
- Unable to Schedule Teams Meeting in 15 or 10 minutes slots (Solved)
- How to Share Folder without Username/Password on Windows 10/11.
- FIX: Thunderbird High CPU or Memory Usage issues.