In some cases a program or an unwanted extension can modify your Internet browser settings without your knowledge in order to display advertisements or/and to compromise your safety and security, etc. For that reasons – almost -all modern Internet browsers today offers the capability to easy remove all toolbars, extensions and settings by resetting/restoring all settings to default installed values.
In this tutorial you can find detailed instructions on how to restore your Internet browser to default values.
How to reset your Internet Browser settings to default settings
The instructions on how you can restore your browser to default settings are different for each browser. Here are detailed instructions for Internet Explorer, Firefox and Chrome, Opera and Safari.
- Internet Explorer (Reset)
- Mozilla Firefox (Reset)
- Google Chrome (Reset)
- Opera (Reset)
- Safari (Reset)
Internet Explorer (Reset).
To reset Internet Explorer to default installed settings:
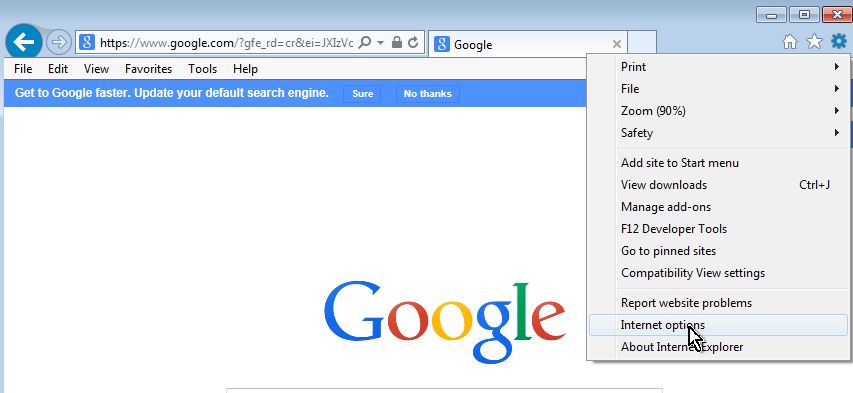
- Click the gear icon
 at the top right corner and choose Internet Options.
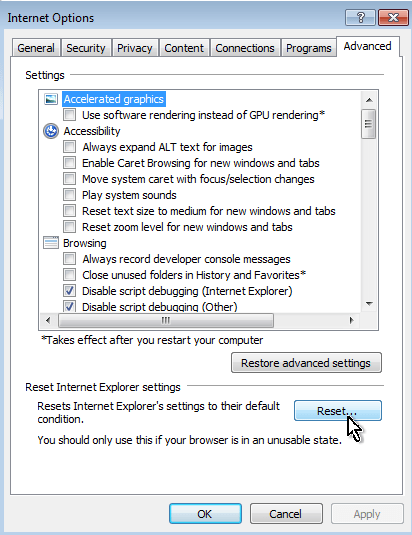
- At the Advanced tab press the Reset button.
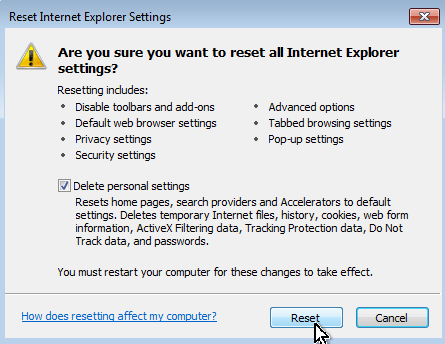
- Check the Delete Personal Settings checkbox and press Reset.
- Close all Internet Explorer windows and restart your browser.
Mozilla Firefox (Reset)
To reset Mozilla Firefox to default installed settings:
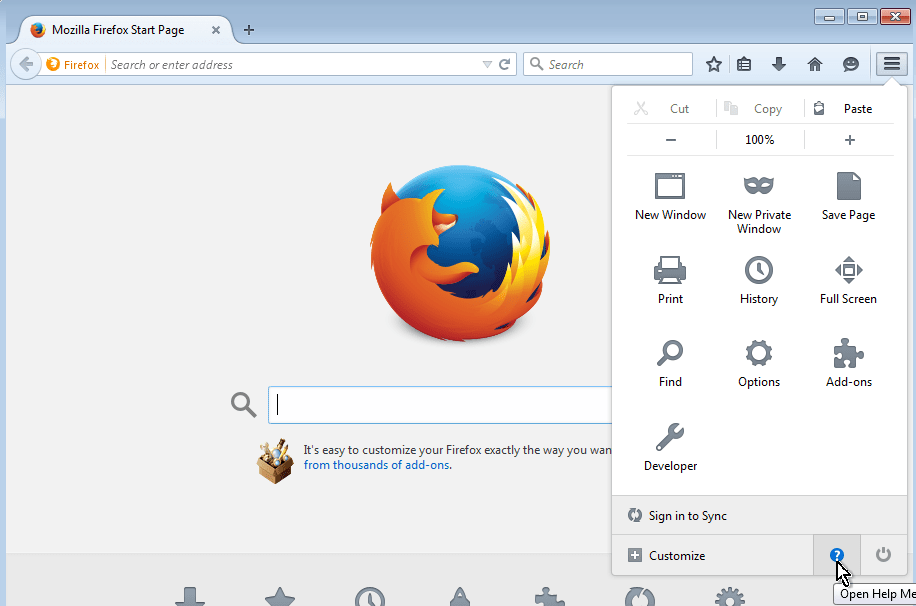
- From Firefox’s menu icon
 choose Help
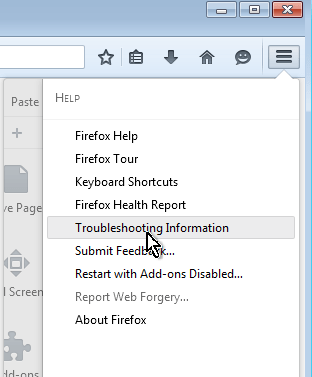
- Choose Troubleshooting Information.
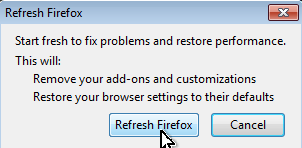
- Press the Refresh Firefox button.
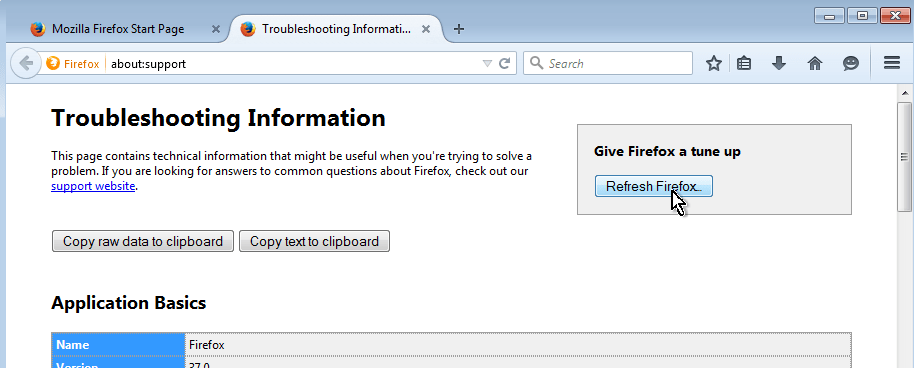
- Press Reset Firefox again.

(After reset, Firefox restarts automatically.)
- Close all open Firefox windows.
Google Chrome (Reset).
To reset Chrome to default installed settings:
- Click on Chrome’s menu
 icon at the upper right corner) and choose Settings.
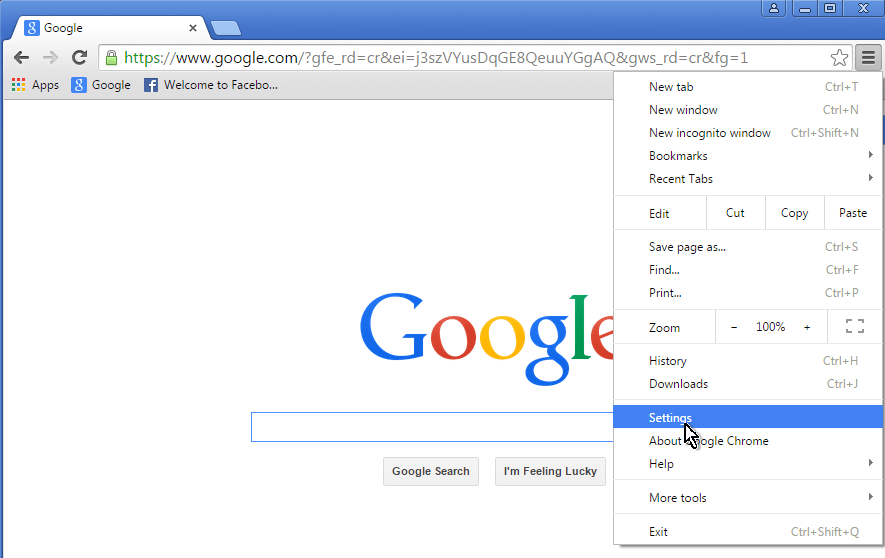
- At Settings page, scroll down and click to Show Advanced Settings.
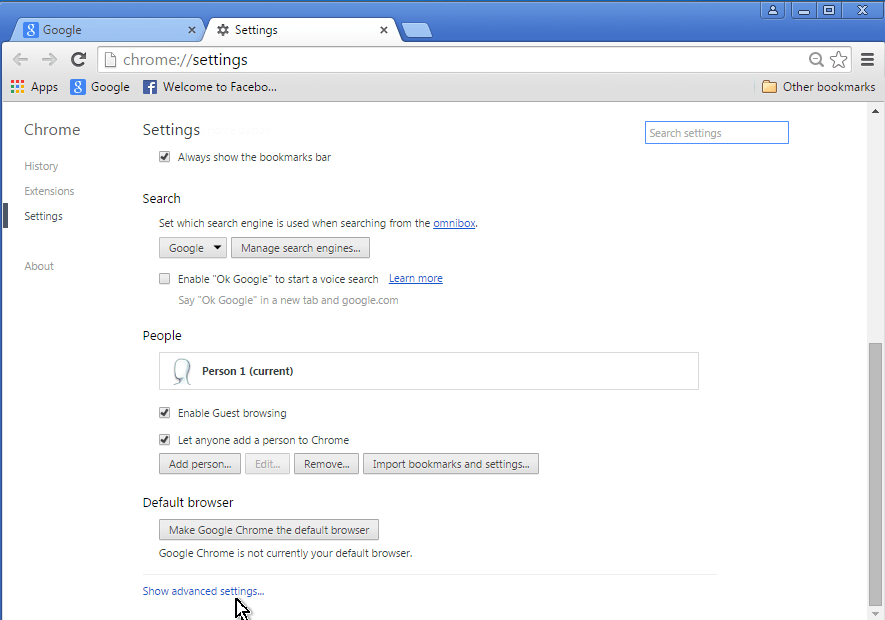
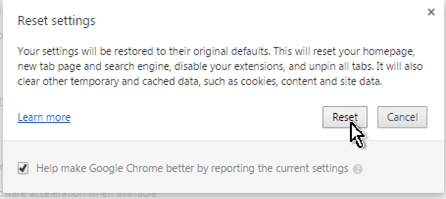
- Scroll down again and press the Reset browser settings button.
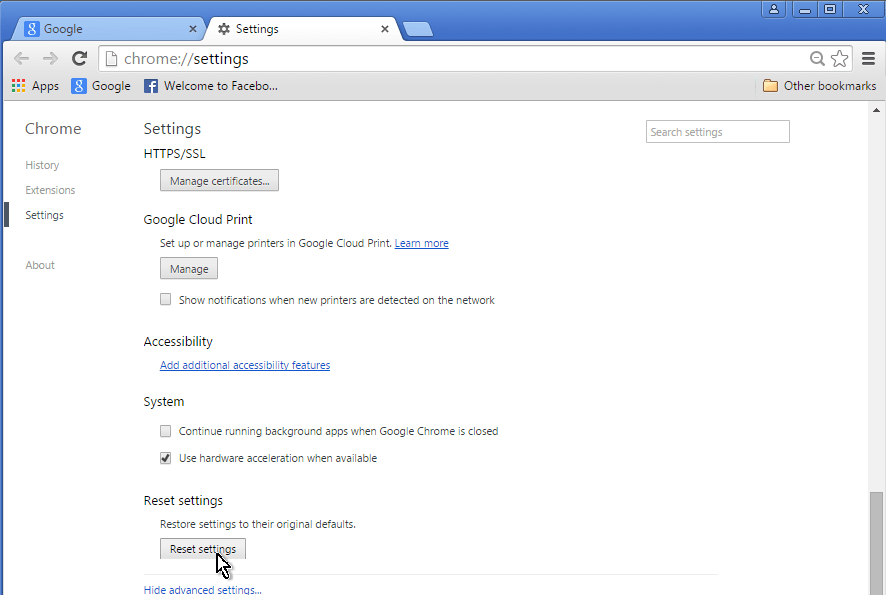
- Click Reset one more time.

- Restart Google Chrome.
Opera (Reset)
Opera browser, doesn’t contain an automatic feature to reset browser settings to default, so you have to done this manually by deleting the Opera’s Profile and Cache folders from your disk. Both named Opera Stable (or Opera on previous versions). Keep in mind that when you delete Opera’s Profile and Cache folders, you will loose all stored bookmarks, extensions and settings. So, before deleting the folders, use this plugin to backup you Opera bookmarks.
Notice: Before continue, first enable the Hidden files view. To do that go to Windows Control Panel, open Folder Options and at the View tab Check to enable the Show hidden files, folders, and drives option.
To reset Opera to default installed settings, delete the Opera Stable folder under these locations:
On Windows 8, 7 & Vista:
By default on Windows 8.1/8, 7 & Vista the Opera Profile settings and Cache are stored at these locations on your disk:
- Profile: %APPDATA%Opera SoftwareOpera Stable
- Cache: %LOCALAPPDATA%Opera SoftwareOpera Stable
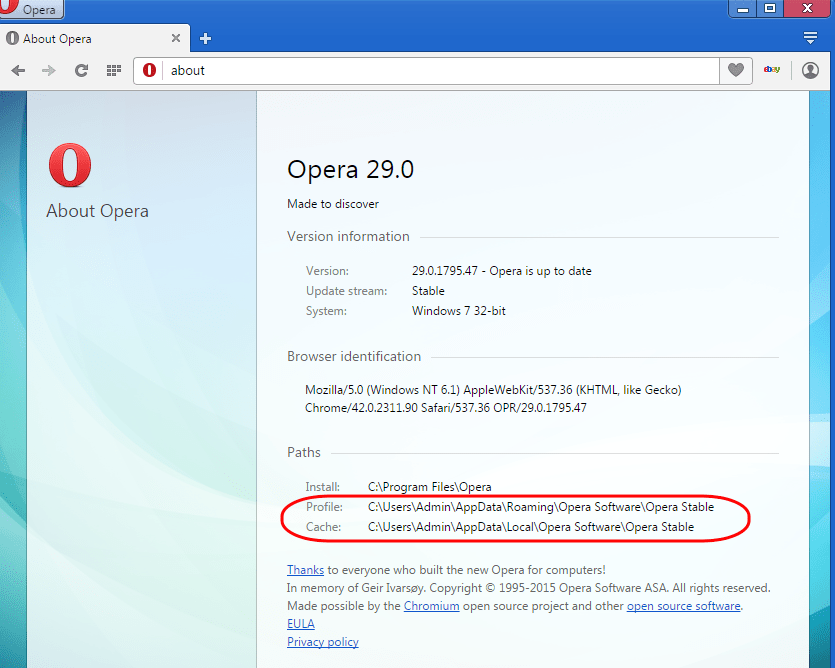
So, if you username is “Admin” then delete the Opera Stable folder from the following two (2) locations:
- “C:UsersAdminAppDataRoamingOpera SoftwareOpera Stable“.
- “C:UsersAdminAppDataLocalOpera SoftwareOpera Stable“.
On Windows XP:
By default on Windows XP the Opera Profile settings and Cache are stored at these locations on your disk::
- Profile: %APPDATA%Opera SoftwareOpera Stable
- Cache: %USERPROFILE%Local SettingsApplication DataOperaOpera
So, if you username is “Admin” then delete the Opera Stable folder from the following two (2) locations:
- “C:Documents and SettingsAdminApplication DataOpera SoftwareOpera Stable“
- “C:Documents and SettingsAdminLocal SettingsApplication DataOpera SoftwareOpera Stable“
Alternate method to locate Opera’s profile and cache storage folders:
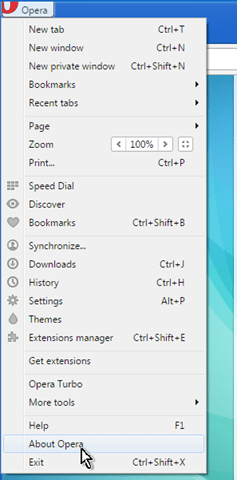
- From Opera’s main menu choose About Opera.
- Under the Paths section note the Profile and Cache values:
Safari (Reset).
To reset Safari to default installed settings:
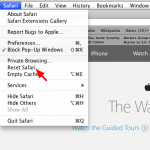
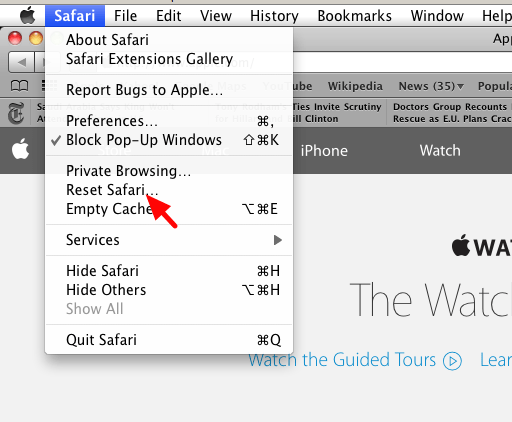
- Form Safari’s menu choose Reset Safari.
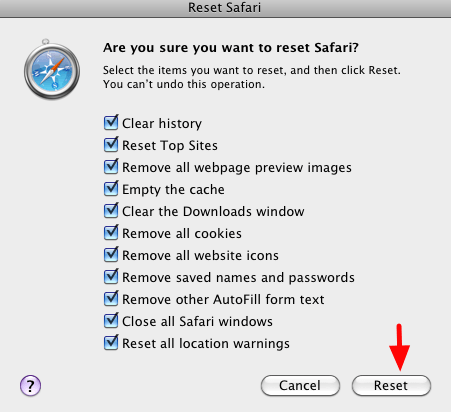
- At Reset Safari dialog window, choose all options (Clear history, Reset Top Sites, Remove all…, etc.) and click Reset.
That’s all folks! Did it work for you?
Please leave a comment in the comment section below or even better: like and share this blog post in the social networks to help spread the word about this tutorial.

