This guide contains instructions on how to setup Windows 11 22H2 and later versions without an Internet connection. (Bypass Internet Connection requirement in Windows 11 22H2 Setup).
The latest version of Windows 11 (22H2) does not allow the installation to continue if you do not have an active network connection. This is because Microsoft requires you to connect your device to a Microsoft account to use Windows 11.
This means that if you do not have Internet connection you will not be able to finish the setup of Windows 11 22H2. (The network connection requirement was not present in previous versions of Windows 11, where you could install Windows 11 even offline and be able create a local account)
More specifically, if during the setup process of Windows 11 22H2, you do not have Network and Internet connection, you will not be able to finish the installation of Windows 11, because there is no option to bypass the Network Connection requirement.
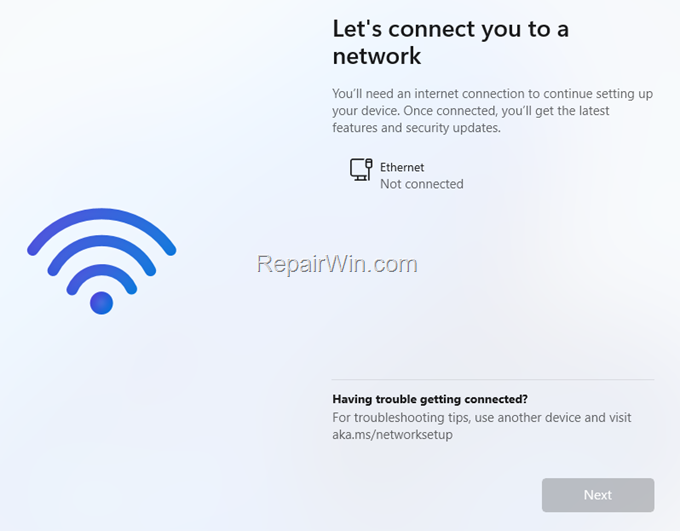

This tutorial contains step-by-step instructions on how to skip the Network/Internet Connection requirement to setup Windows 11 22H2 and later versions.
How to Bypass the Network/Internet Connection requirement to install Windows 11 22H2 and later.
1. At “Let’s connect you to a network” screen, press SHIFT + F10 to open a command prompt window.
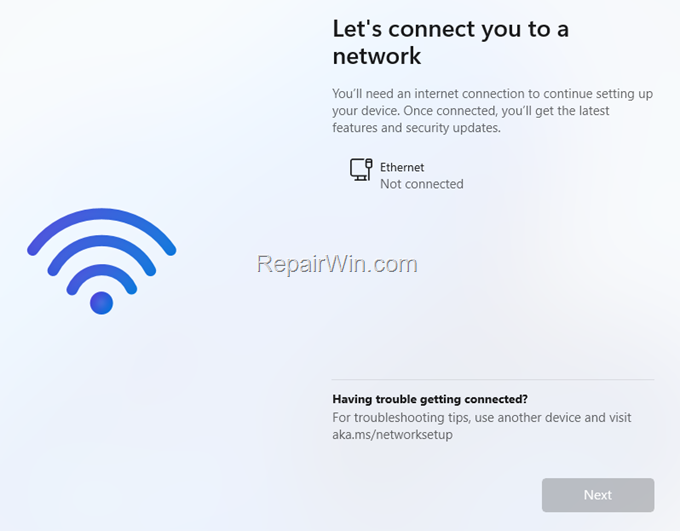

2. In Command Prompt give the following commands:
- cd oobe
- bypassnro

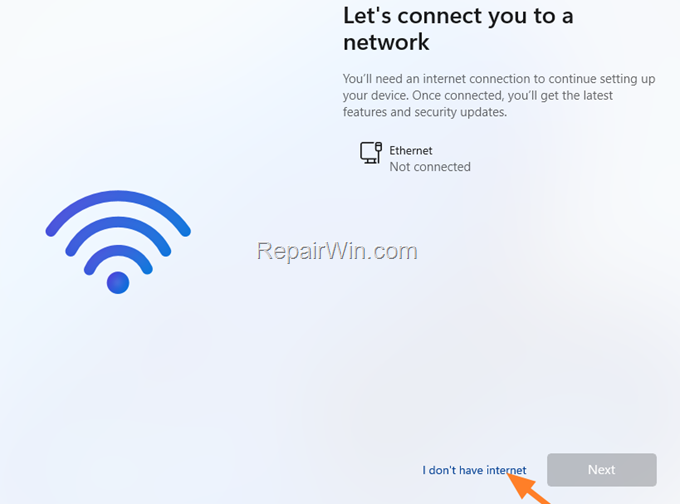
3. Your computer will restart. After restart, choose I don’t have internet.

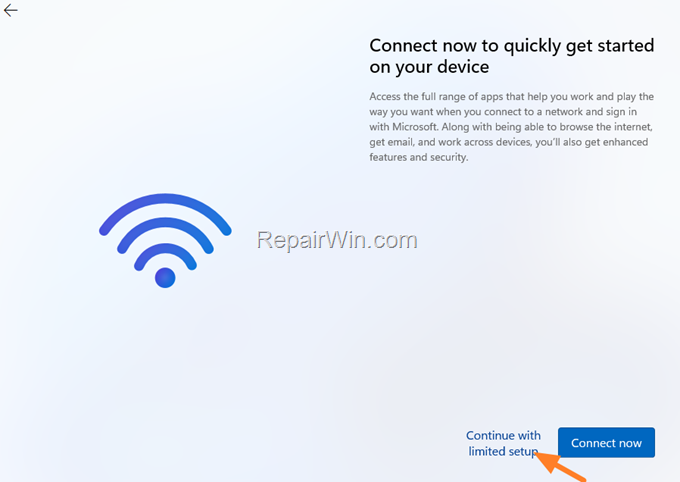
4. Then choose Continue with limited setup

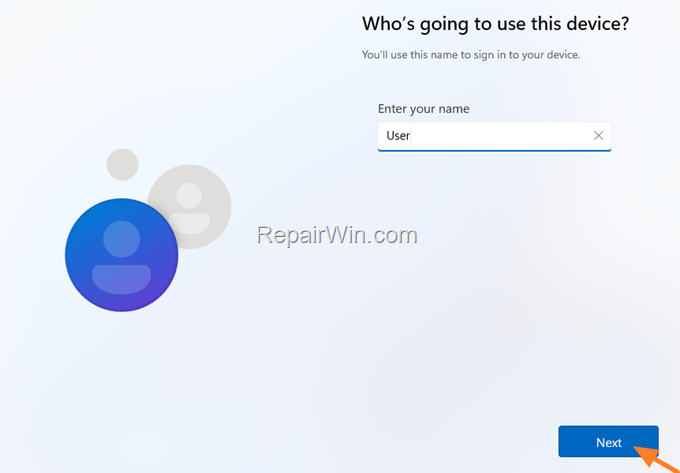
5. Type a username for the Local Account, click Next and continue to Windows 11 setup.

That’s all folks! Please leave a comment in the comment section below or even better: like and share this blog post in the social networks to help spread the word about this solution.
![Setup Windows 11 22H2 without an Internet Connection. [How to] 7 Hình ảnh thuộc sở hữu của trang web qnet88.com](https://qnet88.com/wp-content/uploads/2023/04/btn_donate_lg-132.gif)

