If you want to learn how to crate a shortcut to a program or to a folder/file on your desktop in Windows 11, continue reading below.
Creating desktop shortcuts for frequently used applications and files allows you to launch them easily without having to search each time where they are on the disk or in the Windows 11 apps list.
How to Create Desktop Shortcuts to Apps or Files in Windows 11.
Create Desktop Shortcuts to Programs with Drag and Drop.
To create a desktop shortcut for an App or a program in Windows 11:
1. Click the Start menu and click All Apps.
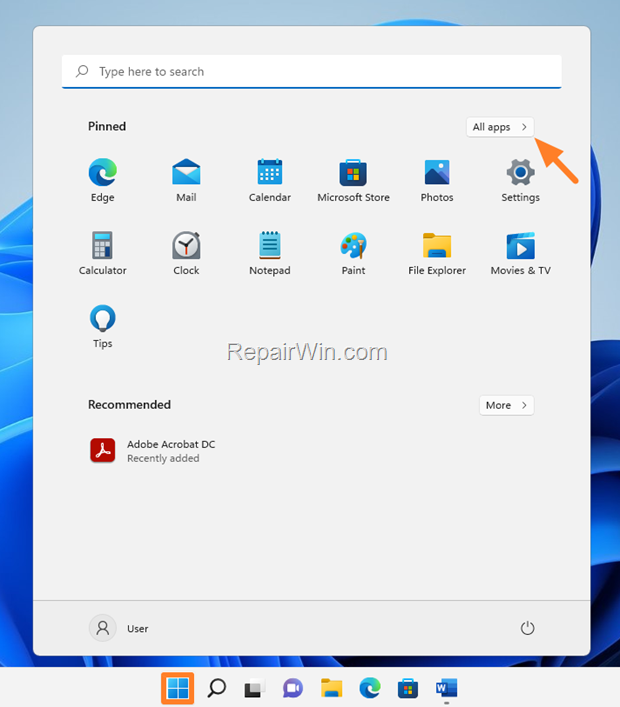

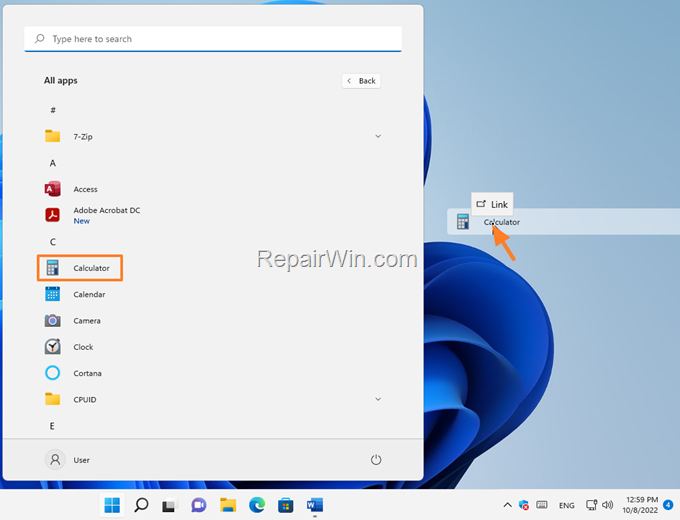
2. Click the program or application you want to create a shortcut for on your desktop, and while holding down the mouse button, drag your mouse to an empty space on your desktop. Then release the mouse button.

Create Shortcuts to any Program from their Location on Disk.
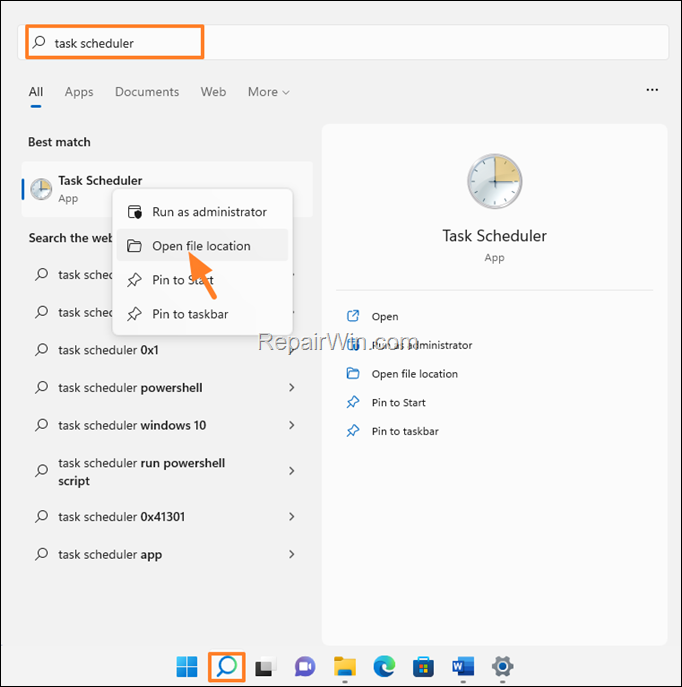
1. In the Search bar, type the name of the program for which you want to create a desktop shortcut. (e.g. “Task Scheduler”).
2. Then at search results, right-click on the program and select Open file location.

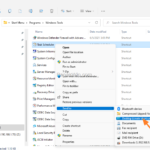
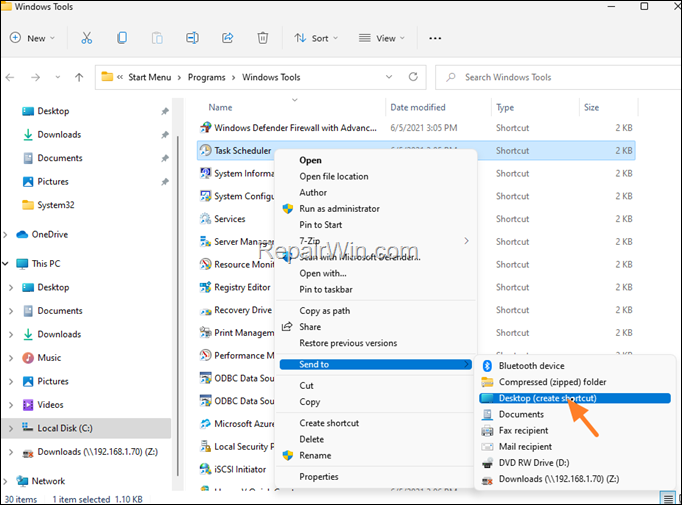
3. Now right-click again on the the program and select Send to -> Desktop (create shortcut).

Create Shortcuts to Folder/Files.
To create a desktop shortcut for a folder/file:
1. Using Explorer, navigate to the folder/file location on the disk.
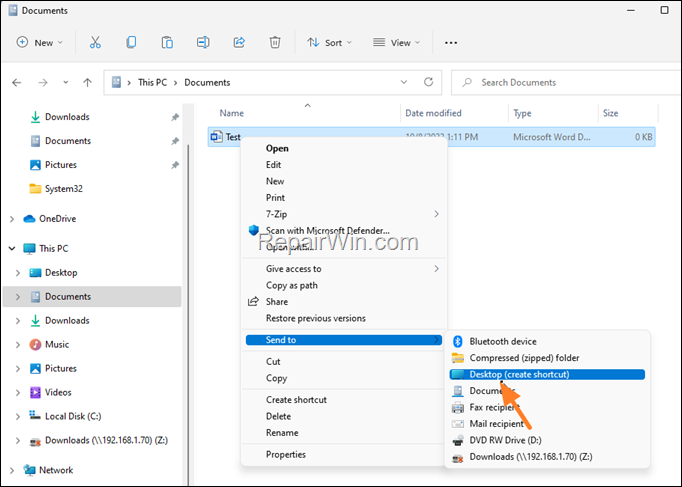
2. Right-click o the folder/file that you want to create a shortcut for, and select Send to -> Desktop (create shortcut)

That’s all folks! Please leave a comment in the comment section below or even better: like and share this blog post in the social networks to help spread the word about this solution.


