The best precaution you can take before making major changes to your Windows computer is to create a system restore point, and in this guide we’ll show you how to do it.
A System Restore Point is a snapshot of your computer’s configuration, including system files, settings, and registry. It allows you to restore your computer to a previous working state in case of system problems that may occur after installing Windows updates, drivers or incorrectly modifying the registry.
System restore points are primarily used for troubleshooting and recovery purposes. If your computer encounters problems, such as software conflicts, driver issues, or system instability, you can use a restore point to revert your system back to a known working state.
When you restore your system using a restore point, Windows restores your system’s files and settings to the state they were in when the restore point was created. However, personal files, such as documents, pictures, and videos, are not affected by the system restore process.
In this guide you’ll learn how to create a system restore point on your Windows computer, and how to restore your computer from a system restore point if needed.
How to Create a System Restore Point in Windows 11/10/8/7 OS.
To create a restore point on Windows:
1. Press Windows ![]()
![]() + R keys to open the run command box.
+ R keys to open the run command box.
2. Type sysdm.cpl and press Enter (OK) to open the System Properties.


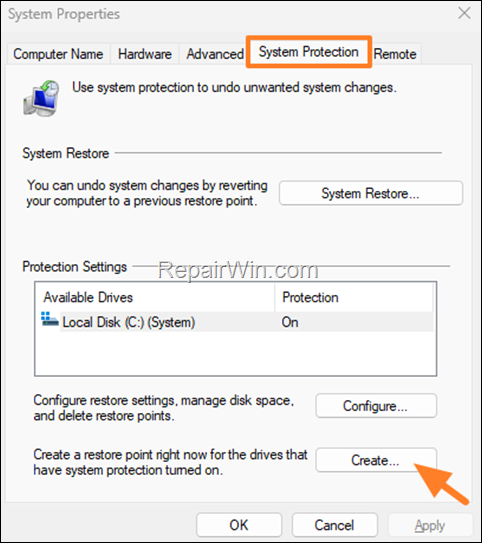
3. Select the System Protection tab click the Create button.*
* Note: If the “Create” button is inactive, then click the Configure button, select the Turn on System Protection option and click OK.

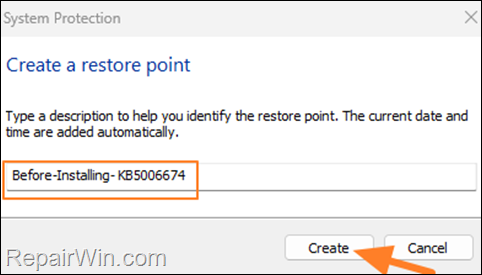
4. Type a name/description to help you identify the restore point and click OK. *
* Note: The creation date and time of the restore point will be added automatically.

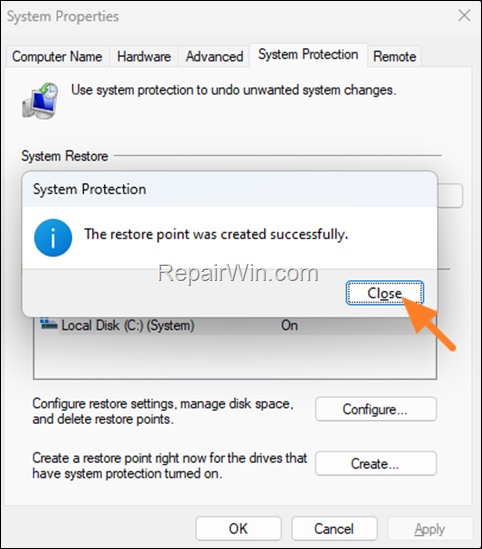
5. Wait for the creation of the system restore point to complete, and then click OK & OK again to close all windows.

6. That’s it. Now continue your work or make the changes you want to your system and use this restore point to restore your system if necessary, by using the instructions below.
How to Restore your System using a Restore Point.
In case you want to restore your system to its previous state, using a restore point you created, follow the respective instructions below depending on whether Windows starts normally or not on your computer.
A. If Windows Starts Normally or in Safe Mode.
To restore your system to a previous working state if Windows starts normally, or in Safe Mode:
1. Press Windows ![]()
![]() + R keys to open the run command box.
+ R keys to open the run command box.
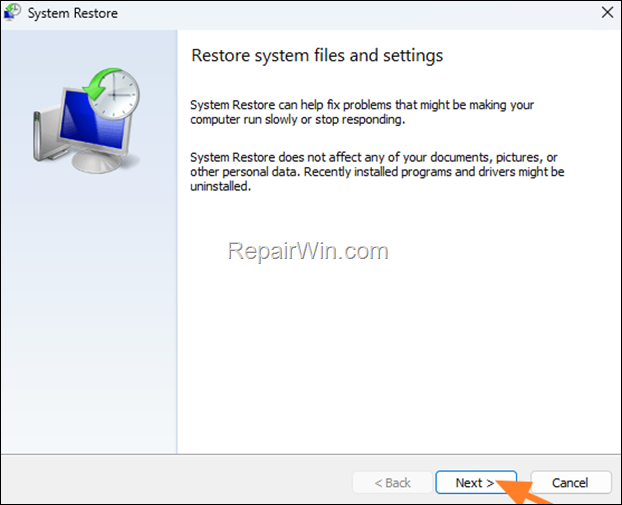
2. Type rstrui and press Enter to open System Restore.


3. At System Restore wizard, click Next.

4. Select the Restore point you created and click Next.
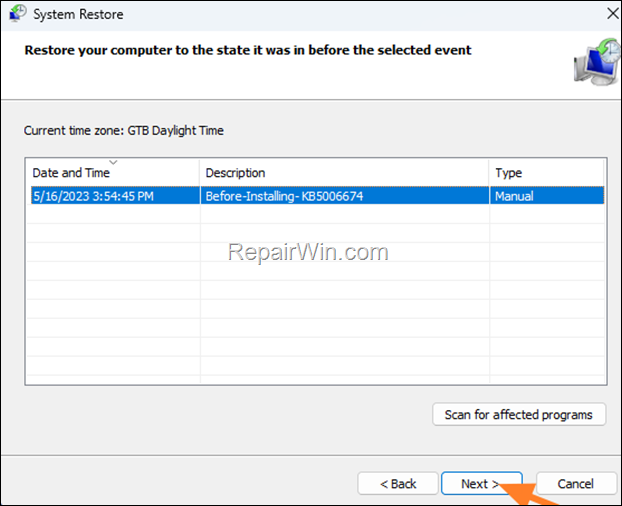

5. Click Finish at next screen to confirm.


6. Read carefully the information message and click Yes.


7. Now wait for the system restore operation to complete and enter to Windows normally.
B. If Windows Cannot Boot/Start.
To restore your system to a previous working state if Windows couldn’t start normally or in Safe Mode:
1. Turn off your PC by pressing and holding down the power button for 5-10 seconds.
2. Turn on your PC again, and when you see the spinning dots, press and hold down again the power button for 5-10 seconds to to re-terminate its operation.
3. Repeat the above step two (2) more times and then leave Windows to enter in Automatic Repair screen and click Advanced options.


4. At the next screen, choose Troubleshoot.


5. Click Advanced options again.


6. Click System Restore.


7. Click Next at the first screen.
8. Now select the Restore Point you created and click Next again.


9. Finally click Finish and then Yes to restore your system using the selected restore point.


10. Now wait for the system restore process to complete and once this done Windows will start up again normally.
That’s all folks! Did it work for you?
Please leave a comment in the comment section below or even better: like and share this blog post in the social networks to help spread the word about this solution.


