This article contains step by step instructions on how to remove BitLocker Protection on the system drive C: in order to be able to clean install Windows 10 on a BitLocker protected computer, if you don’t have the BitLocker Recovery key or the BitLocker password or if you cannot unlock the BitLocker drive for any reason.

When a Windows 10 device (laptop or PC) is protected with the BitLocker, then the only way to access its contents or to reset the device (by using the “Reset This PC”, “Refresh your PC” features), or to reinstall Windows, is to unlock the operating system drive C: by using the BitLocker Recovery Key or the BitLocker password.
If you don’t have the BitLocker Recovery key or the BitLocker password to unlock the system drive C:, or the BitLocker key is not accepted, then the only option you left (unfortunately), is to fully erase the drive and to perform a clean Windows installation.
In this tutorial you ‘ll find instructions on how to resolve the following problem when trying to install Windows 10 or to reset a Windows 10 device at its factory default state: “The drive where Windows is installed is locked. Unlock the drive and try again”.
How to Clean Install Windows 10 on a BitLocker Protected Computer (FIX: Cannot Install/Refresh Windows 10 – Drive is Locked with BitLocker.)
Requirement: A Windows 10 Installation Media (USB or DVD).
If you don’t own a Windows Installation Media then you can create one by using Microsoft’s Media Creation tool.
- How to create a Windows 10 USB installation media.
- How to create a Windows 10 DVD installation media.
To perform a clean installation of Windows 10, on a BitLocker Protected Computer/Drive, follow the instructions below: *
* CAUTION: THE BELOW PROCEDURE WILL DELETE ALL THE STORED DATA ON THE LOCKED DRIVE. PROCEED ONLY IF YOU CANNOT UNLOCK THE BITLOCKER PROTECTED DRIVE/COMPUTER.
1. Boot your system from the Windows 10 installation media. *
* Note: To be able to boot from the Windows Media (USB or DVD) follow the below steps:
- Method 1: After Power On, press the corresponding Function key (commonly is the “F12” or the “F8” key) to view the “Boot Order” or “Boot Menu” options. Then select the USB (or the DVD) device which contains the Windows installation Media (files) and hit Enter.
- Method 2: Enter BIOS Setup (Settings) and set the Windows Installation Media as the “First Boot Device” at “Boot Order” menu. Then Save and Exit from BIOS settings.
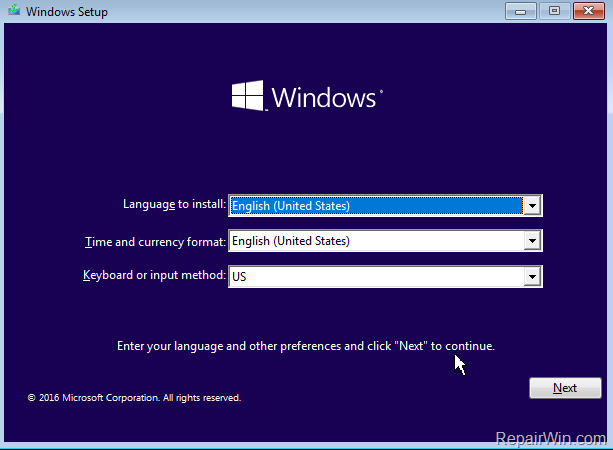
2. At the below screen press the SHIFT + F10 keys to launch command prompt. (or press Next > Repair My Computer > Troubleshoot > Command Prompt). *
* Note: If you prompted for the recovery key, click SKIP this drive.

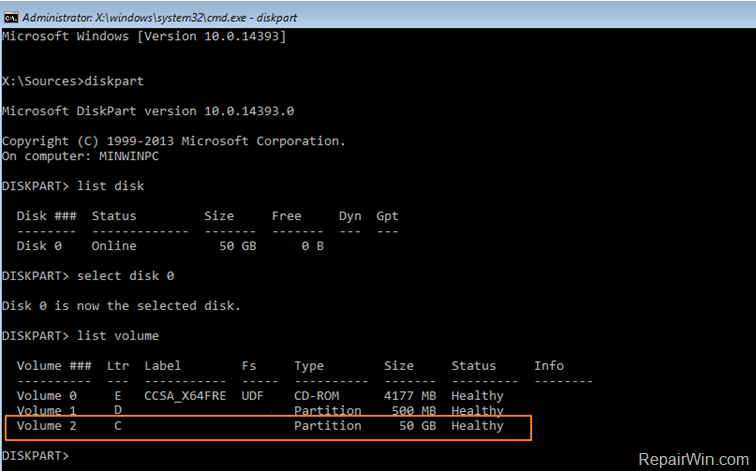
3. In command prompt give the following commands in order:
- diskpart
- list disk
- select disk 0
- list volume
4. Now locate which of the listed volumes has the larger size in GB. Commonly the larger volume is where Windows installed on (the locked drive). *
* e.g. At the below screenshot the “Volume 2” has the larger size.

5. Then select the larger volume by typing this command: *
- select volume number
* Note: Change the volume number at the above command according your case (e.g. “select volume 2”)
6. Finally delete the selected volume by giving this command:
- delete volume override

7. Type exit to close DISKPART tool and then close Command Prompt.
8. Turn Off and then Turn ON your device again, and…
9. Boot from the USB Windows Installation Media.
10. Click Next and then Install Now.
11. Choose “I don’t have a product key” and then accept the License agreement.
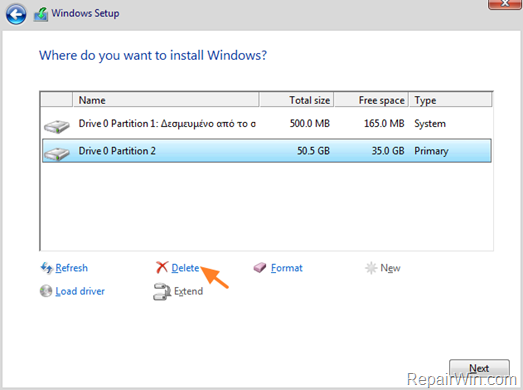
12. Select “Custom install” and then delete all the rest partitions/volumes on the disk.

13. When done, choose the “Unallocated space” and click Next.
14. Follow the on-screen prompts to clean install Windows 10.
That’s all folks! Did it work for you?
Please leave a comment in the comment section below or even better: like and share this blog post in the social networks to help spread the word about this problem.


