Many times, there is the need to disable Windows Updates because they can cause several problems on the system functionality and stability, especially in cases where a new update has not tested enough before it published. Windows Updates are controlled and downloaded from the Windows Update service, which is included in all Windows versions.
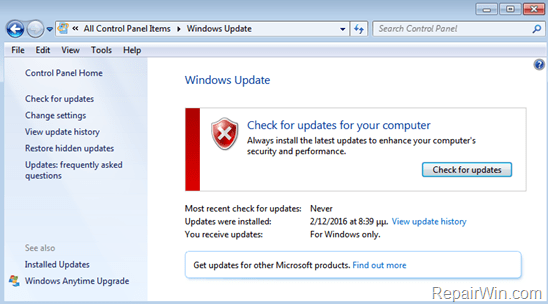
Windows Update service, is an essential Windows service because it provides updates for all Microsoft products that installed on a working Windows computer. In fact, the Windows update service, checks and downloads all the available updates that improves the Windows security (security updates), the system functionality or any other update available for installed Microsoft products (e.g. MS Office) .
In this article you will find detailed on how to disable Updates in Windows 10, 8, 7 or Vista
How to Disable Updates in Windows 10, 8, 7 or Vista.
In order to prevent updates installation, follow the corresponding instructions below according the installed Operating System:
- To disable Windows Update in Windows 10 follow the instructions in Method 1 or Method 2.
- To disable Windows Updates in Windows 8, Windows 7 or Windows Vista follow the instructions in Method 1 or Method 3.
Method 1. Disable Updates by Disabling the Windows Update Service.
– The easiest method to disable Windows Updates, in all Windows versions (Windows 10, 8, 7 or Vista) , is to disable the Windows Update Service. To do that:
1. Press Windows ![]() + R keys to open the run command box.
+ R keys to open the run command box.
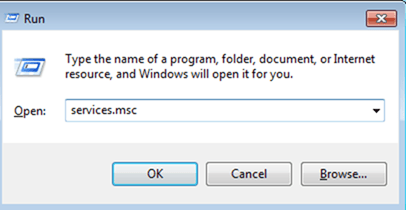
2. Type: services.msc & click OK.
- (Accept the UAC warning if appears).
3. In Services control panel double click at Windows Update service to open it’s properties.
4. To completely disable Windows Updates, set the Startup type: to Disabled.
5. Click OK and restart your computer.
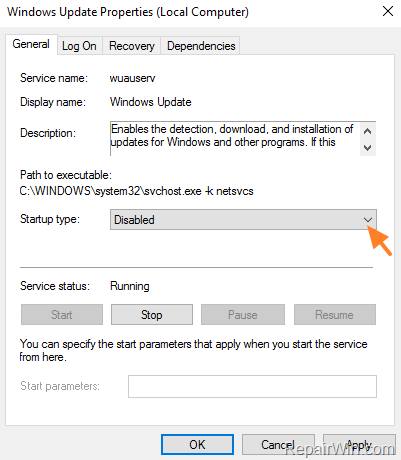
6. From now on, Windows Updates are disabled on the system. If you want to enable Windows Updates on the feature, just follow the same procedure, and set the Startup type to Automatic.
Method 2. Disable Updates in Windows 10 by setting the Wi-Fi connection to Metered.
– The second method to prevent Windows from downloading and installing the new updates, is by setting the Wireless Internet connection as “Metered” *, but this method works only in Windows 10 and Windows OS.
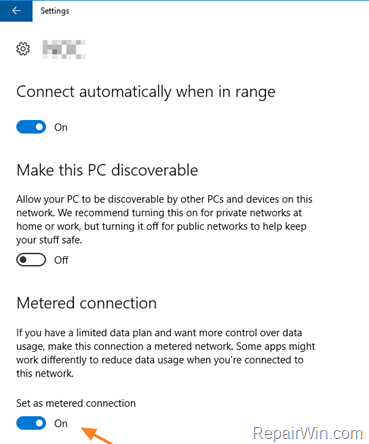
* A metered connection is an Internet connection that has a data limit associated with it. In Windows 10 Cellular data connections are set as metered by default and the Wi-Fi network connections can be set to metered but aren’t by default. Ethernet connections cannot be set as metered.
– To set the Wi-Fi Network connection as metered in Windows 10:
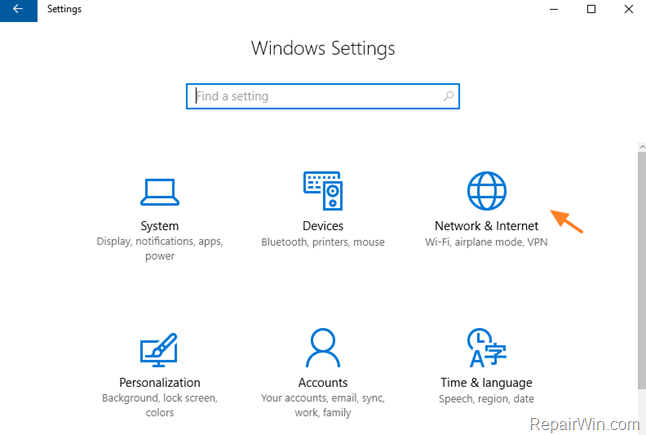
1. From the Start ![]() menu choose Settings
menu choose Settings ![]() and then click Network & Internet.
and then click Network & Internet.
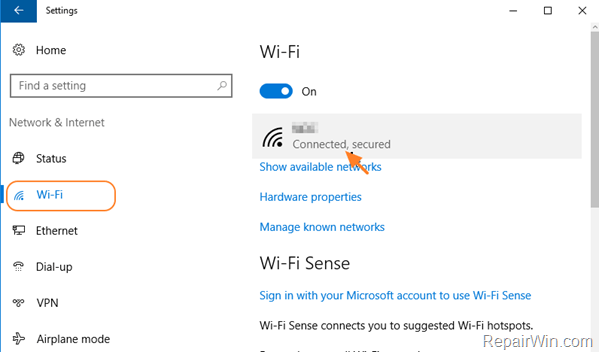
2. Choose Wi-Fi on the left and then click at the Wireless network that you ‘re connected to.
3. Drag the Set as metered switch to On.
Method 3. Disable Windows Updates from Update Settings (Windows 8, 7 & Vista).
– The third method that works only in Windows 7 or Windows Vista, is to disable the Windows Updates, by using the Windows Update settings. To do that:
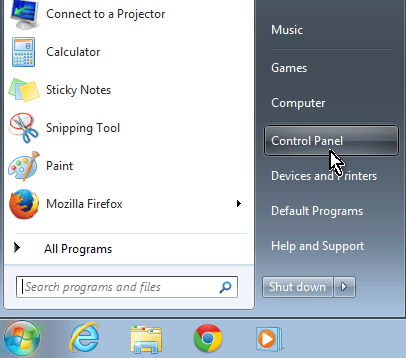
1. Click at the Start menu and select Control Panel. *
* In Windows 8 right click on Start ![]() menu and select Control Panel.
menu and select Control Panel.
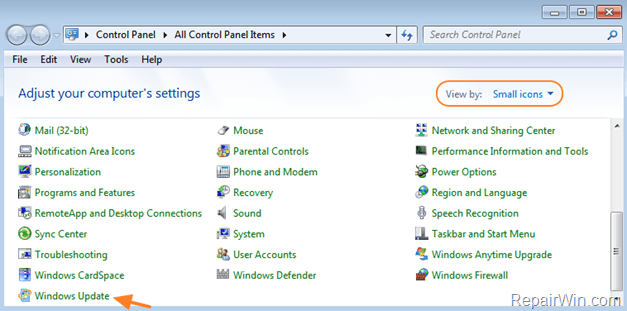
2. Set the View By to Small icons and then double click at Windows Update.
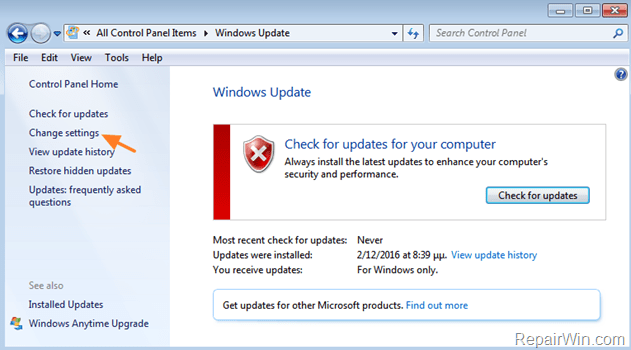
3. Click Change Settings on the left pane:
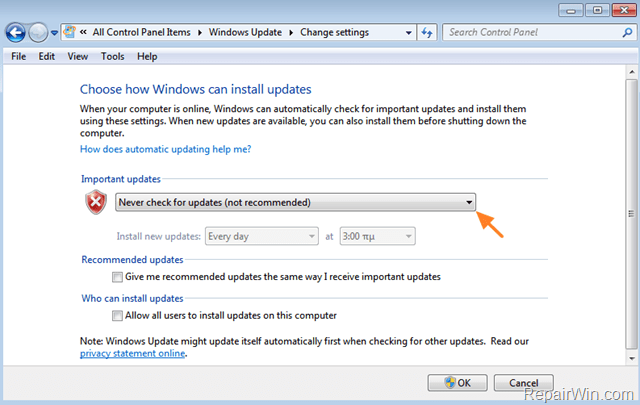
4. Under Important Updates section, select the “Never check for updates (not recommended)” option and click OK.
That’s all folks! Did it work for you?
Please leave a comment in the comment section below or even better: like and share this blog post in the social networks to help spread the word about this solution.

