If you want to use Windows 10/11 with a local account, but the “Sign in with a local account instead” option is missing, continue reading below to fix the problem.
As you know, Windows 10/11 requires you to sign in with a Microsoft account so you can take advantage of all the new features provided by the operating system, but also allows you to sign in with a local account, as described in a previous tutorial. But in some cases, the “Sign in with a local account” option is missing from “Accounts > Your Info” options, and so it is impossible for the user to use a local account in Windows 10/11.


How to fix: “Sign in with a local account instead” option is missing on Windows 11/10.*
Nội dung
* Note: After trying different methods to correct the problem mentioned without success, I have come to the conclusion that the safest and easiest way to overcome the problem is to create a new local account and then to transfer all the files from the Microsoft account to the new local account (as descripted below), or to perform a clean Windows installation.
Step 1. Create a New Local Admin Account on Windows 11/10.
Proceed and create a local administrator account on Windows 10/11, using the steps below:
1a. Press Windows ![]()
![]() + R keys to open the run command box.
+ R keys to open the run command box.
1b. In the “Open” box, type: control userpasswords2 & click OK.


2. In ‘Users Accounts’ window, click the Add button to add a new local account.


3. Click Sign in without a Microsoft Account in order to create a local account.


4. Then choose Local Account.


5. Fill the required fields (username, password & password hint) and click Next & Finish.


6. Now, highlight the new user and select Properties


7. At Group Membership tab, place the bullet to Administrator and click OK twice to close the ‘User Accounts’ window.


Step 2. Sign-in with the new Account.
Now logout from the Microsoft Account, and sign-in to Windows using the new local account you created in previous step.
1. Right-click on the Start ![]()
![]() button and select Shut down or Sign out > Sign out
button and select Shut down or Sign out > Sign out


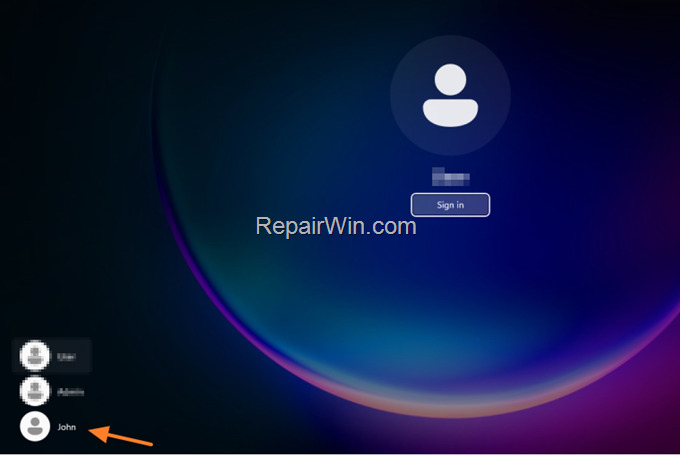
2. In the sing-in screen, click the new account to login with it. *
* Note: If you own Windows 10/11 Professional and your PC is Joined to an Azure AD Domain, select Other User and then type the username of the local account in this format: .Username (e.g. “.John“)


Step 3. Transfer all your files from the MS account to the new account.
After entering in Windows using the new local account, proceed and copy/move all files from the Microsoft Account to the new local account. To do that:
1. Explore the contents of the “C:Users” folder.
2. Open the profile folder related to your Microsoft account (e.g. “user1”) and then transfer all your personal files to the new user profile user folder (e.g. “John”).
Step 4. Turn Off the BitLocker Encryption (If Enabled).
On some OEM laptops with Windows 11 pre-installed, BitLocker disk encryption is already enabled without the user being aware of it. Since BitLocker stores the decryption key (aka “recovery key”) in the Microsoft Account used to install Windows 11, you must disable the BitLocker encryption in order to completely remove the Microsoft Account from your PC and to avoid problems in the future. To do that, follow the instructions below according your Windows 11 Edition (Home or Professional).
To Turn Off the Device Encryption, on Windows 11 Home:
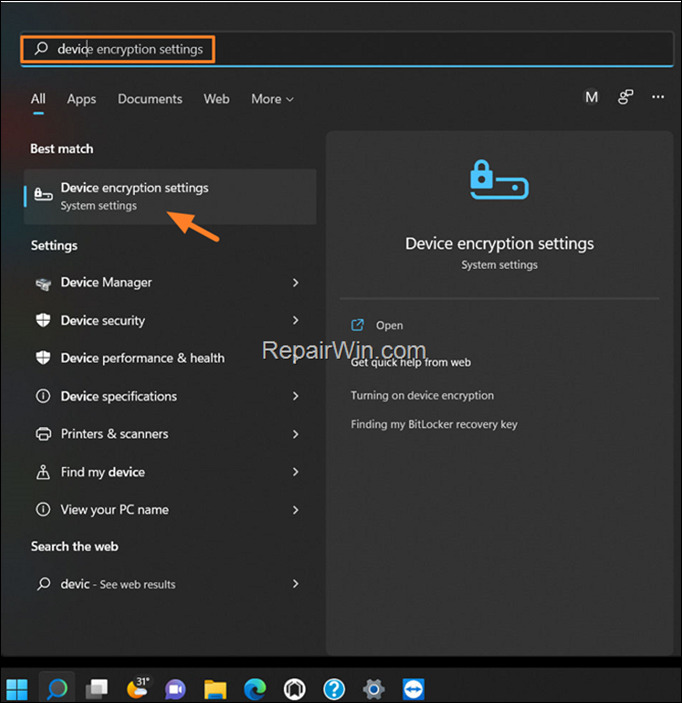
1. On the search bar, type “device encryption settings” and then Open them.


2. Toggle the Device encryption switch to OFF. *
* Note: If the device encryption is already Off skip to step-4.


3. Then click Turn off to remove the device encryption and then wait for the decryption to complete. When this done, continue to next step.


To Turn Off the Device Encryption, on Windows 11 Pro:
1. On the search bar, type “bitlocker” and then open click Manage BitLocker. *
* Alternatively: Navigate to Control Panel > All Control Panel Items > BitLocker Drive Encryption.


2. If BitLocker is enabled on the C: drive, click Turn off BitLocker. Then click Turn Off BitLocker again and wait until BitLocker decrypts and unlocks your files. When it’s done proceed to the next step.


Step 5. Disconnect Microsoft Account from PC.
At this point you can safely disconnect the Microsoft Account from Windows 10/11, if you don’t want to use it. To do that:
1. Navigate to Start > Settings > Accounts > Work or school and click Disconnect.


2. Click Yes again, to remove the MS Account and then continue to next step.


Step 6. Remove the Microsoft Account from the PC.
After ensuring that you have transferred all your personal files from the MS account, you can proceed to delete your Microsoft Account from the PC, by following the below steps:
1a. Press Windows ![]()
![]() + R keys to open the run command box.
+ R keys to open the run command box.
1b. In the “Open” box, type: control userpasswords2 & click OK.


2. Select the Microsoft Account and click the Remove button. Click Yes to confirm you decision and then OK to close the ‘User Accounts’ window.


Step 7. Remove Microsoft Account’s Profile folder.
The final step, is to delete the profile folder of the removed Microsoft Account:
1a. Press Windows ![]()
![]() + R keys to open the run command box.
+ R keys to open the run command box.
1b. In the “Open” box, type: control sysdm.cpl & click OK, to open the System Properties.


2. At Advanced tab open the User Profiles Settings.


3. At the ‘User Profiles’ window, select the Account Unknown profile and click Delete and then Yes to remove the profile folder of the deleted Microsoft Account.


That’s all folks! Please leave a comment in the comment section below or even better: like and share this blog post in the social networks to help spread the word about this solution.

Bài liên quan
- FIX: Error 0x81000203 in System Restore. (Solved)
- Cannot Access Shared folder. User has not been granted the requested logon type at this computer. (Solved)
- FIX: Cannot clear TPM – 0x80284001, 0x80290300 or 0x80290304.
- Unable to Schedule Teams Meeting in 15 or 10 minutes slots (Solved)
- How to Share Folder without Username/Password on Windows 10/11.
- FIX: Thunderbird High CPU or Memory Usage issues.

