This tutorial contains instructions to fix the Windows 10 Upgrade Error 0xC1900101 – 0x40017: “The installation failed in the SECOND_BOOT phase with an error during BOOT operation”.
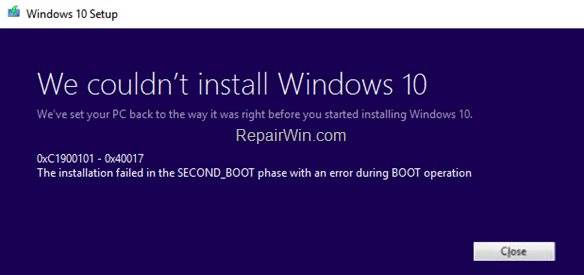
Windows 10 Upgrade Problem 0xC1900101 – 0x40017 in details: When you try to upgrade Windows 10 to the latest version (build) or when you try to upgrade your system from Windows 7 or 8.1 to Windows 10, the installation stops with error “We couldn’t install Windows 10 – 0xC1900101 – 0x40017 – The installation failed in the SECOND BOOT phase with an error during BOOT operation”, and then reverts back to the previous Windows version.
How to FIX Windows 10 Update Error 0xC1900101 – 0x40017 “Installation failed in the SECOND_BOOT phase with an error during BOOT operation”
Nội dung
The error code 0xC1900101 – 0x40017 during the Windows 10 upgrade, indicates a problem with an incompatible device, driver or program on the system. So, before you continue to apply the methods below, apply the following:
1. First of all, make sure that the Date & Time settings are correct.
2. Then, ensure that you have enough free space. Windows 10 requires at least 32 GB of free space to upgrade. To free up disk space use Disk Cleanup.
3. Install the latest drivers for all the devices on your system, especially for the Ethernet & the Wireless adapter (if any). *
4. Disconnect all external USB drives & SD cards and any other USB device that don’t needed.
5. If you ‘re using a third-party antivirus program, then temporarily disable or -better- uninstall it.
6. Disable the Hard Drive Encryption (If enabled).
7. Finally, before restarting your computer to install the update, disconnect from the network. (e.g. Unplug the Ethernet cable or disable the Wi-Fi) adapter).
* Note: If after applying the instructions in this article, the Windows 10 Upgrade Installation still fails, proceed and update also the BIOS (Firmware) on your system.
Method 1. Run the Windows Update Troubleshooter.
The first method to fix the Windows 10 update error 0xC1900101 – 0x4001E, is to run the Windows Update Troubleshooter.
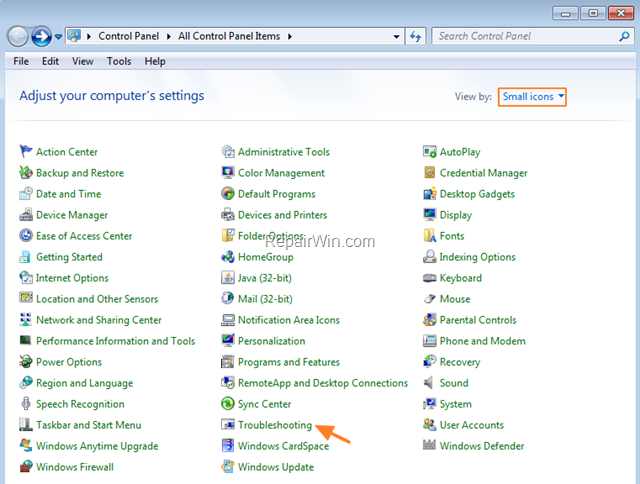
1. Navigate to Windows Control Panel, set the ‘View By’ to Small icons and open Troubleshooting.
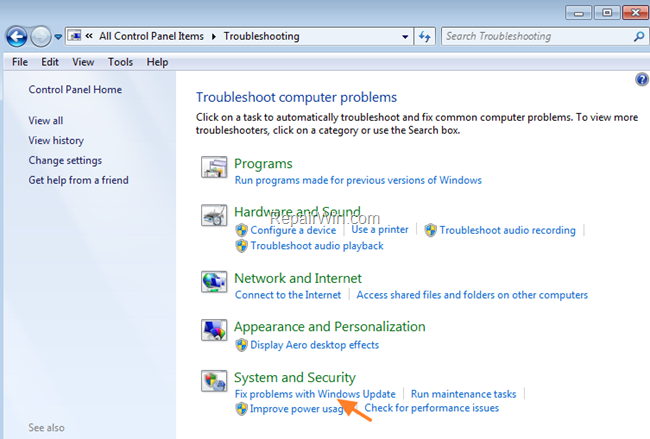
2. In Troubleshooting options, click Fix problems with Windows Update.
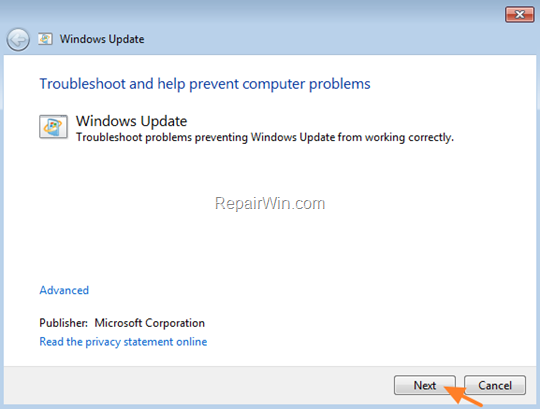
3. Click Next to troubleshoot Windows update problems.
5. When the troubleshooting process is complete, close the troubleshooter and restart your PC.
6. Check for updates.
Method 2. Delete the ‘SoftwareDistribution’ Folder.
The “C:WindowsSoftwareDistribution“ folder, is the location where Windows store the Windows Updates. Many times, this folder becomes corrupted and you must re-create it in order to download the updates from scratch. To rebuild (re-create) the “SoftwareDistribution” folder follow the steps below:
Step 1: Stop Windows Update Service.
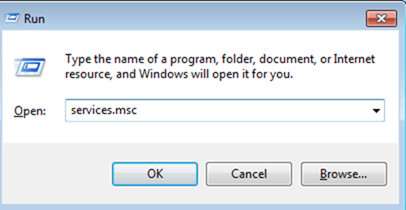
1. Open Windows Services control panel: To do that:
- Press Windows
 + R keys to open the run command box.
 - In the Search box, type: services.msc & click OK.
- (Accept the UAC warning if appears).
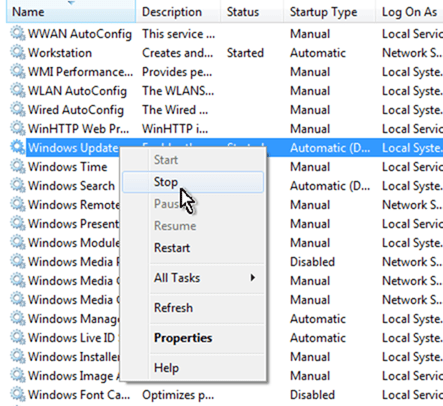
2. In Services control panel locate the “Windows Update” service.
3. Right-click on Windows Update service and select “Stop”.
Step 2: Delete the SoftwareDistribution folder.
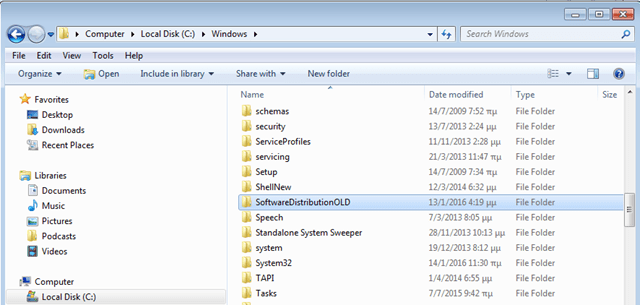
1. Open Windows Explorer and navigate to: C:Windows folder.
2. Find and Delete the “SoftwareDistribution” folder (or rename it. e.g. to “SoftwareDistributionOLD”) .
Step 3: Start the Windows Update Service.
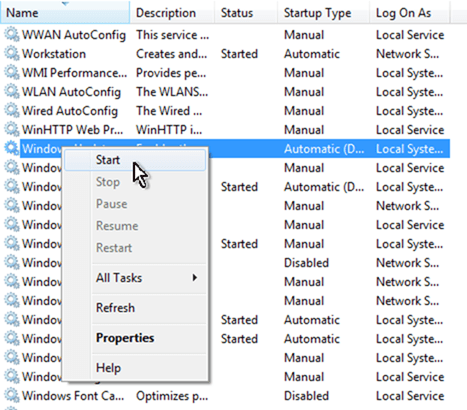
1. Open Windows Services control panel.
2. Right-click on Windows Update service and select “Start”.
Step 4: Check and Install Windows 10 Update.
1. Navigate to Settings -> Update and Security and click Check for Updates.
Method 3. Update Windows 10 by using the Update Assistant
1. Navigate to Windows 10 download site and click the Update now button.
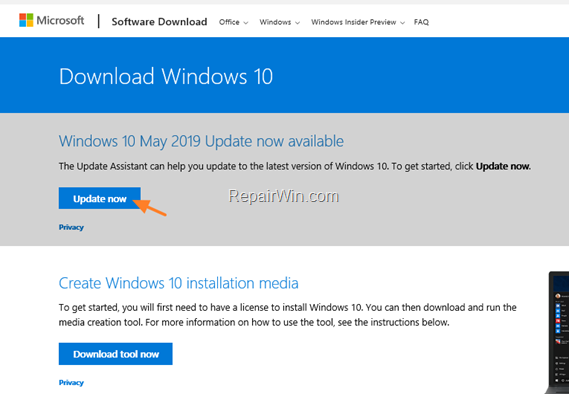
2. Save the “Windows10Upgrade9252.exe” file on your desktop.
3. Double click at the downloaded file to open the Windows Upgrade Assistant.
4. Click Update Now to start the update.
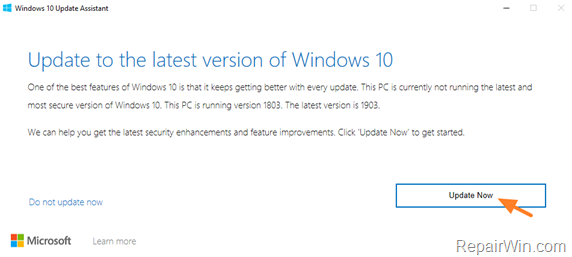
5. Let Windows to finish the downloading and the verification.
6. When the verification is reaches 100%, disconnect your computer from the Internet, or set it to “Airplane mode“.
7. Wait until Windows updating your system.
8. When prompted, restart your system to install the update.
Method 4. Update Windows 10 from ISO/USB.
The next method to fix the Windows 10 update error “Installation failed in SECOND_BOOT phase” is to update Windows 10, from the Windows ISO file. To do that:
Step 1. Download Windows 10 in a ISO File.
1. Navigate to Windows 10 download page and download the Media Creation Tool.
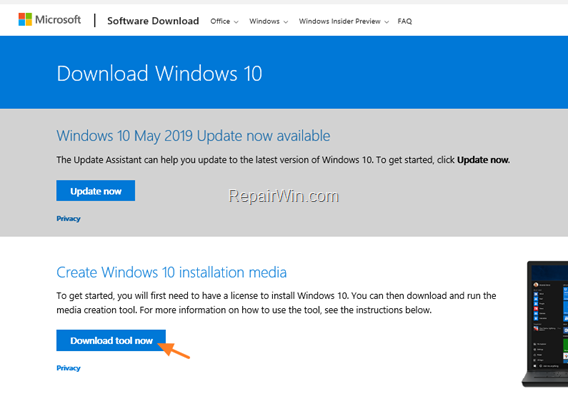
2. Run the ‘Media Creation Tool’ and Accept the License Terms at the first screen.
3. Select Create installation media for another PC.
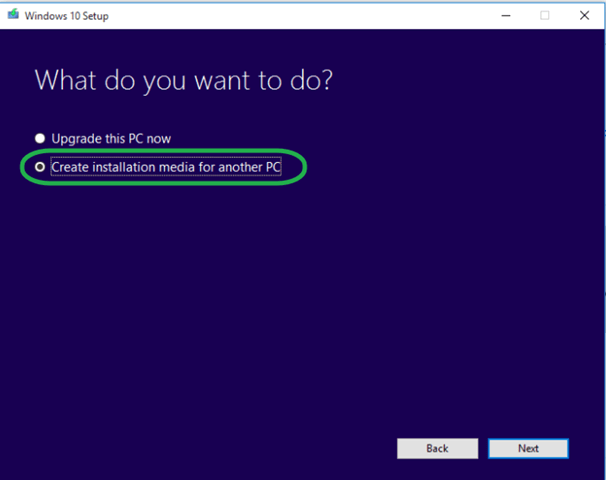
4. At ‘Language, architecture and edition’ screen click Next.
5. Select ISO file and click Next.
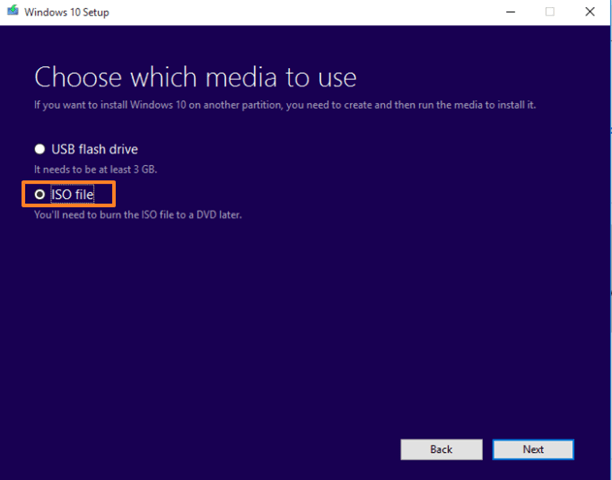
6. Save the ‘Windows.iso’ file to your desktop.
7. The Media Creation Tool will now begin to download the Windows 10 in an ISO format.
8. When the download is completed, close the Media Creation Tool.
Step 2. Update Windows 10 from the ISO file.
1. Disconnect your computer from the Internet, (or set it to “Airplane mode” if you own a laptop).
2. Disable or temporarily uninstall any third-party antivirus.
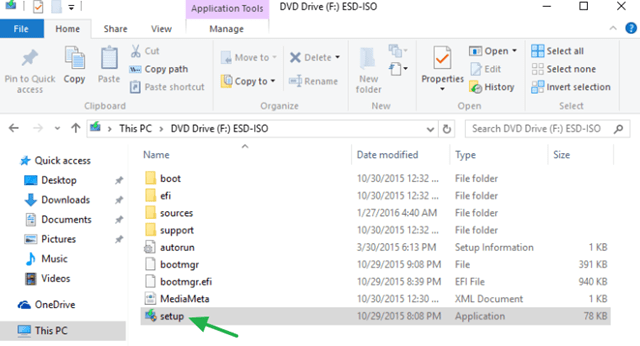
3. Then, right click on the “Windows.iso” file (on your desktop) and click Mount.
4. Double click at Setup application.
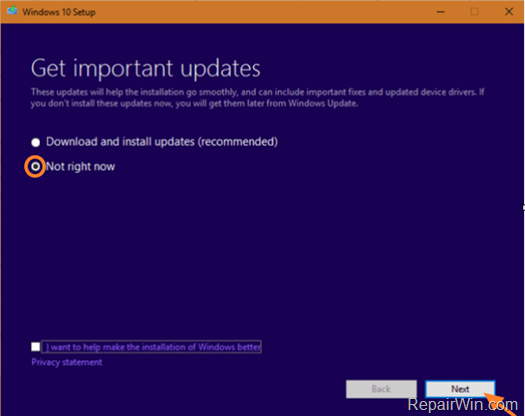
5. At the below screen choose ‘Not right now’ and click Next.
6. Follow the rest onscreen instructions to update your system.
Method 5. Clean install Windows 10.
The last method, to fix the Windows 10 Upgrade issues, is to perform a clean installation of Windows 10 on your system.
Important: The clean Windows 10 installation means that all your files and settings will be lost during the installation process. So, proceed and backup all your important files and settings to another storage media before continue. (e.g. to an external USB drive).
To perform a clean Windows 10 installation read the instructions on this article: How to clean install Windows 10
That’s all folks! Did it work for you? Please leave a comment in the comment section below or even better: like and share this blog post in the social networks to help spread the word about this solution.
Bài liên quan
- FIX: Error 0x81000203 in System Restore. (Solved)
- Cannot Access Shared folder. User has not been granted the requested logon type at this computer. (Solved)
- FIX: Cannot clear TPM – 0x80284001, 0x80290300 or 0x80290304.
- Unable to Schedule Teams Meeting in 15 or 10 minutes slots (Solved)
- How to Share Folder without Username/Password on Windows 10/11.
- FIX: Thunderbird High CPU or Memory Usage issues.