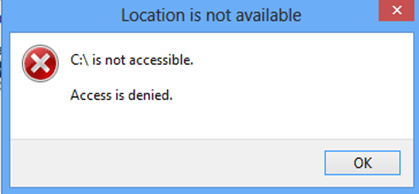
On a Sony Vaio laptop computer the following problems appeared after Windows 8 Refresh: Windows 8 Metro apps doesn’t load correctly (many apps are missing from the screen) and when you try to access the contents of drive C: the following error appears on the screen “C: is not accessible. Access is denied.” As a matter of that Windows doesn’t work normally and the user cannot access any of his personal files.
After some research on the Internet I found that this is a common symptom (problem) happening on many Sony Vaio laptops after refreshing the Windows 8 Operating System. Also during problem exploration, I discover that while on Safe Mode, I can access the disk contents normally without problems. At this point, I take advantage of this situation and I take a backup of the user’s personal files before proceeding to resolve the ‘access denied’ error on disk C:.
How to resolve Access Denied error on disk C: after Windows 8 refresh.
Step 1. Boot Windows 8 in Safe Mode.
In order to boot Windows 8 in Safe Mode:
- Navigate with your mouse to the right bottom corner on your screen to open “Settings”
- Hold the “SHIFT” key and click the “Power” button.
- Choose “Restart”.
When your computer restarts:
- At the “Choose an option” screen, click on “Troubleshoot”.
- At “Troubleshoot” window, click on “Advanced Options”.
- At “Advanced Options”, choose “Startup Settings”.
- At “Startup Settings” window, press “Restart”.
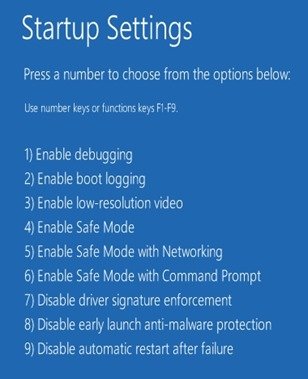
Finally when your computer restarts again and displays the below screen, press the key number “4” on your keyboard to enter Safe Mode.
Step 2. Modify Permissions on Disk C:.
Advice: Before proceeding to apply the instructions mentioned in this step, take a backup of your personal files to another media. (e.g. your external USB disk).
1. Open Windows Explorer.
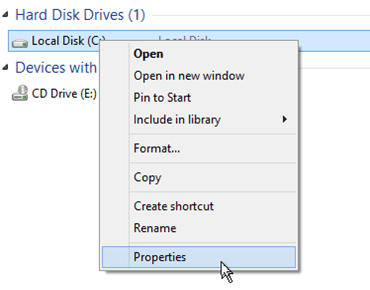
2. Right-click on local disk C: and choose Properties.
3. Select the Security tab.
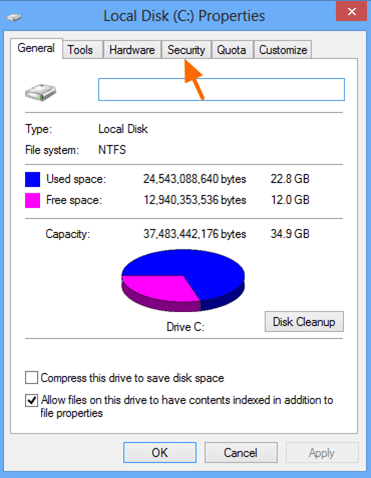
4. At Security tab click Advanced.
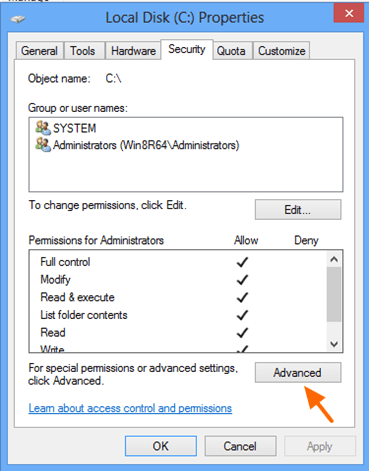
5. At Advanced Security Settings window choose “Add“.
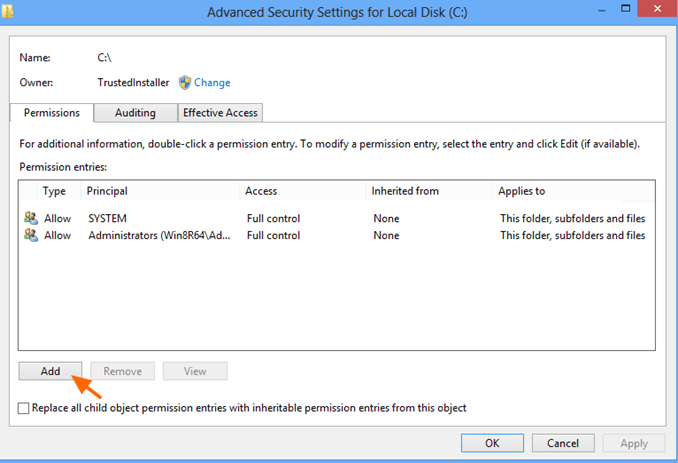
6. Choose “Select a principal“.
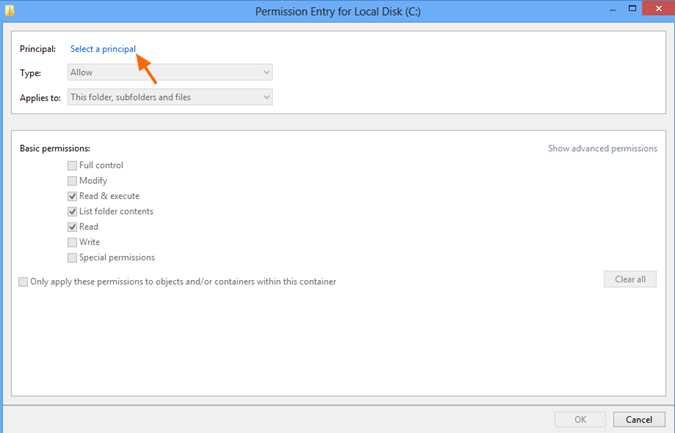
7. Type your username on the object name box (e.g. “Admin” on this example) and click OK.
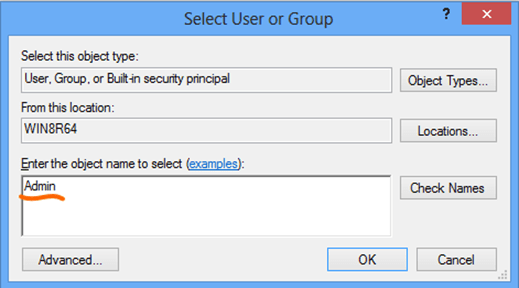
8. At the next screen make the following settings and choose OK:
Type: Allow
Applies to: This Folder, subfolders and files.
Basic Permissions: Full Control
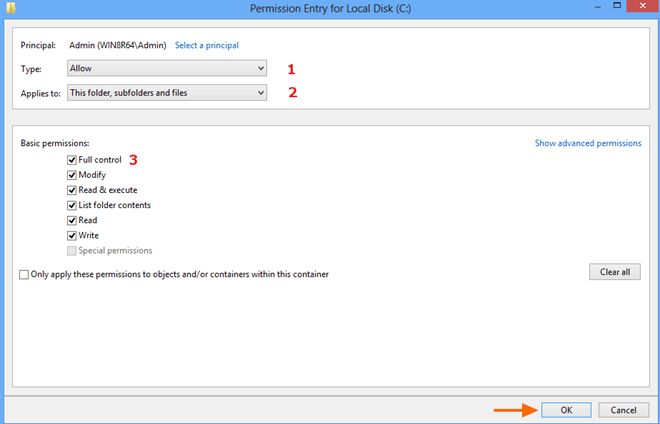
9. Click “Apply“.*
* Note: At this point you should receive several warnings messages saying that “changing the permissions to some system folders may reduce system security” (or something like that). Say “Continue” (yes) to all of them.
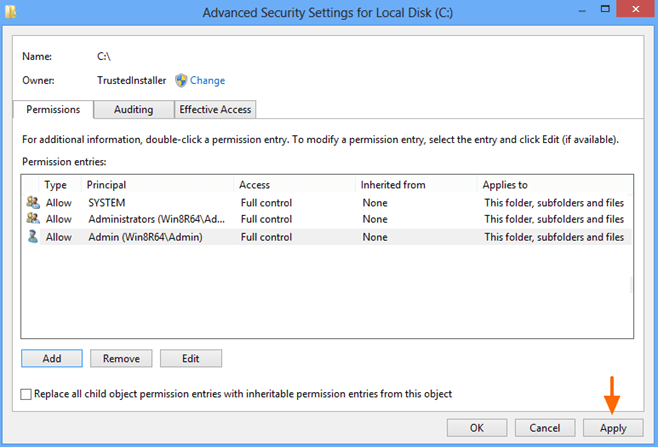
10. Finally when Windows finishes setting permissions click OK (twice) to exit drive’s properties.
11. Restart your computer and now you should be able to access your local drive C: without problems.
Final thoughts: In such cases, in order to ensure the normal Windows 8 operation, stability and security, I prefer to take a backup of the important files and then I proceed to perform a totally clean re-install of the Operating System.
Detailed instructions on how to Reset Windows 8 (or 8.1) to the factory installed state you can found here: How to Reset Windows 8 to default installed state.
That’s all folks! Did it work for you?
Please leave a comment in the comment section below or even better: like and share this blog post in the social networks to help spread the word about this.

