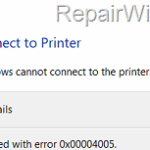
Several users with Windows 10 and usually after installing updates, cannot connect to a shared printer because of error “Windows cannot connect to the printer – Operation failed with error 0x00004005 or 0x0000011b”.
The printer errors 0x00004005 & 0x0000011b with decryption “Operation Failed – Windows Cannot add/connect to Printer”, occurs when you try to add a shared printer to Windows 10 that is shared on another computer running Windows 10 or Server 2016 or Server 2019. To fix the problem, follow the instructions below:


How to FIX Printer Error 0x00004005: Cannot Connect to Printer in Windows 10.
Method 1. Install KB5006738 to fix Printing Error 0x00004005.
Microsoft released update KB5007253 on November 22, 2021, which is supposed to fix printing issues that occurred after installing KB5006670, KB5007186, KB5008212 or KB5006738 updates. So, before you continue further…
1. Download and install the 2021-11 Cumulative Update Preview for Windows 10 (KB5007253) from the Microsoft Update Catalog.
2. After installation, reboot the computer and then check if the printing problem persists.
Method 2. Uninstall Recently Installed Updates.
If you cannot print to a shared printer, or if you cannot add/connect to a shared printer after the installation of Windows updates, proceed to uninstall them and see if that fixes the problem. To do that:
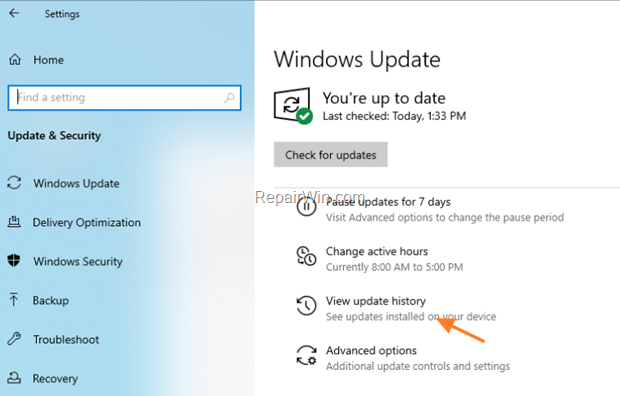
1. Go to Settings -> Update and Security.
2. Click View update history.

3. Click Uninstall updates.
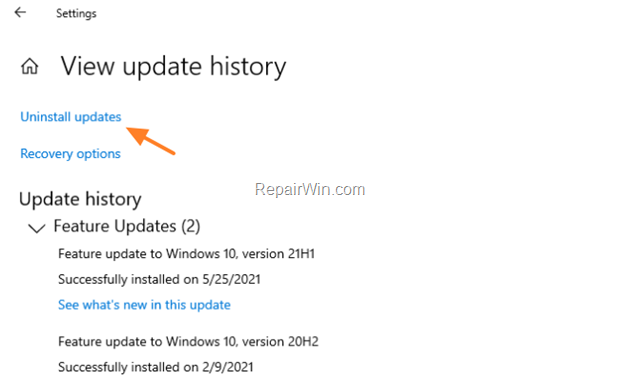

4. Now under “Microsoft Windows” section, proceed and remove any recently installed updates or any of the following KB updates that can cause the printing problem.
- KB5008212
- KB5007186
- KB5006738
- KB5006670
- KB5005573
- KB5005565
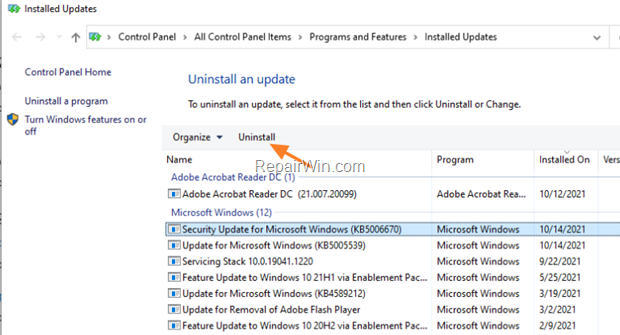

5. Restart your PC.
6. After rebooting, try to print or to add the shared printer. If the problem is not solved, continue to next method, otherwise proceed and prevent the removed update(s) to be re-installed, by doing the following:
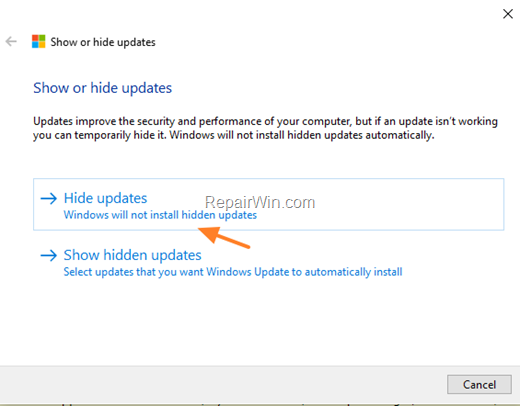
1. Download the Show or Hide updates tool “wushowhide.diagcab” tool from: https://www.majorgeeks.com/files/details/wushowhide.html
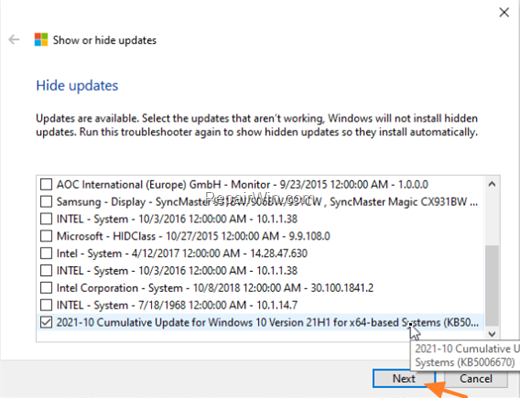
2. Run the tool, click Next and then select Hide updates.
3. Let the tool to find the available update and when this done, select the update you removed and click Next.
4. When the troubleshooting is complete close the troubleshooter and restart your PC
Method 3. Delete Print Spooler Jobs.
1. Press Windows ![]()
![]() + R keys to open the run command box.
+ R keys to open the run command box.
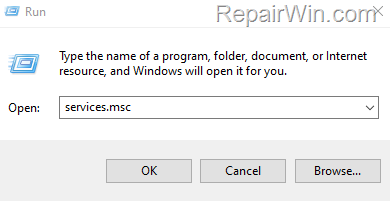
2. In the Search box, type: services.msc & click OK.

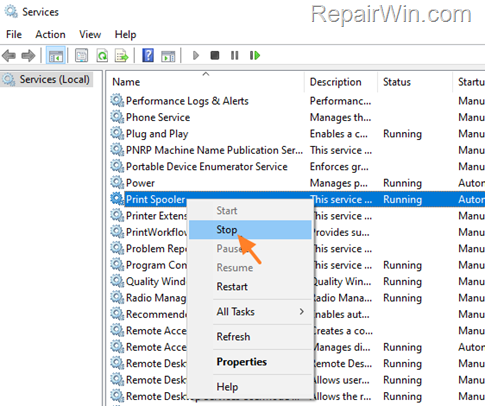
3. In Services panel, right-click on Print Spooler service and click Stop.

4. Without closing the Services window, open File Explorer and navigate to the following location on disk.
- C:Windowssystem32spoolprinters
5. Delete all files inside the PRINTERS folder and close Explorer.
6. Back in Services window, right-click on Print Spooler service and click Start.
7. Now try to print/connect again to the shared printer.
Method 4. FIX “0x00004005 Cannot Connect to Printer” error via Registry.
Another method to solve the error 0x00004005 when tryin to connect to shared printer, is to modify the RpcAuthnLevelPrivacyEnabled REG_DWORD value in registry on both PCs. To do that: *
* Important: You have to apply the below modification in Registry on both PCs.
1. Press Windows ![]()
![]() + R keys to open the run command box.
+ R keys to open the run command box.
2. Type regedit and press Enter.
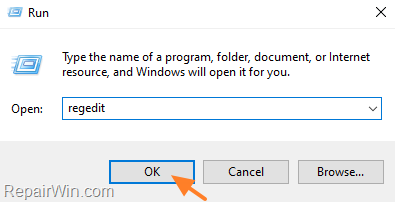

3. In Registry Editor navigate to the following key:
- HKEY_LOCAL_MACHINESYSTEMCurrentControlSetControlPrint
4. Right-click at an empty space at the right pane and choose New > DWORD (32-bit) Value


5. Give at new value the name: RpcAuthnLevelPrivacyEnabled
6. Double-click at the RpcAuthnLevelPrivacyEnabled value, set the value data to 0 and click OK.


7. Close the registry editor.
8. Restart your computer.
9. Now try to connect to your network printer. The error 0x00004005 should be resolved.
Method 5. Add the Shared Printer using a Local Port.
Another way to bypass the error 0x00004005 when installing a network printer on Windows 10, is to manually add the printer by using a local port.
1. Navigate to Control Panel > Devices and Printers.
2. Click Add a printer. *
* Note: If the shared printer is already in the list, remove it before proceeding to re-add it.
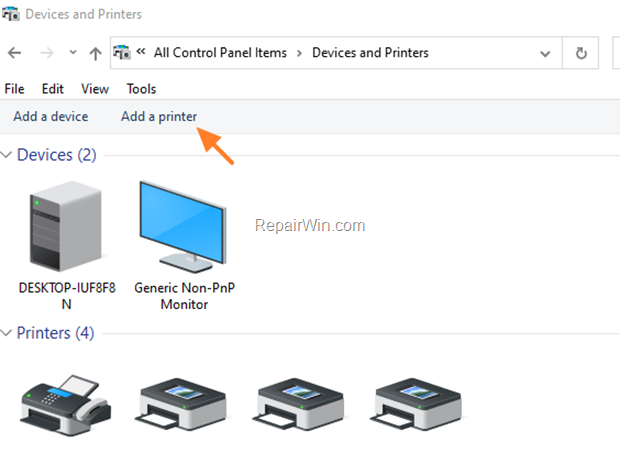

3. At the next screen, click The printer that I want isn’t listed.


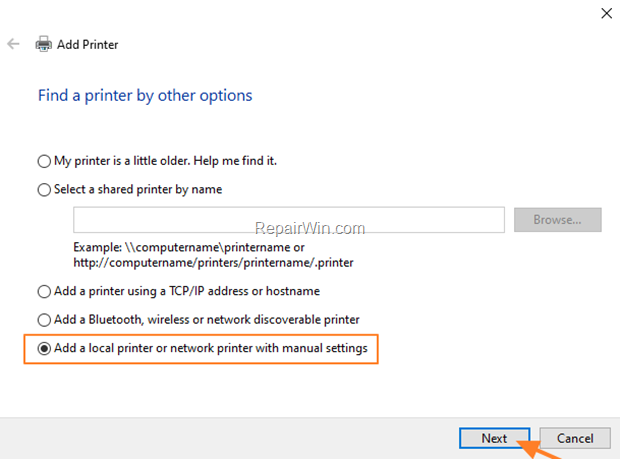
4. Select Add a local printer or network printer with manual settings and click Next.

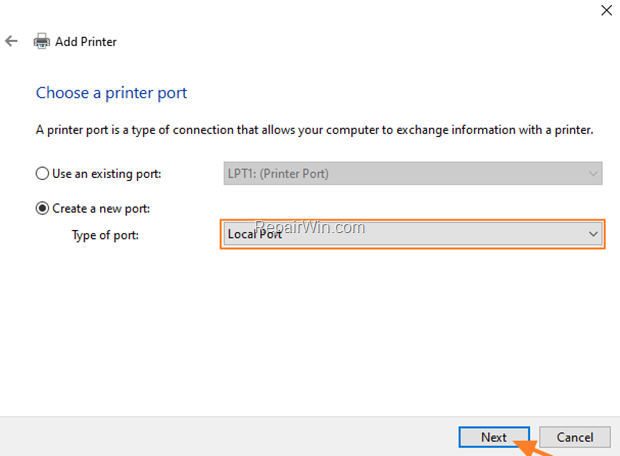
5. Click Create a new port and select Local Port from the drop-down menu. Click Next.

6. At the screen specify the port name in one of the following formats and click OK:*
- \ComputerNameSharedPrinterName
- \ComputerIPAdressSharedPrinterName
* Examples:
a. If the computer name of the computer that shares the network printer is “Computer01” and the printer’s share name is “HP1100” then the port name is “\Computer01HP1100”
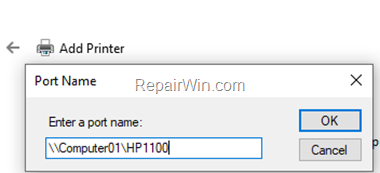

b. If the IP Address of the computer that shares the network printer is “192.168.1.20” and the printer’s share name is “HP1100” then the port name is “\192.168.1.20HP1100”


7. At the next screen select the network printer model and click Next. *
* Note: If you cannot find the printer’s model here, then download the printer driver from the manufacturer and then install the printer locally on your PC (LPT1). After installation, perform again the steps on this method to manually install the printer by using the “Local Port” option.
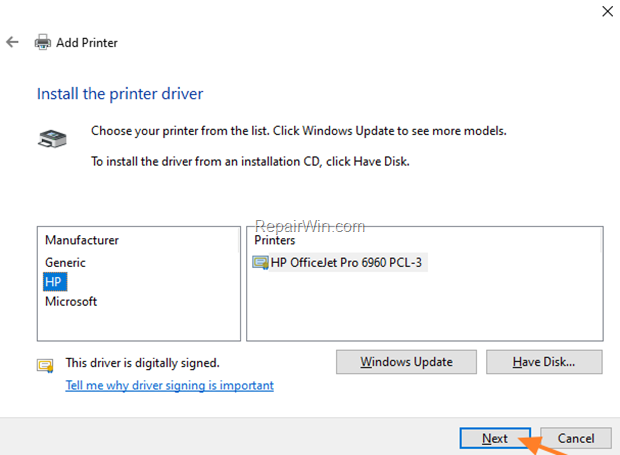

8. When the printer installation is completed print a test page to test the printer and you’re done.
That’s all folks! Did it work for you?
Please leave a comment in the comment section below or even better: like and share this blog post in the social networks to help spread the word about this problem.


