In this tutorial you’ll find instructions to fix the Cryptographic Services high disk or CPU Usage problem on Windows 10/11.
The Cryptographic Services (CryptSvc) is a legitimate Windows process that is responsible for encrypting and decrypting data on the storage device when accessing it.
The Cryptographic Services High Disk or CPU usage problem in Windows 10 can be due to various reasons, but it is usually caused by corruption of Windows system files or files inside the ‘catroot2’ folder where stored the signatures of the Windows Updates files.
How to FIX Cryptographic Service High Disk or CPU Usage problems in Windows 10/11.
Method 1. Delete or Rename the CATROOT2 folder.
As mentioned above, the high CPU or DISK usage problems caused by Cryptographic Services are usually due to errors in the files of the ‘catroot2’ folder. In such a case, the solution is to rename or delete the ‘catroot2’ folder in order to force Windows to recreate it.
1. Restart Windows in Safe Mode. To do that:
1. Press the Windows
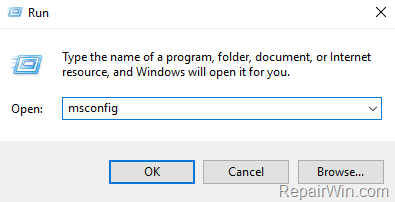
+ R keys to open the run command box.
2. Type msconfig and press Enter.
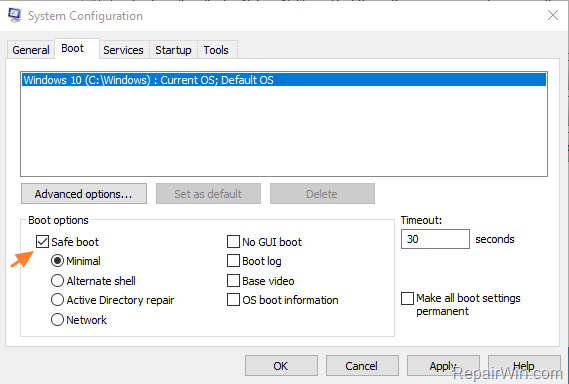
3. At Boot tab select the Safe Boot option, then click OK and restart your computer.
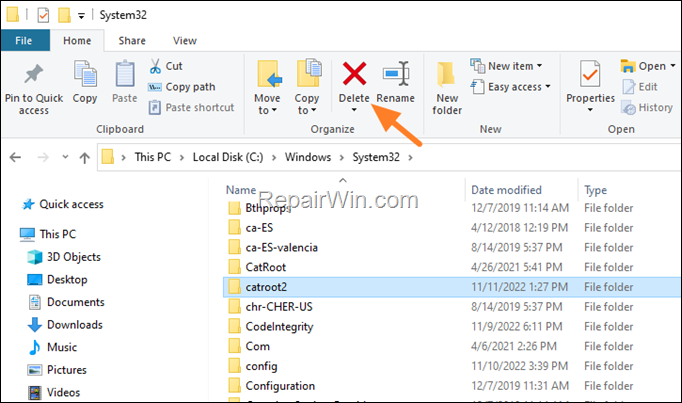
2. In Safe Mode, open Explorer and navigate to: C:WindowsSystem32 folder.
3. Delete or rename the catroot2 folder.

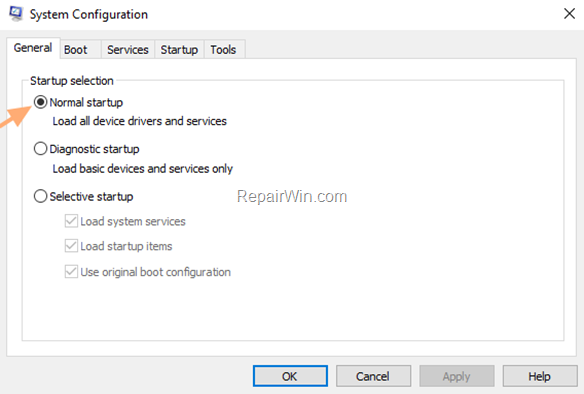
4. When done, run the ‘msconfig’ tool again and at the General tab, check the Normal startup and click OK. Then, click Restart to start Windows normally.

5. After restart check if the problem is fixed.
Method 2. Re-Download the Windows Update(s).
The second method to fix the Cryptographic Service high Disk/CPU usage issues, is to force Windows to download the updates from scratch. To do that:
Step 1: STOP the Windows Update Service.
1. Open Windows Services control panel: To do that:
- Press Windows

 + R keys to open the run command box.
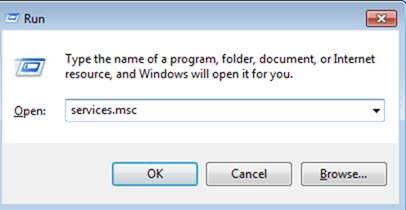
 - In the Search box, type: services.msc & click OK.
- Press Windows

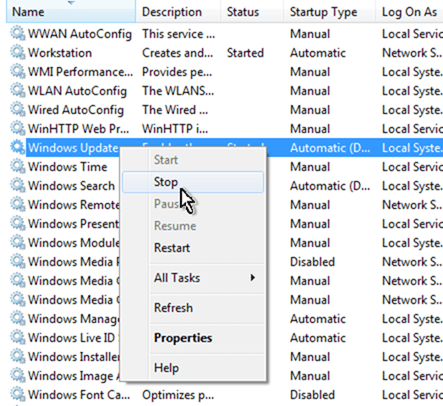
2. In Services control panel locate the “Windows Update” service.
3. Right-click on Windows Update service and select “Stop“.

Step 2: Delete the SoftwareDistribution folder.
1. Open Windows Explorer and navigate to: C:Windows folder.
2. Find and Delete the “SoftwareDistribution” folder (or rename it. e.g. to “SoftwareDistributionOLD”) . *
* Note: If you cannot delete the folder, start Windows in Safe Mode.


Step 3: START the Windows Update Service.
1. Open Windows Services control panel.
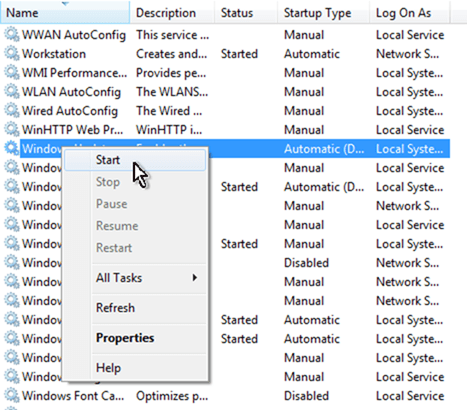
2. Right-click on Windows Update service and select “Start“.

Step 4. Check & Install Updates.
1. Finally, go to Settings -> Update and Security -> and click Check for Updates. Then install all updates found.
Method 3. FIX Cryptographic Services High CPU or Disk Usage by Repairing Windows.
1. Open Command Prompt as Administrator.
2. In command prompt give the following command and press Enter:
- DISM /Online /Cleanup-Image /StartComponentCleanup


3. When the process is completed, give the following command:
- DISM.exe /Online /Cleanup-image /Restorehealth


4. When the DISM operation is completed, type the following command and hit Enter:
- sfc /scannow


5. Now wait until the System File Checker repairs the Windows System Files.
6. When this done, restart your computer and try to install the update.
Method 4. Run Windows Maintenance Tasks.
Another method to fix the high disk usage on Cryptographic service, is to run the Windows Maintenance Tasks.
1. Right click to Start menu ![]()
![]() and select Control Panel.
and select Control Panel.
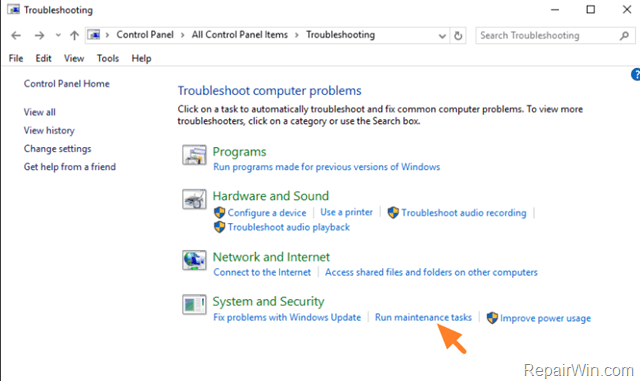
2. Open Troubleshooting.
* If you don’t see the Troubleshooting option, set the View (View by) to Small icons.
3. Under System and Security select Run Maintenance Tasks.

3. Press Next and then wait until the System Maintenance utility detecting problems.
4. Follow the on screen instructions to fix the problems found.
Method 5. Scan your computer for viruses.
If after following the above methods the issue is not fixed, use this Malware Scan and Removal Guide to check your computer for viruses.
That’s all! Did it work for you?
Please leave a comment in the comment section below or even better: like and share this blog post in the social networks to help spread the word about this solution.


