This tutorial contains instructions to resolve the Windows Update error 80070002: “An error occurred while checking for new updates for your computer”. The error 0x80070002 in Windows Update can caused because of incorrect date and time settings or other reasons that prevent the download of the new updates.
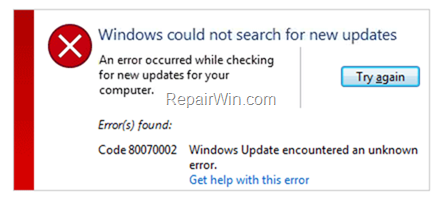
In this troubleshooting guide you will find detailed instructions to resolve the Windows Update error 0x80070002 in Windows 10/8/7 operating systems.
How to FIX Windows Update Error 0x80070002 (Windows 10/8/7).
Important: Before proceeding to the methods below, try the following:
a. Make sure that the Year/Date & Time settings are correct.
b. Disable or temporary uninstall your Security/Antivirus Software.
Method 1. Run the Windows Update Troubleshooter.
The first method to solve the error 0x80070002 is to run the Windows Update Troubleshooter.
1. Navigate to Windows Control Panel. To do that:
- Press the Windows
 + R keys to open the run command box.
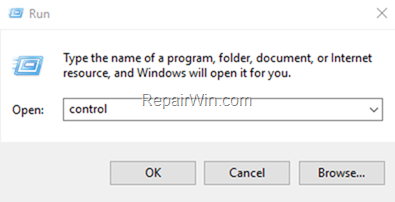
 - In the Search box, type: control & click OK.
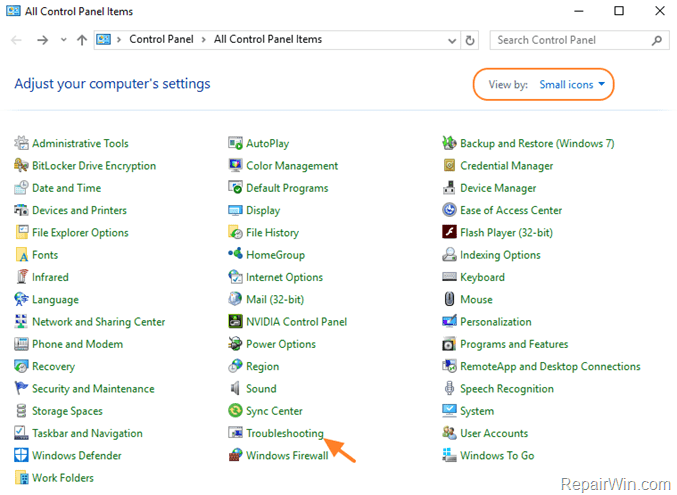
2. Set the View By: to Small icons and click Troubleshooting.
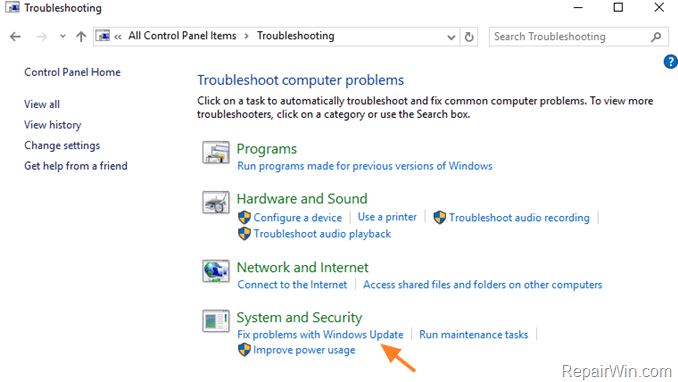
3. Under System and security section select Fix problems with Windows Update.
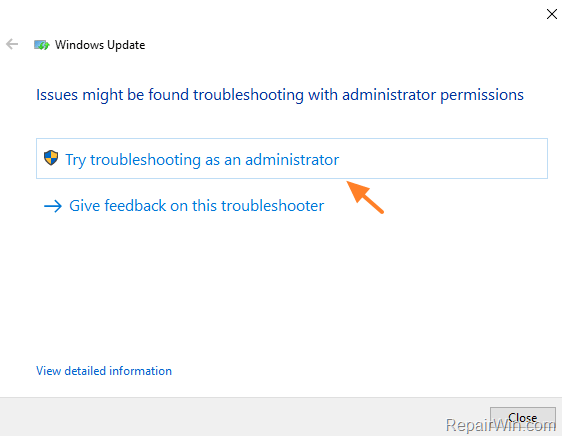
4. Press Next at the first screen and then choose Try troubleshooting as an administrator.
5. When the repair is completed, restart your computer and run Windows Update (Update & security > Check for Updates).
Method 2. Remove Windows Update Files.
The Windows Updates files are stored into the SoftwareDistribution folder, at this location on the disk: “C:WindowsSoftwareDistribution”. Some times this folder becomes corrupted and needed to re-create it, in order to download and install updates from scratch.
To rebuild (re-create) the “SoftwareDistribution” folder follow the steps below:
1. Open Windows Services control panel: To do that:
- Press the Windows
 + R keys to open the run command box.
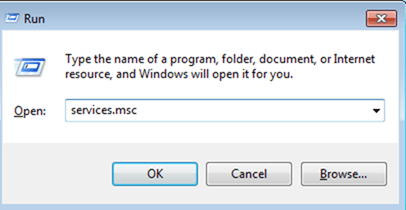
 - In the Search box, type: services.msc & click OK.
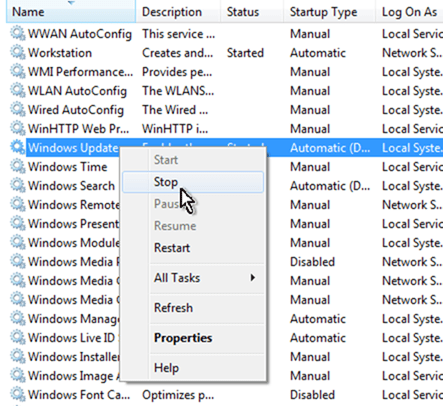
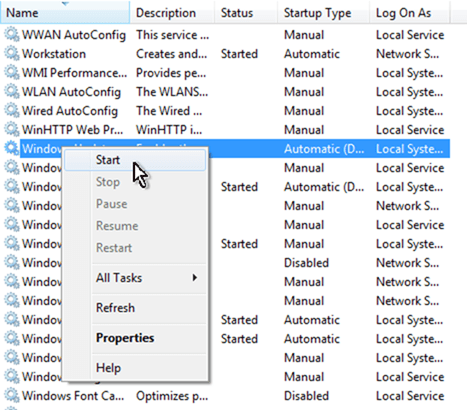
2. In Services control panel locate the Windows Update service.
3. Right-click on Windows Update service and select Stop.
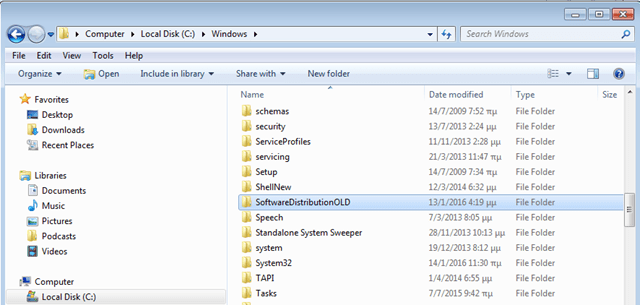
4. Open Windows Explorer and navigate to: C:Windows folder.
5. Find and Delete the SoftwareDistribution folder (or rename it. e.g. to “SoftwareDistributionOLD”) .
6. Now go back to Windows Services control panel, right-click on Windows Update service and select “Start”.
7. Restart your computer.
8. After restart, navigate to Update & security and Check for Updates.
Method 3. FIX Windows Update Error 0x80070002 with DISM.
The next method to resolve the Windows Update problem 0x80070002, is to repair Windows by using the System Update Readiness (DISM) tool.
1. Open Command Prompt as Administrator. To do that:
- At the search box type: command prompt or cmd
- Right-click at Command Prompt result and select Run As Administrator.
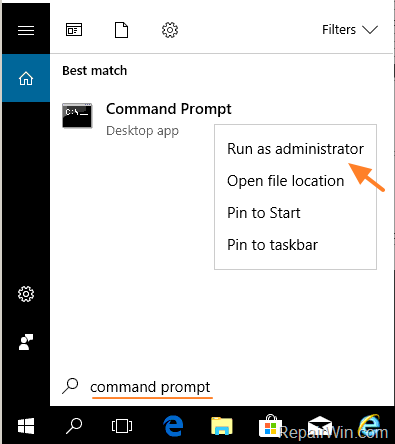
2. In command prompt give the following dism command and press Enter:
- DISM.exe /Online /Cleanup-image /Restorehealth

3. When the DISM operation is completed, type the following command and hit Enter:
- sfc /scannow

4. Now wait until the System File Checker repairs the Windows System Files.
5. When this done, restart your computer.
6. Run Windows Update and try to install the failed update.
Method 4. Restore your System to a Previous State.
Try to restore your system to a previous working state and then try to install updates.
1. Press Windows ![]() + R keys to open the run command box.
+ R keys to open the run command box.
2. Type rstrui & click OK.
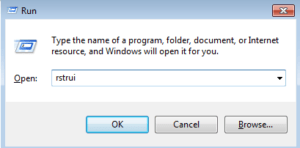
3. Click Next at the first screen.
4. Choose an earlier working state (Date/Time) and click Next to start the restore process.
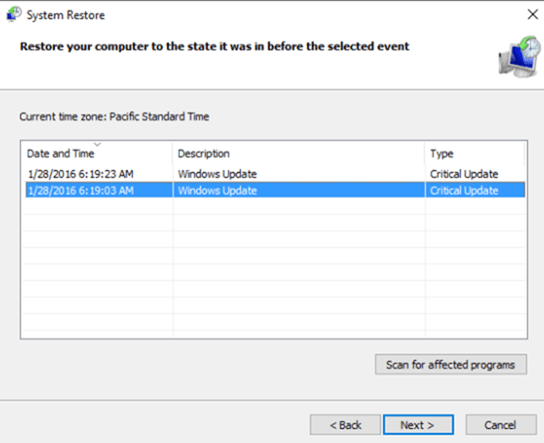
4. When the restore is completed, run Windows Update to find and install Updates.
Method 5. Change DNS Settings
The final method to resolve the error 80070002 in Windows Update, is to change the DNS settings. To do that:
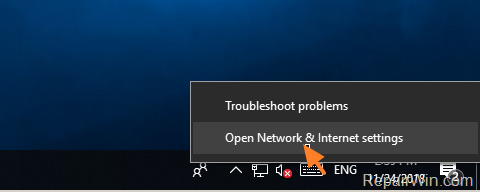
1. Right click on the Network icon ![]() in Taskbar and click Open Network and Sharing Center. *
in Taskbar and click Open Network and Sharing Center. *
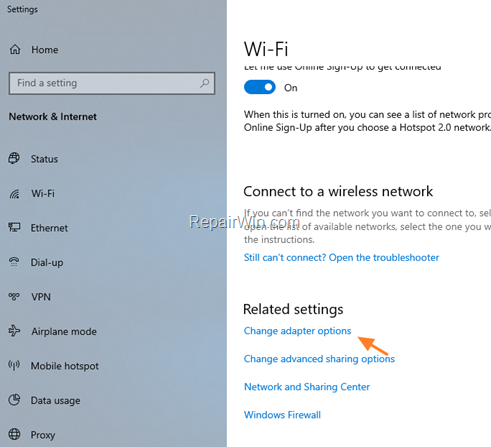
2. Select Ethernet (or Wi-Fi) on the left, and then at ‘Related settings’ section, click Change adapter options.
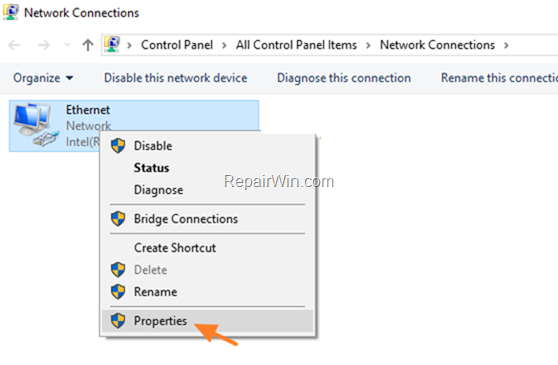
3. Right click on the active Network Adapter (Ethernet or Wi-Fi) and select Properties.
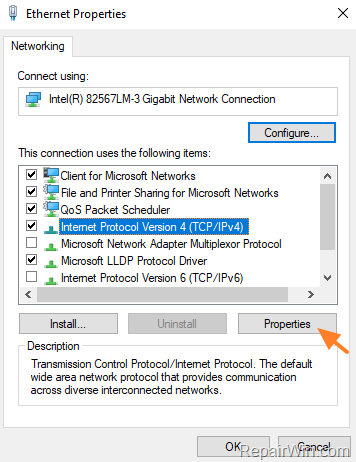
4. Select the ‘Internet Protocol Version 4 (TCP/IPv4)’ and click Properties
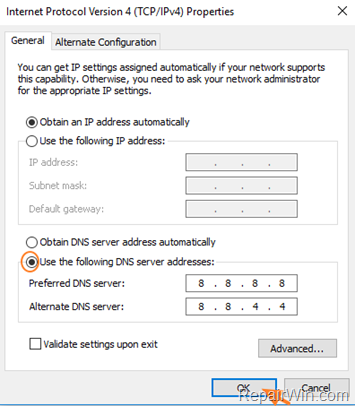
5. At Internet Protocol Version 4 (TCP/IPv4) properties:
a. Check the Use the following DNS server addresses: radio button.
b. Then, type the following DNS server addresses (Google’s public DNS Servers) and click OK.
- 8.8.8.8
- 8.8.4.4
6. Restart your computer and check for updates.
That’s all! Did it work for you?
Please leave a comment in the comment section below or even better: like and share this blog post in the social networks to help spread the word about this solution.

