If you suddenly lost Sound in Windows 10 and the volume icon appears with a red X, continue reading below to fix the problem. This tutorial contains instructions on how to fix the “No Sound, No Audio & No Playback Devices” issues after installing updates in Windows 10.
Many users have reported that after installing the Windows 10 May update (21H1), they lost the Audio on their computer, with the following symptoms:
- Volume icon on taskbar appears with a RED X Symbol.

- No Sound Output Devices or Input Devices found in Sound Settings.

- No Playback or Recording devices appears in Sound Control Panel (No Audio devices are installed)

- Relate Article: FIX: HDMI No Sound to TV or HDMI Not showing in Playback devices
How to FIX: No Audio after Windows 10 Update & Volume icon is displayed with a RED X.
Method 1. Rollback Audio Drivers.
1. Open Device Manager. To do that:
1. Press Windows
+ R keys to open the run command box.
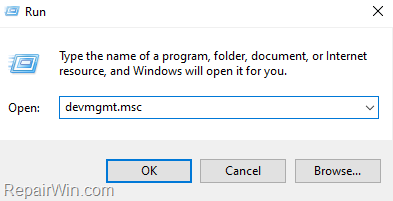
2. In the “Open” box, type: devmgmt.msc & click OK.
2. Expand the Sound, video and game controllers.
3. Right click on the High Definition Audio device and select Properties.

4. At Driver tab, click Roll Back Driver button. *
* Note: If the Roll Back Driver button is inactive, continue to the next step.

5. Select a reason for the driver package rollback and click Yes.

6. When the driver rollback is completed, restart your computer.
7. After restart, proceed and test the sound.
Method 2. Uninstall and Re-Install the Sound Card Driver.
1. Open Device Manager.
2. Expand the Sound, video and game controllers.
3. Right click at High Definition Audio and select Uninstall device.

4. After uninstall, restart your computer, and let Windows to install the sound drivers automatically. If this doesn’t happen, then navigate to Settings > Update and Security and force Windows to Check for updates.
5. Check the Sound.
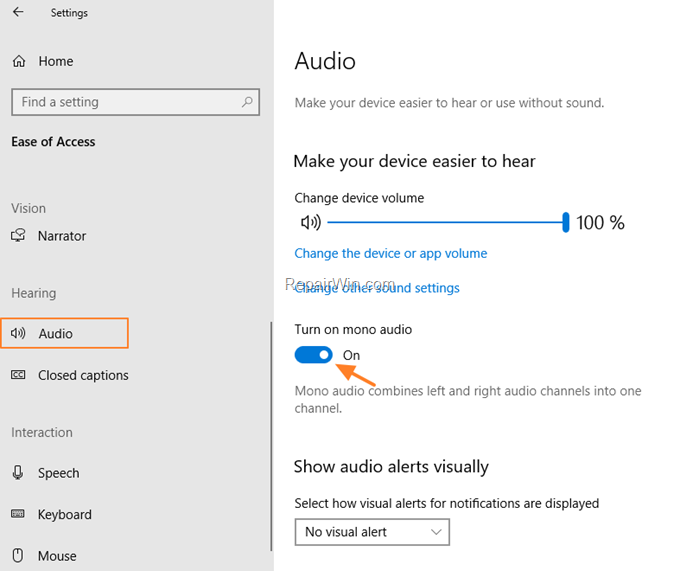
Method 3. Restore Lost Sound by Enabling ‘Mono Audio’.
1. Press Windows ![]() + I keys to open Settings and then open Easy of Access.
+ I keys to open Settings and then open Easy of Access.

2. Select Audio at the left and at the right Turn on mono audio.

3. Now right-click on the Sound icon ![]() on the taskbar and Open Sound Settings.
on the taskbar and Open Sound Settings.
4. If your audio devices are displayed, the sound should work now.
5. Finally, Turn off mono Audio in Easy of Access > Audio settings and enjoy the sound. *
* Note: If the sound works but you lose it again after the reboot, apply the same steps again or try the next method.

Method 4. FIX Lost Sound issue by Modifying Registry.
The next method to fix the lost sound issue after Windows 10 21H1 update, is to restore the “ConsoleSecurity” REG_BINARY value data to default:
1. Open Registry Editor. To do that:
1. Press Windows
+ R keys to open the run command box.
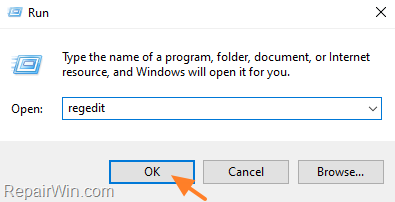
2. Type regedit and press Enter.
2. Navigate to the following key:
HKEY_LOCAL_MACHINESYSTEMCurrentControlSetControlTerminal ServerWinStations
3. Now look at the right-pane and check if the “ConsoleSecurity” value displays “zero length binary-value” as Data. If so, proceed as follows:

4a. At the right-pane, right-click at Winstations key and select Export to backup the registry key.

4b. Type “Winstations” as File name and Save the registry file (“Winstations.reg”), on your Desktop..

5. Close Registry Editor.
6. Open Command Prompt as Administrator.
7. Copy & Paste the following command (in green letters) into the CMD window, and press Enter:
REG ADD “HKLMSYSTEMCurrentControlSetControlTerminal ServerWinStations” /f /v ConsoleSecurity /t REG_BINARY /d 010014809c000000a800000000000000140000000200880006000000000014000100000001010000000000050400000000001400bf030f000101000000000005120000000000140089000f00010100000000000513000000000014008100000001010000000000051400000000001800bf030f000102000000000005200000002002000000001800210100000102000000000005200000002b020000010100000000000512000000010100000000000512000000

8. Aster receiving the “Operation completed successfully” message close Command Prompt.
9. Restart your PC.
10. Test the Sound on your PC and you’re done! *
* Note: If the problem persists, double-click at the “Winstations.reg” on your desktop to restore the registry as it was before the modification and continue to next method.
Method 5. Repair Windows Component Store & System Files.
1. Open Command Prompt as Administrator.
2. In command prompt give the following command and press Enter:
- DISM /Online /Cleanup-Image /StartComponentCleanup

3. When the process is completed, give the following command:
- DISM.exe /Online /Cleanup-image /Restorehealth

4. When the DISM operation is completed, type the following command and hit Enter:
- sfc /scannow

5. Now wait until the System File Checker repairs the Windows System Files.
6. When the repair is completed, restart your PC and check if the problem has resolved.
That’s all! Which solution worked for you?
Please leave a comment in the comment section below or even better: like and share this blog post in the social networks to help spread the word about this solution.


