The Windows Update normally downloads and installs updates and features automatically. However, in some cases may display the error: “We couldn’t check for updates, because you aren’t connected to the Internet”, despite the fact that the computer is already connected to the Internet.
Problem in details: On a Windows 10/11 computer that has internet access and the user can download or browse the internet, apps from the Microsoft Store or new Windows updates can’t be installed, because of one of the following errors:
- You’ll need the Internet for this.
It doesn’t look like you’re connected to the Internet. Check your connection and try again. 0x800713AB - We couldn’t check for updates, because you aren’t connected to the Internet. Make sure you have a cellular data or Wi-Fi connection and try again.
- We couldn’t connect to the update service. We’ll try again later, or you can check now. If it still doesn’t work, make sure you’re connected to the Internet.


How to FIX: ‘We couldn’t check for updates because you aren’t connected to the Internet’ on Windows Update & Microsoft Store apps on Windows 10/11.
To fix the “No Internet” issue in Windows Update or in Microsoft Store, ensure first that your PC has the correct Date & Time and then proceed to the methods below:
Method 1. Delete the Windows Update Store folder.
Step 1: Stop the ‘Windows Update’ service
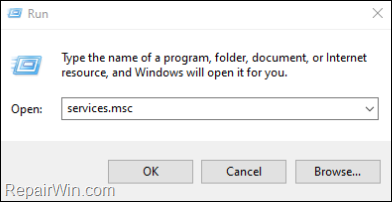
1. Open Windows Services control panel: To do that:
- Press Windows

 + R keys to open the run command box.
 - In the Search box, type: services.msc & click OK.
- Press Windows

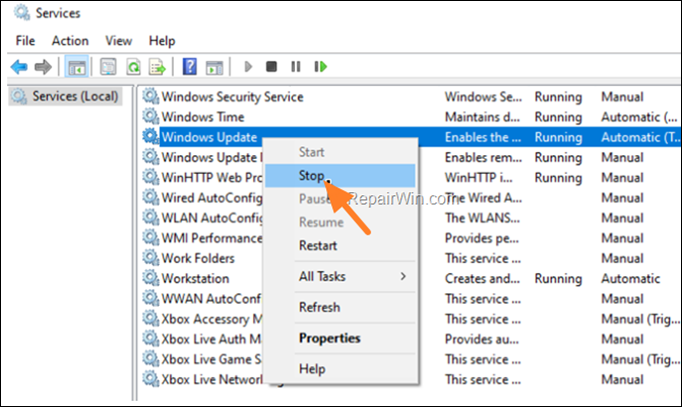
2. In Services control panel locate the Windows Update service.
2a. Right-click on Windows Update service and select Stop.

3. Now, without closing the Services window proceed to Step-2 below.
Step 2: Delete the ‘SoftwareDistribution’ folder. *
* Info: The “C:WindowsSoftwareDistribution“ folder, is the location where Windows store the Windows Updates. Many times, this folder becomes corrupted and you must re-create it in order to download the updates from scratch.
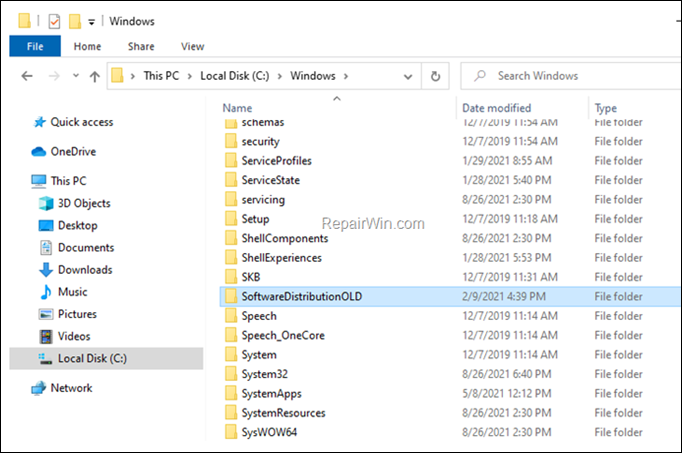
1. Open Windows Explorer and navigate to: C:Windows folder.
2. Find and Delete the SoftwareDistribution folder (or rename it. e.g. to “SoftwareDistributionOLD”) .

Step 3. Start the ‘Windows Update’ service.
In Windows Services control panel, apply the following actions:
1. Right-click on Windows Update service and select Start.
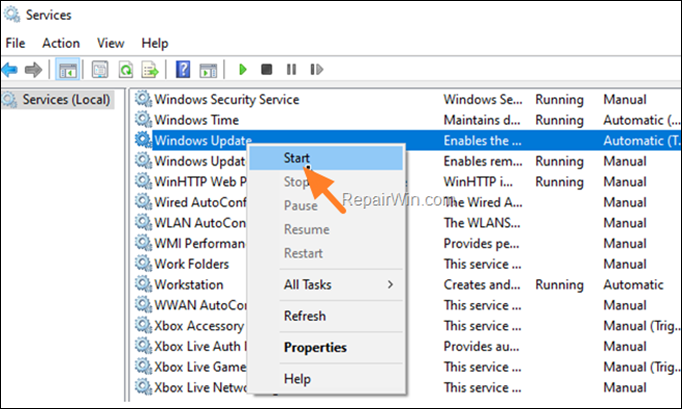

Step 4: Check and Install Windows 10 Updates.
1. Finally, navigate to Settings -> Update and Security -> and click Check for Updates.
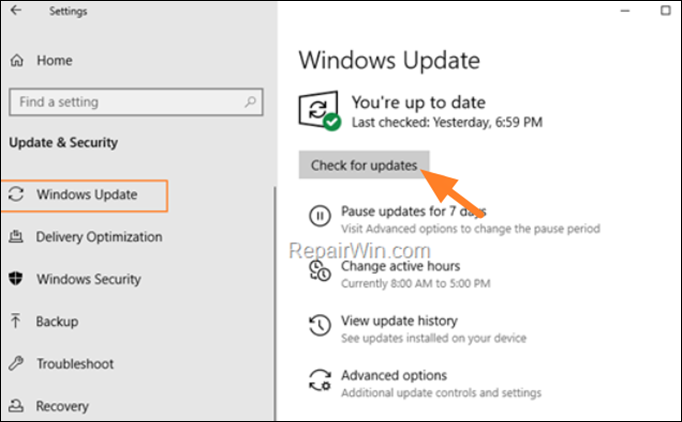

Method 2. FIX ‘You aren’t connected to the Internet” error, by Clearing DNS Cache.
The second method to solve the Windows Update error “We couldn’t check for updates, because you aren’t connected to the Internet”, is to clear the DNS cache. To do that:
1. Type cmd in search box and hit enter to open Command Prompt:
2. Give the following command to clear the cache:
- ipconfig /flushdns
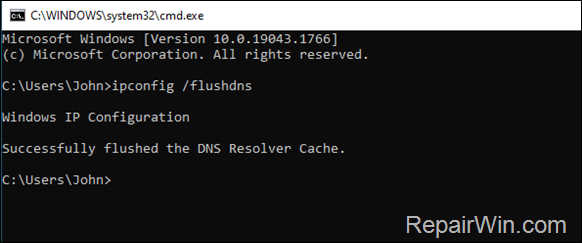

3. Close the Command Prompt window and hen check if the problem resolved.
Method 3. Change DNS Servers.
Many times the “We couldn’t connect to the update service because you aren’t connected to the Internet” error in Windows Update is caused due to the DNS servers being used. So go ahead and change them and use Google Public DNS Servers. To do that:
1. Right click on the active Network icon in Taskbar (or go to to Windows Control Panel) and click Network and Sharing Center
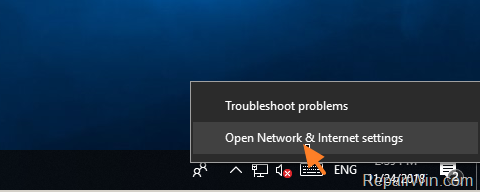

2. Select the active Network Card and then click Change adapter options.
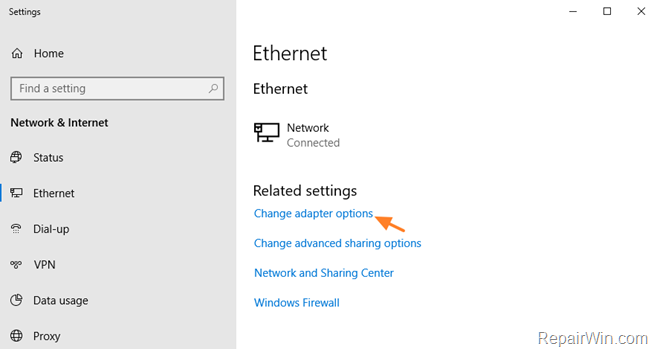

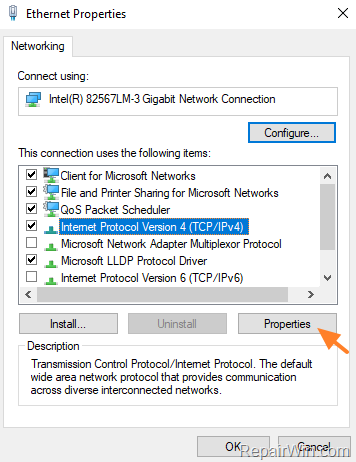
3. Right click on your active Network Adapter and select Properties.
4. Select the ‘Internet Protocol Version 4 (TCP/IPv4)‘ and click Properties

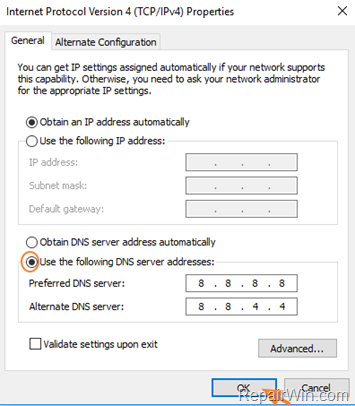
5a. Check the “Use the following DNS server addresses:” radio button.
5b. Type the following DNS server addresses (Google’s public DNS Servers) and click OK.
- 8.8.8.8
- 8.8.4.4

6. Restart your computer and check if the problem is resolved
Method 4. FIX ‘No Internet’ error in Windows Update with DISM & SFC Tools.
If the above methods do not solve the problem, try checking and repairing any errors in the Windows system files as follows:
1. Open Command Prompt as Administrator.
2. In command prompt give the following command and press Enter:
- DISM /Online /Cleanup-Image /StartComponentCleanup


3. When the process is completed, give the following command:
- DISM.exe /Online /Cleanup-image /Restorehealth


4. When the DISM operation is completed, type the following command and hit Enter:
- sfc /scannow


5. Now wait until the System File Checker (SFC), repairs the Windows System Files.
6. When this done, restart your computer.
7. Open Windows Update and try to install the failed update(s).
Method 5. Restart your Router.
If you still can’t download Windows updates or apps from the Microsoft Store, try restarting your Internet router and then your computer and see if that resolves the problem.
Method 6. Scan for viruses & Disable 3rd party AV programs.
Many viruses or malicious programs can cause problems in Windows update. So use this Malware Scan and Removal Guide to check and remove viruses or/and malicious programs that may be running on your computer.
At next, and if you’re using a third-party Antivirus/Security program, temporarily disable or uninstall it, to ensure that is not causing the problem.
Method 7. Repair Windows 10.
The final method to resolve the “No Internet” error in MS Store or in Windows Update, is to repair Windows 10 with In-Place Upgrade.
That’s all folks! Did it work for you?
Please leave a comment in the comment section below or even better: like and share this blog post in the social networks to help spread the word about this solution.


