This tutorial contains detailed instructions on how to perform a clean Windows 11 installation from USB on your computer.
A clean installation of Windows 11 means that everything stored on the disk will be deleted and then Windows will be reinstalled on the computer from the beginning. Performing a new installation of Windows 11 gives you the opportunity to get rid of problems that occurred after installing other programs or any malware that affected the proper operation of your computer.
How to Clean Install Windows 11 on your laptop or desktop PC.
Step 1. Backup your files.
The clean Windows 10 installation means that all your files and settings will be lost during the installation process. So, backup all your important files to an external storage media before continue. (e.g. to an external USB hard drive). After backing up your files disconnect the storage device from your PC.
Step 2. Create a Windows 11 Installation media.
To fresh install Windows 11 on your PC, you’ll need a Windows 11 installation media on a USB drive.
To create a Windows 11 USB installation media: *
* Note: The detailed steps of creating a Windows 11 USB media can be found in this article.
1. Connect an empty USB drive with at least 8GB space on your computer.
2. Download the Windows 11 Media Creation Tool. (Source).
3. Run the downloaded file and when prompted Accept the license terms.
4. Choose the Windows 11 language and click Next.
5. Choose which USB flash drive you want to use and click Next. *
* Important: All the files on the USB drive will be deleted during the process.

6. Wait until the process of creating the Windows 11 installation media is complete and when this is done, click on the Finish button.
Step 3. Install Windows 11.
Suggestion: Before continuing, disconnect any external devices that don’t needed during the installation (e.g USB storage devices, printers, etc.).
1. Start your system from the Windows 11 USB installation Media. To accomplish this task, perform one of the following:
a. Turn On your PC and press the corresponding key to access the “Boot Order” screen (usually is the F8 or F12 key). At “Boot Order” screen, select the USB drive with the Windows 11 installation files and press Enter.
b. Turn On your PC and enter in BIOS settings by pressing Delete or F2 or F10. Go to Boot Order settings and set the Windows 11 USB drive as the First Boot Device.
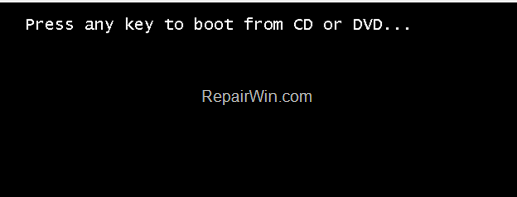
2. When prompted, press any key to boot from CD or DVD…
3. At 1st Windows setup screen, choose the installation language, time and input method & click Next.

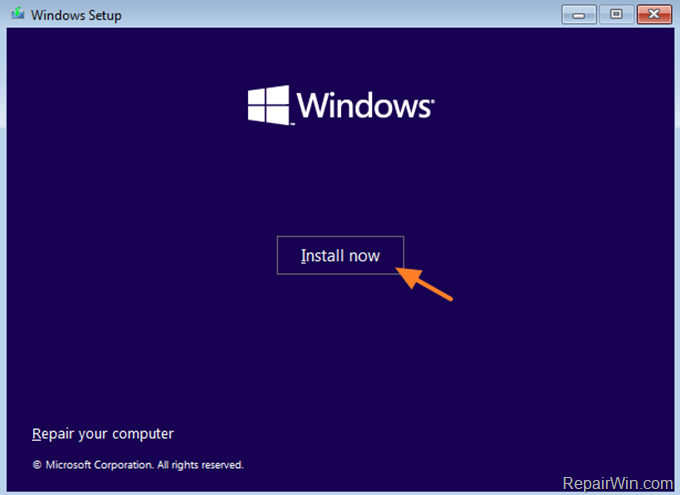
4. Click Install now.
5. At next screen choose I don’t a product key. *
* Notes:
1. If you are installing Windows 11 for the first time on this computer, you will be prompted to enter the Windows 11 product key after installation to activate Windows.
2. If you previously installed and activated Windows 11 or Windows 10 on the same machine, Windows 11 will automatically activate after the machine connects to Microsoft servers.
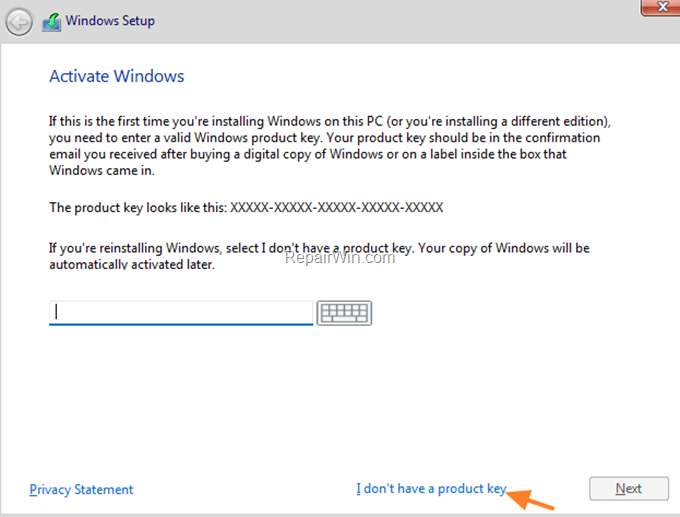
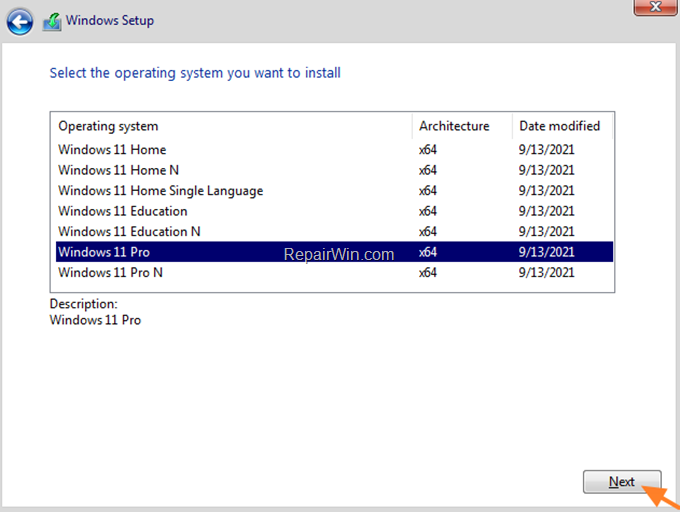
6. Select the Windows 11 edition you want to install and click Next.
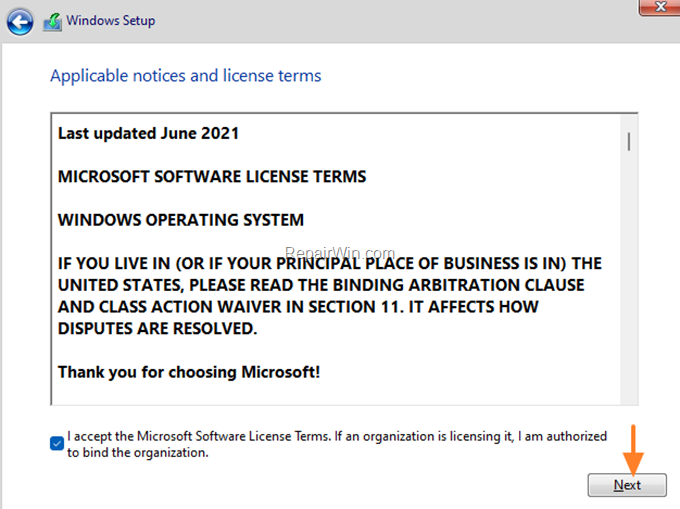
7. Accept the license terms and click Next.
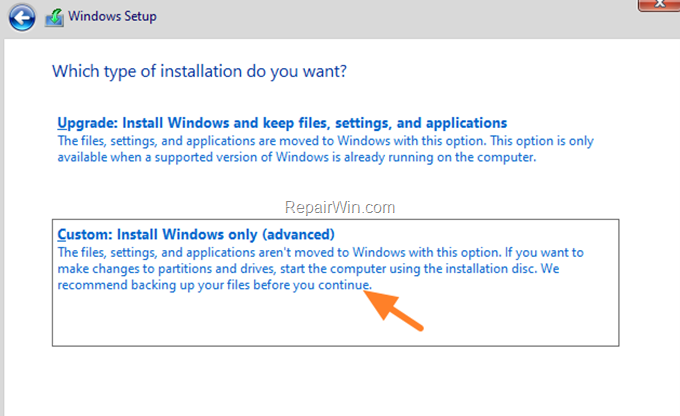
8. Choose Custom: Install Windows only (Advanced) to perform a clean installation of Windows 11. *
* Note: If you want to upgrade or repair Windows 11 without loosing files and settings, choose the “Upgrade” option at this point.
9. At next screen, perform one of the following actions, according your case:
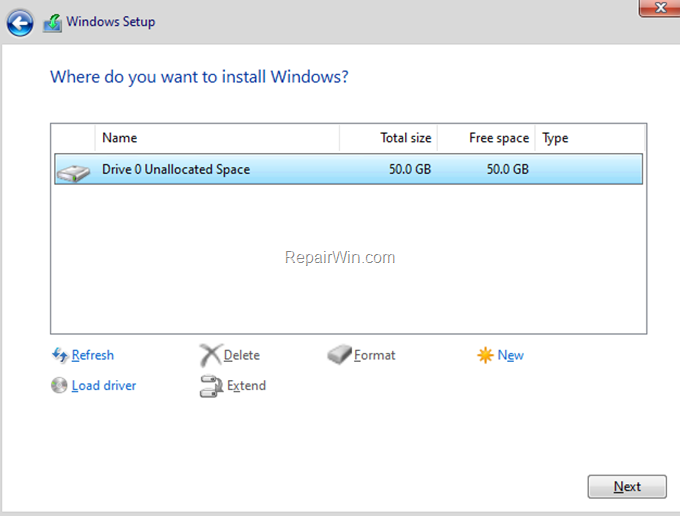
a. If you are installing Windows 11 on a new computer or hard disk, select the drive with Unallocated space and click Next.
b. If you are installing Windows 11 on a computer or drive that you are already using, then select one at a time and delete all partitions on the drive (until all available disk space is Unallocated) and click Next. *
* Important: This process will delete all the files on the disk, so be sure to back up all your files to another storage device before proceeding.
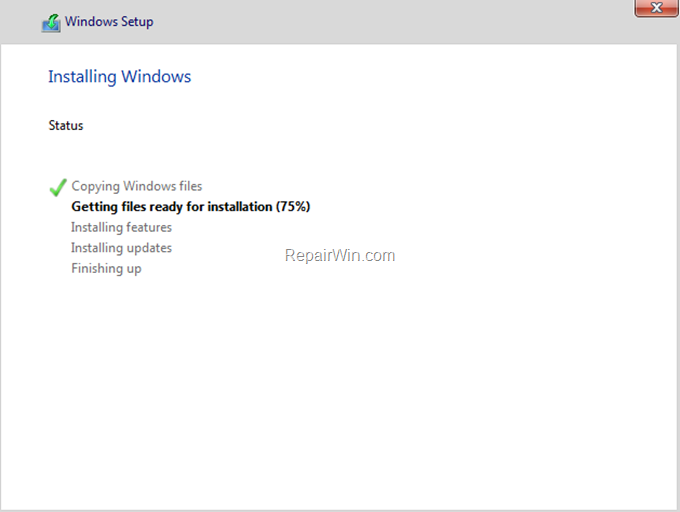
10. At this point the Windows 11 installation will start and the system will reboot 2-3 times during the process. Wait while Windows is being installed and do not turn off your computer.
11. When prompted, choose your Country or Region and click Yes. *
* Note: Before you click “Yes” in the country/region options, and if you do not want to sign in to Windows 11 using a Microsoft account, disconnect the network cable from your computer (if connected), and do not connect to a wireless network during the setup process (until Windows installation has completed and until you see the Windows 11 desktop).

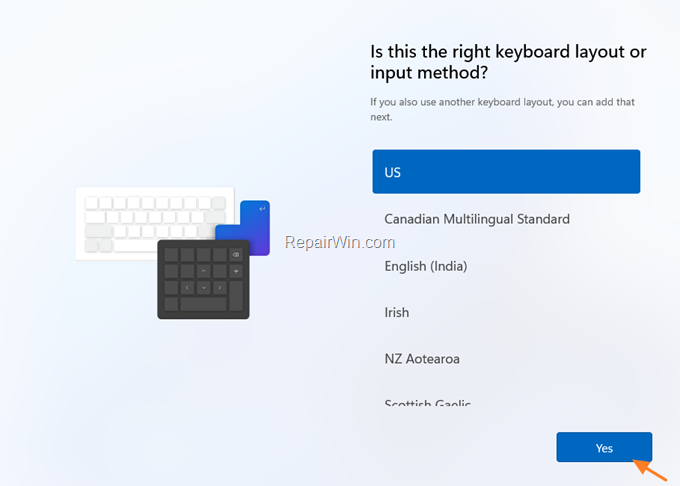
12. Chose you Keyboard layout (input method) and click Yes.
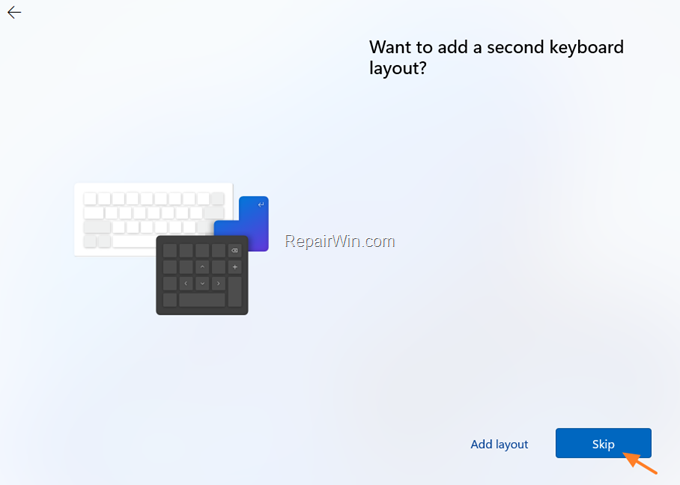
13. If you want to add a second keyboard layout select “Add layout” to add it now, or click Skip to add it later.
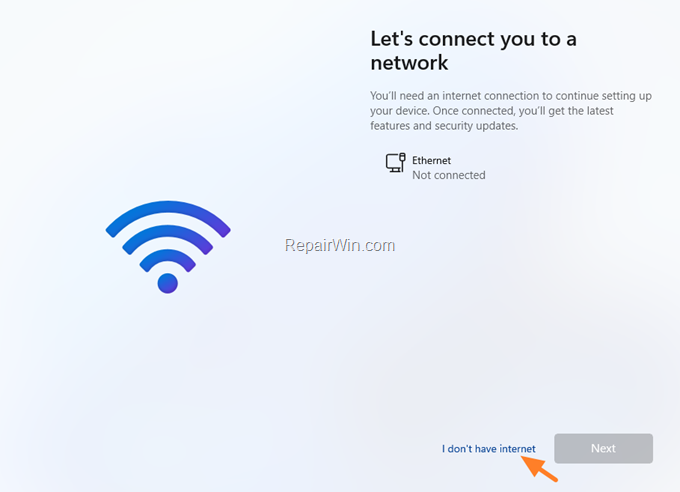
14. At next, and if you ‘re not connected to a network, you’ll be asked to connect your device to your Wireless network. This will allow you to sign in to Windows 11 with a Microsoft account in the next step. If you don’t want to sign-in to Windows with a MS account and to use a Local Account instead, select I don’t have Internet.& click Continue with limited setup at next screen
* Note: In this tutorial we demonstrate how to login with a local account to Windows 11.
15. At next, and if you ‘re connected to a network you’ll be asked to use (add) your Microsoft account to sign in to Windows 11. If you’re not connected to a network type a name in order to create a new Local Account for Windows 11.
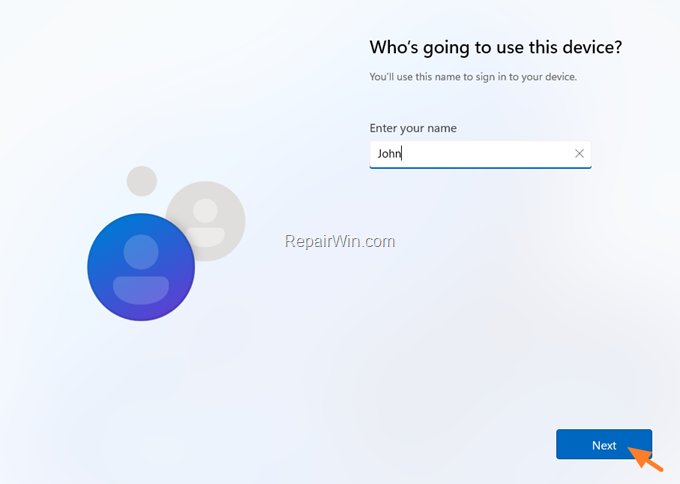
16. Type a password for the created account (or the password for the MS account), and click Next.
17. Choose carefully your privacy settings and click Next.
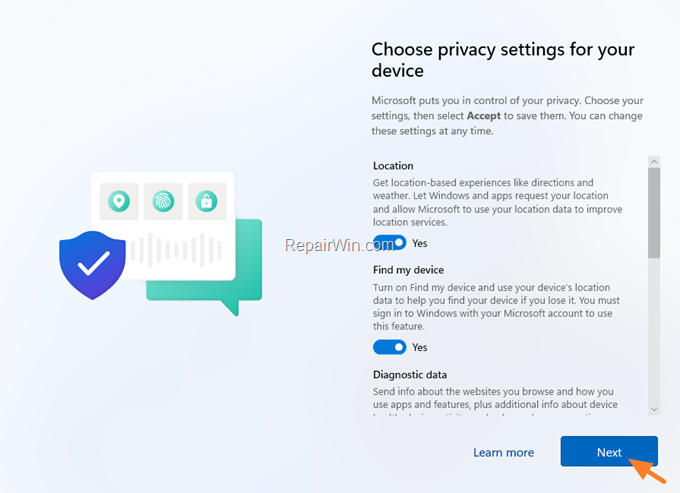
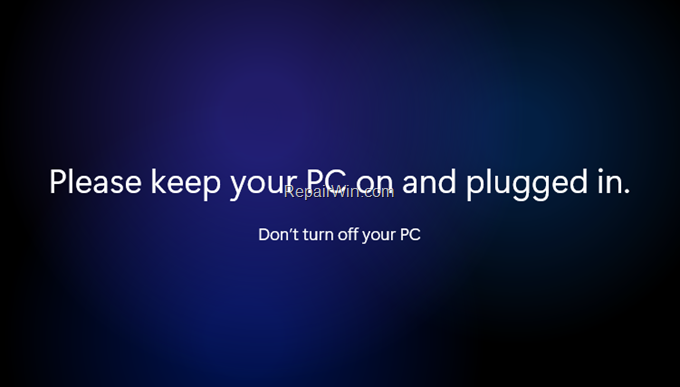
18. Now wait a few minutes for your device to configure and complete the Windows 11 installation.
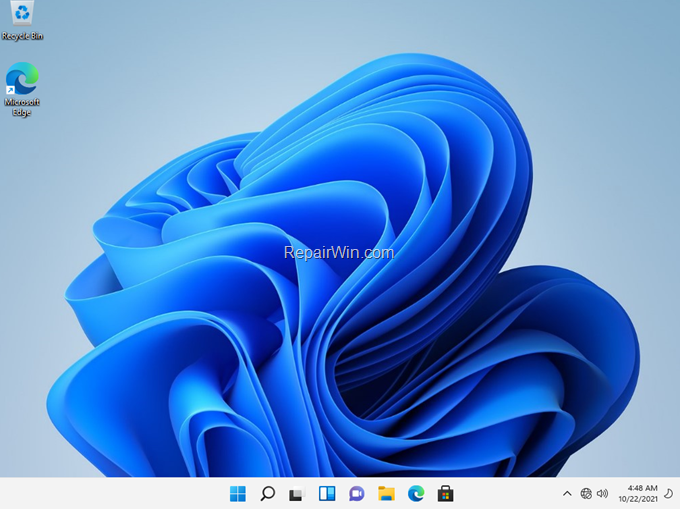
19. When the installation is complete, the Windows 11 desktop will appear on your screen.
That’s all folks! Did it work for you?
Please leave a comment in the comment section below or even better: like and share this blog post in the social networks to help spread the word about this.

