This article contains instructions to prevent Edge Chromium to be installed automatically in Windows 10, in order to keep the legacy version of Edge, or to avoid the slow performance issues that may appear after installing the KB4559309 update which installs the new Chromium version of Microsoft Edge automatically. *
* Note: If the new Edge Chromium, is already installed on your PC, follow the instructions in this article to uninstall it and then come back on this page to block its installation in the future.
How to Prevent EDGE Chromium version from Installing Automatically in Windows 10.
Method 1. Prevent the Automatic Delivery of Edge Chromium using Registry.
1. Open Registry Editor: To do that:
2. Navigate to the following key at the left pane:
- HKEY_LOCAL_MACHINESOFTWAREMicrosoft
3. Right-click at Microsoft key and select New > Key.
4. Type as key name EdgeUpdate and hit Enter.
4. Now, right-click at the blank space on the right pane and select New > DWORD (32-bit) Value.
5. Name the new value DoNotUpdateToEdgeWithChromium and hit Enter.
6. Double click at new created value and set the value data to 1. When done, click OK.
7. Close Registry editor and restart your PC. *
* Note: To allow the installation of the Microsoft Edge Chromium on the feature, just delete the EdgeUpdate key (HKEY_LOCAL_MACHINESOFTWAREMicrosoftEdgeUpdate), and restart your PC.
Method 2. Prevent Edge Chromium Installation with Microsoft’s Blocker Toolkit.
1. Download the Blocker Toolkit for Edge Chromium from here: https://docs.microsoft.com/en-gb/deployedge/microsoft-edge-blocker-toolkit.
2. Double-click to run the Blocker Toolkit and choose Yes at the first screen.
3. At “where you want to place the extracted files” window, type C:EdgeBlocker and click OK.
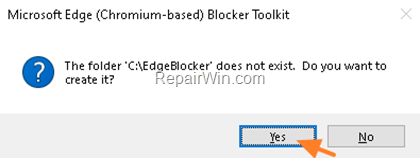
4. Then ask Yes to create the “C:EdgeBlocker” folder.
5. When the extraction is done, open Command Prompt as Administrator.
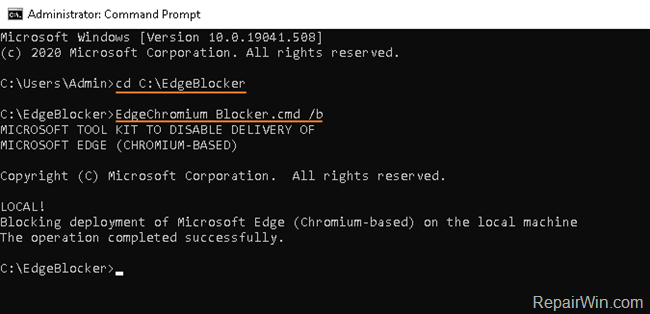
6. In command prompt type: cd C:EdgeBlocker
7. Finally give this command, to block the Edge Chromium installation on your PC:
8. Once the command is complete, Windows 10 will not download and install Microsoft Edge Chromium automatically. *
* Note: If you change your decision and you want to install the Chromium Edge on the future, follow the same steps, but give this command:
That’s all folks! Did it work for you?
Please leave a comment in the comment section below or even better: like and share this blog post in the social networks to help spread the word about this solution.


