Trusted Platform Module (also known as “TPM” or “TPM Module” or “TPM chip) is a hardware device used to enhance the security and integrity of computing devices.
In Windows 10/11, the TPM is automatically initialized by the operating system and its used to store the encryption keys for the BitLocker encryption technology to encrypt and protect the computer’s data. So, usually there isn’t a need to clear the TPM keys or reset the TPM to factory default settings.
However, in some cases, you may need to delete the keys from the TPM, especially when Windows does not automatically initialize the TPM, or when you experience authentication problems, or when you want to perform a clean installation of the operating system.
How to Reset/Clear TPM Keys without losing your Data on Windows 10/11.*
* Important: Because the clearing of TPM keys (also known as “resetting the TPM”), can cause data loss, follow the below steps exactly to avoid data loss.
Step 1. Disable Encryption on Windows.
As mentioned above, the TPM stores all the encryption keys used by BitLocker to protect and encrypt your sensitive data on your Windows Device. So the first step, is to disable the encryption of your device to avoid losing your data and the access to your device after clearing the TPM.
To disable the BitLocker Encryption on Windows 10/11, follow the instructions below according your Windows Edition. (Home or Pro)
Windows 10/11 Home.
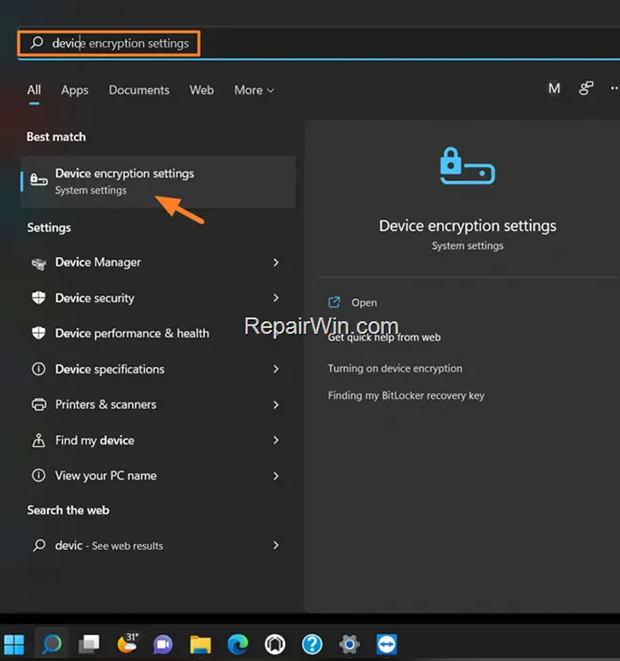
1. On Windows 10/11 Home version, search for “device encryption settings” and then open the Device encryption settings. *
* Note: If you couldn’t find the ‘device encryption settings’ then your system either doesn’t support encryption, or you’re running Windows 10/11 Pro. At such case, continue reading below to check if BitLocker is enabled and then continue to next step.

2 Now according the Device Encryption status, do the following:
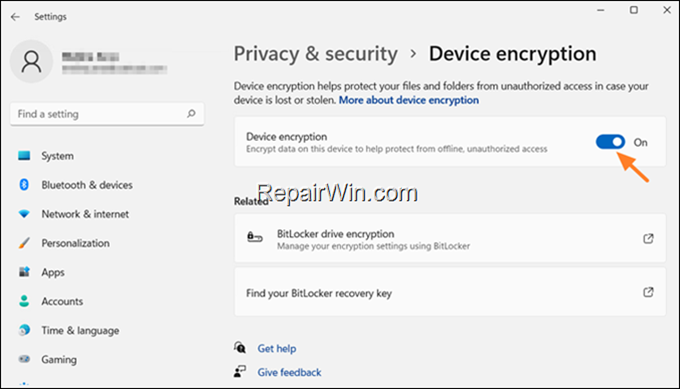
- If the Device Encryption is OFF skip to Step -2
- If the Device encryption is ON, set the related switch it to OFF to disable the encryption on your system. Then click Turn off when asked to remove the device encryption, and wait until your data is decrypted. When this done, proceed to Step-2.

Windows 10/11 Pro & Enterprise.
1 On Windows 10/11 Pro and Enterprise versions, type “manage bitlocker” in the search and then click Manage BitLocker.


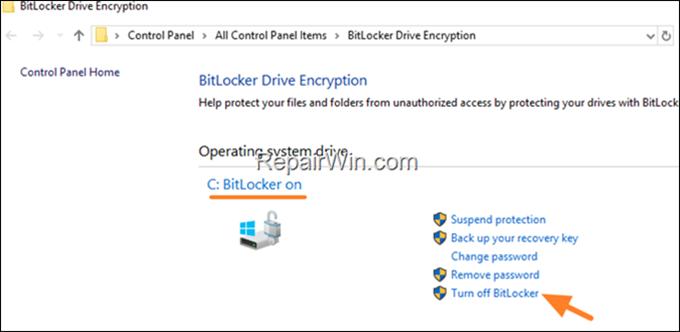
2. At ‘BitLocker Drive Encryption’ screen, check if the BitLocker is On* on the operating system drive, and if so, click Turn off BitLocker and then wait for BitLocker to decrypt and unlock the drive. When this done, proceed to Step-2.
* Note: If BitLocker is OFF proceed to next step.

Step 2. Back up your data (Precautionary step).*
* IMPORTANT: As a precaution and before clearing the TPM keys, I recommend to take a backup copy of all your important personal folders and files to an external USB drive.
* Note: Usually, all your important files are stored on the following folders under the “C:Users<YOURUSERNAME>” folder:
- Desktop, Documents, Downloads, Music, Pictures, Videos.
So, copy these folders to a USB drive among with any other folders or files you may need and then proceed below to reset the TPM.
Step 3. Specify a Password in Sign-in Options.
If you sign in to Windows using a PIN, then after deleting the TPM keys Windows will lose your PIN information and as a result you will not be able to sign in to your computer using your PIN. To avoid this to happen, proceed and specify a password as an alternative sign-in method To do that:
1. Go to Start > Settings > Accounts > Sign-in options.


2. At Ways to sign in options, click Password and then click Add and specify a password.


Step 4. Clear TPM Keys (Reset TPM).
After disabling the encryption on your system and backing up your data, go ahead to clear the TPM, using one of the methods below. *
* Note: Microsoft recommends cleaning TPM keys, only from Windows.
- Clear TPM from Windows Security.
- Clear TPM from TPM Management Console.
- Clear TPM from PowerShell.
- Clear TPM from BIOS Settings.
Method 1. Reset TPM keys from Windows Security.
The fist method to delete the TPM keys, is by using the Windows Security settings.
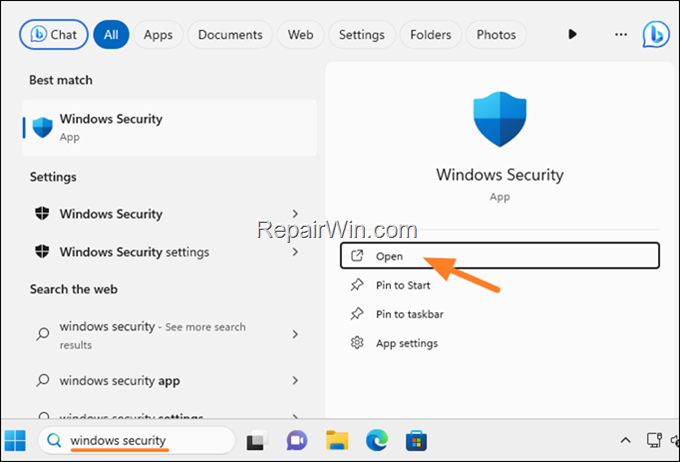
1. Type windows security in the search and then open the Windows Security app.

2. In Windows Security, select Device security on left and click Security processor details on right.*
* Note: If on this screen you see the message “There is no TPM available. Please check you BIOS settings“, use one of the below methods to reset the TPM.
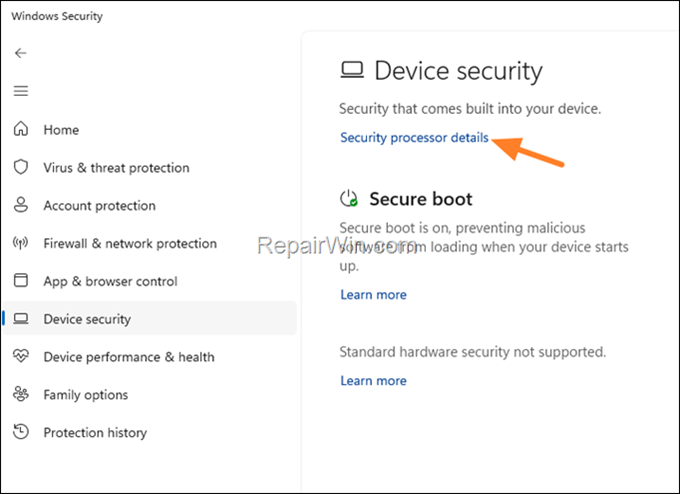

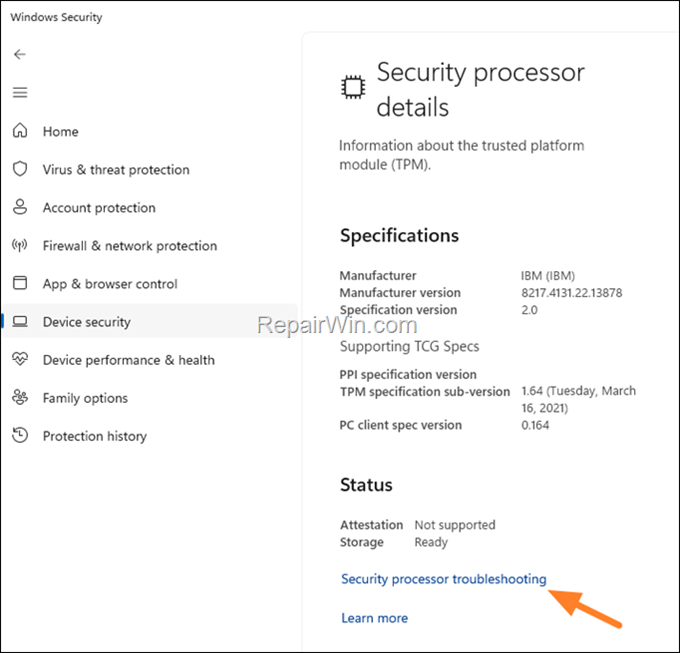
3. Then click Security processor troubleshooting.

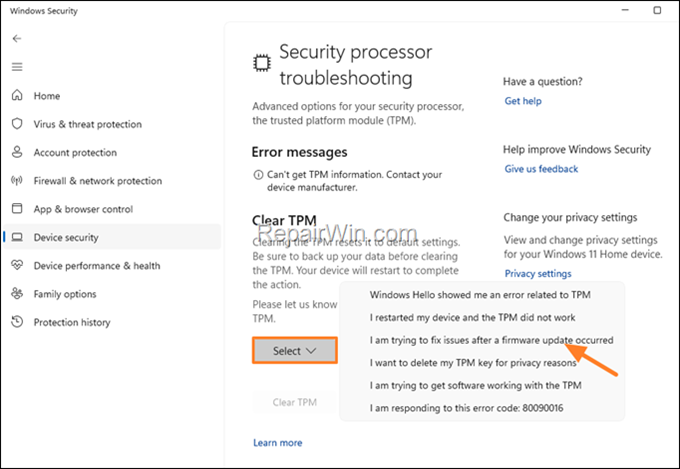
4. Under Clear TPM, click the Select button and then select any reason to reset the TPM from the list.

5. Then click Clear TPM to reset the TPM to its default settings.
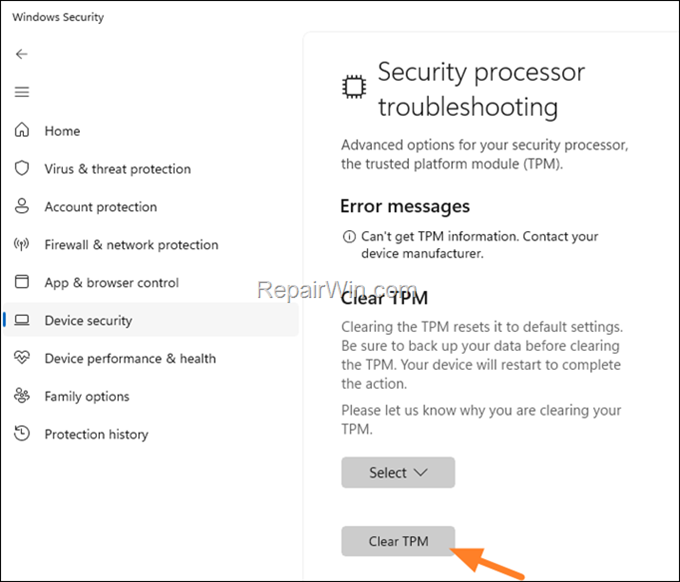

6. Now read carefully the information message and then click Clear and restart.*
* Important: If you sign-in to Windows using a PIN then you’ll be asked to change your PIN at next logon. To do that, you need to know your account’s password. If you haven’t set a password in Sign-In options, proceed and specify one before clearing the TPM (see step-3 above).
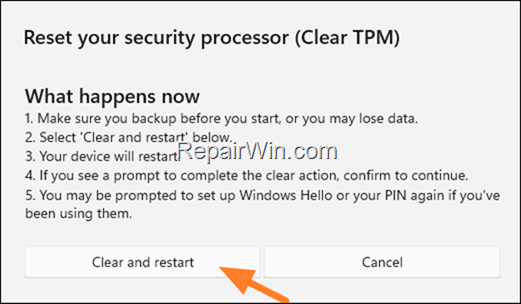

7. During the restart, you might be prompted by the UEFI to press a key to confirm that you wish to clear the TPM. If so, press the corresponding key to continue.
8. Now, let your computer to boot to Windows and setup a new PIN (if prompted), by using your account password.
* Note: After clearing the TPM keys, and if you want to, you can re-enable the Device Encryption on your computer.
Method 2. Clear TPM from TPM Management Console.
1. Press Windows ![]()
![]() + R keys to open the run command box.
+ R keys to open the run command box.
2. Type tpm.msc and press Enter to open the TPM Management Console.


3. In TPM Management, click Clear TPM on the right pane (Actions pane).
* Important: If you sign-in to Windows using a PIN then you’ll be asked to change your PIN at next logon. To do that, you need to know your account’s password. If you haven’t set a password in Sign-In options, proceed and specify one before clearing the TPM (see step-3 above).


4. Then read carefully the information message and if you agree, click Restart to confirm your decision.
5. During the restart, you might be prompted by the UEFI to press a key to confirm that you wish to clear the TPM. If so, press the corresponding key to continue.
6. Now, let your computer to boot to Windows and setup a new PIN (if prompted), by using your account password.
* Note: After clearing the TPM keys, and if you want to, you can re-enable the Device Encryption on your computer.
Method 3. Clear TPM keys from Terminal (PowerShell).
1. On the search box, type powershell or terminal and then click Run as administrator.


2. Then type the following command and press Enter to reset the TPM to its default state. *
- Clear-Tpm
* Important: If you sign-in to Windows using a PIN then you’ll be asked to change your PIN at next logon. To do that, you need to know your account’s password. If you haven’t set a password in Sign-In options, proceed and specify one before clearing the TPM (see step-3 above).
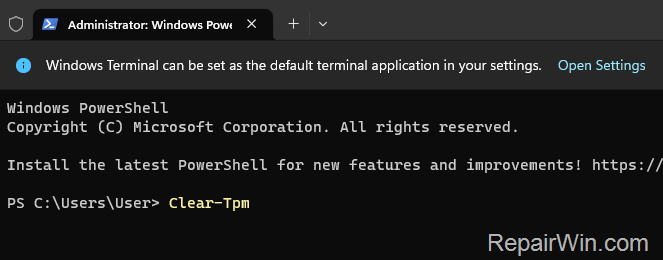

3. When the command is executed, restart your computer to apply the change.
4. During the restart, you might be prompted by the UEFI to press a key to confirm that you wish to clear the TPM. If so, press the corresponding key to continue.
5. Now, let your computer to boot to Windows and setup a new PIN (if prompted), by using your account password.
* Note: After clearing the TPM keys, and if you want to, you can re-enable the Device Encryption on your computer.
Method 4. Reset TPM to default values from BIOS Settings.
If you cannot clear (reset) the TPM module from within Windows, proceed and reset it in BIOS settings as instructed below:
1. Shutdown your computer.
2. Power On your computer again and when you see the manufacture’s logo press the corresponding key (eg: Del, F2, F10, etc.) to enter in BIOS Setup Utility.
3. In BIOS setup, find the Secure Boot option and make sure that is Enabled. (If not, Enable it).
4. Then navigate to Security settings page and ensure that a TPM Device is Available and the TPM State is Enabled. (If not, set the TPM State to “Enabled”, Save and Exit from BIOS, boot to Windows and try to clear the TPM keys from within Windows, as instructed above).
5. To clear the TPM keys from here, do one of the following:
- Select the Clear TPM option and press Enter and then Yes to reset the TPM to its default settings, or…
- Select the Restore Security settings to Factory Defaults option and press Enter.
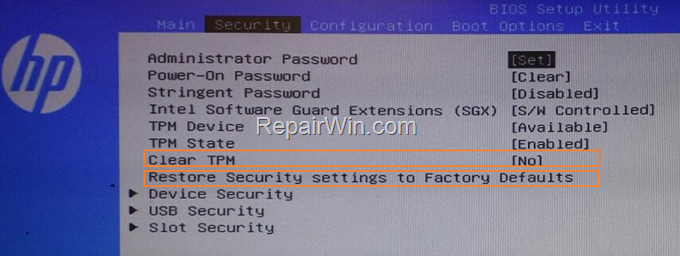

6. After resetting the TPM, Save and Exit from BIOS setup.
7. After the computer restarts, you may be asked to accept the change by pressing a corresponding on your keyboard. If so, press that key, to reset the TPM and to clear all its security keys.
8. Finally, let your computer to boot to Windows and you’re done!
That’s all folks! Did it work for you?
Please leave a comment in the comment section below or even better: like and share this blog post in the social networks to help spread the word about this.
