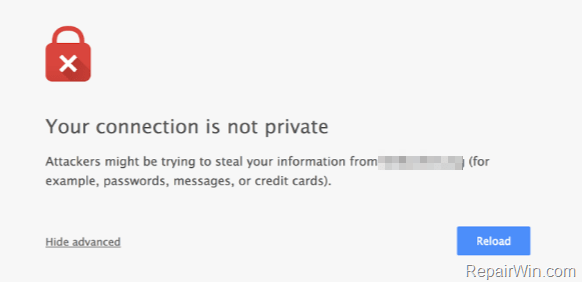
The “Your connection is not private” or “NET::ERR_CERT_AUTHORITY_INVALID” or “ERR_CERT_COMMON_NAME_INVALID” errors in Chrome, appeared due Secure Socket Layer (SSL) errors, that is used from Websites for security and privacy reasons. In fact SSL technology is a cryptographic mechanism that provides security protection to the sensitive data you enter (e.g. username or password) on websites that require or collect sensitive information (e.g. Banks, Medical or Financial sites, etc.)
The primary goal of SSL, is to provide a private a secure connection between the client (e.g. your Web browser) and the Server. To accomplish this task an SSL certificate (also know as “digital certificate”) is installed on a web server in order to authenticate the identity of the website and to encrypt the data that transmitted on it. These sites is easy recognized, because they use the HTTPS URL prefix instead of HTTP.
The “Your connection is not private” or the Certificate errors, commonly occurred when Chrome cannot verify the Certificate (e.g. the certificate doesn’t come from a trusted publisher) or when the connection between the client and the server is not secure.
This tutorial contains detailed instructions to fix the following errors on Google Chrome:
- Your connection is not private
- NET::ERR_CERT_AUTHORITY_INVALID
- ERR_CERT_COMMON_NAME_INVALID
How to resolve the “Your connection is not private” error on Google Chrome.
Method 1. Check Date & Time Settings.
First make sure that you Date and Time Settings are correct. This is the most common solution to fix the “Your connection is not private” error in Chrome. To establish a secure connection, your clock needs to be set correctly. This is because the certificates that websites use to identify themselves are only valid for specific periods of time.
Method 2. Disable all Chrome extensions to fix the “connection is not private” issue.
1. From Chrome’s menu ![]() icon (at the upper right corner), choose Settings.
icon (at the upper right corner), choose Settings.
2. Click Extensions on the left pane and then Turn Off all installed extensions.
3. Restart Chrome and try to access a HTTPS website.
If the “Your connection is not private” problem persists:
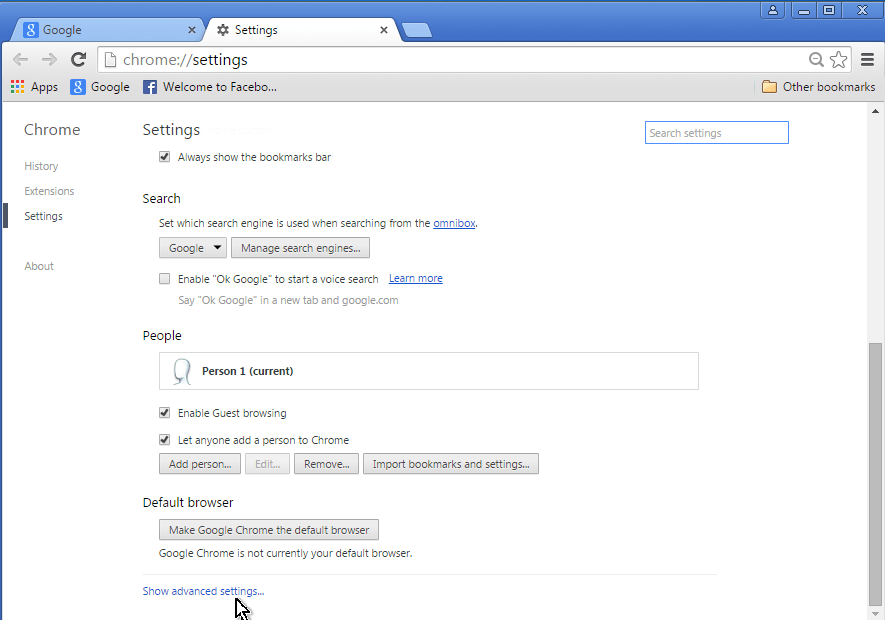
- At Settings page, scroll down and click to Show Advanced Settings.
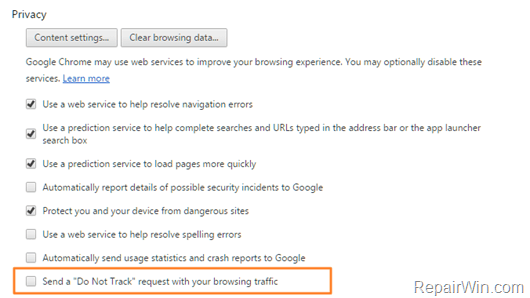
- At Privacy section make sure that the “Send a Do Not Track request with your browsing traffic” option is unchecked.
- Restart Google Chrome again and if the problem persists, reset Chrome Settings. To do that:
1. Scroll down again and press the Reset browser settings button.
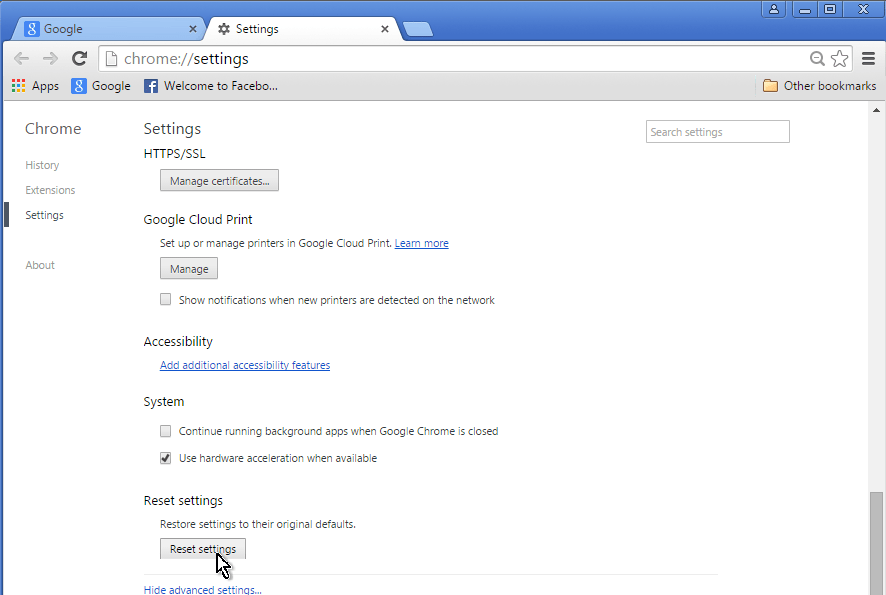
2. Click Reset one more time.
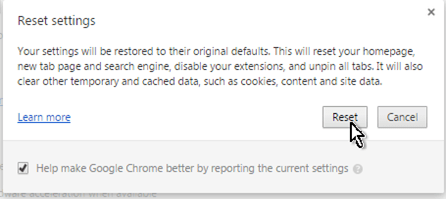
3. Restart Google Chrome.
Method 3. Check your Firewall Settings.
If you use a third party firewall or antivirus program to filter the Internet traffic, try to temporarily disable the Web (Internet) protection or disable the “HTTPS Scanning” or the “HTTPS protection” feature.
- If you ‘re using AVAST antivirus then disable the HTTPS Scanning. To do that:
- Open Settings -> Active Protection -> Web Shield –> Customize -> uncheck the Enable HTTPS scanning box.
- If you using BitDefender antivirus, then disable the Scan SSL feature. To do that:
- Open Settings –> Privacy Control, select the Antiphishing tab and set the Scan SSL to OFF. (In Bitdefender Total Security 2015 go to: Protection –> Web Protection –> Disable Scan SSL)
Method 4. Manually assign DNS Settings.
– Use Google’s Public DNS Servers to resolve the “Your connection is not private” Google Chrome error.
How to manually change DNS Settings in Windows:
1. Open Network and Sharing Center -> Change Adapter Settings.
2. Right click on your active Network Adapter and select Properties.
3. Select the ‘Internet Protocol Version 4 (TCP/IPv4)’ and click Properties
4. Check the “Use the following DNS server addresses:” radio button.
5. Type the following DNS server addresses (Google’s public DNS Servers):
- 8.8.8.8
- 8.8.4.4
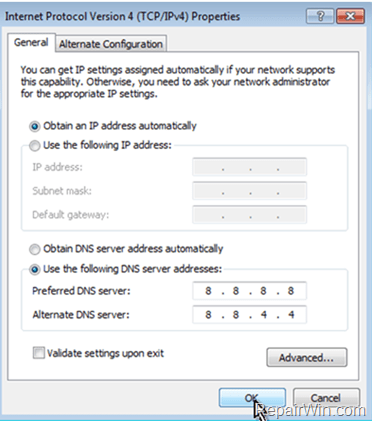
6. Press OK twice to exit Network properties.
7. Restart your computer.
That’s all! Did it work for you?
Please leave a comment in the comment section below or even better: like and share this blog post in the social networks to help spread the word about this solution.

