This tutorial contains instructions to fix the Black Wallpaper issue when background image is set to ‘Stretch” in Windows 7 OS. The Black Wallpaper problem, may appear in Windows 7 based computers after installing the January 14, 2020—KB4534310 update.

The Windows 7 black background issue, is is a known bug after installing the update KB4534310 and as Microsoft says: “We are working on a resolution and will provide an update in an upcoming release, which will be released to all customers running Windows 7 and Windows Server 2008 R2 SP1.”
If you want to resolve the “black wallpaper” problem, until Microsoft releases an update to fix it, follow the instructions below.
How to FIX the Black Wallpaper issue in Windows 7.
Method 1. Uninstall the KB4534310 update.
The first method to fix the black wallpaper problems in Windows 7 is to remove the KB4534310 update.*
* Note: Since the KB4534310 update, includes security enhancements and fixes for Windows 7, it is not advisable to uninstall it. So, we suggest to fix the problem by following the instructions at Method-2 below.
To Uninstall the KB4534310 update:
1. Right-click at the Start menu ![]() and choose Control Panel.
and choose Control Panel.
2. Set the View By: to Small icons and click Program & Features.

3. Click View installed updates on the left pane.

4. At the search box, type “KB4534310” and press Enter.
5. Highlight the “Security Update for Microsoft Windows (KB4534310)” and click Uninstall.

Method 2. Change Picture Position other that “Stretch”.
The Black Wallpaper problem in Windows 7, appears only when the selected background picture is stretched. So, the next method to fix the problem, is to set another picture position for the background image. To do that:
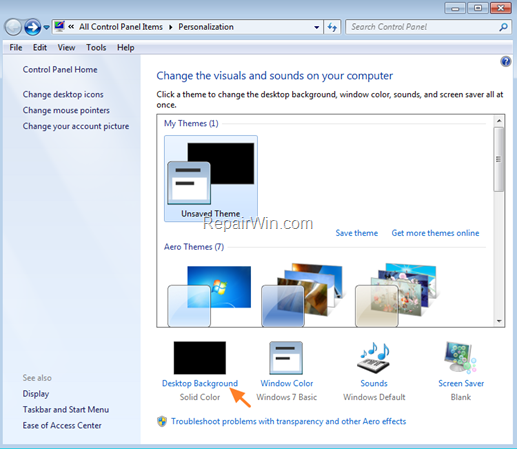
1. Right click on your desktop and click Personalize.

2. Click Desktop Background

3. Now, apply the following actions:
a. At Picture location, select Picture Library.
b. Select the picture that you want for background, or any other custom image/photo that matches your screen resolution. *
* Tip: To find out the current screen resolution, right click on Desktop and click Screen resolution.
c. At Picture position, select any other option except “Stretch“, such as “Fill”, “Fit”, “Tile”, or “Center”.
d. When done, click Save changes.

That’s all! Did it work for you?
Please leave a comment in the comment section below or even better: like and share this blog post in the social networks to help spread the word about this solution.


