If you’re using a laptop with Windows 10 and the Disable Touchpad option is missing in touchpad settings, then continue below to fix the problem.
As you may know, when working with a USB external mouse on your Windows 10 laptop, there is no need to keep your touchpad enabled to make typing easier. For this reason, in most laptops you can easily turn off (disable) the touchpad device when it’s not needed, by using one of the following ways:
- By pressing a Function key (e.g. F3, F4, etc.), with or without pressing the Fn key at the same time.
- By double-tapping at the upper left corner of touchpad’s surface. (If your touchpad supports this option).
- By pressing the on/off key-switch for the touchpad. (if your laptop has a such key).
- By Disabling Touchpad or Deactivating Touchpad when mouse is connected, in Windows 10 Touchpad settings:
- Start
![image_thumb[2]_thumb image_thumb[2]_thumb](data:image/svg+xml;base64,PHN2ZyB4bWxucz0iaHR0cDovL3d3dy53My5vcmcvMjAwMC9zdmciIHdpZHRoPSIyMiIgaGVpZ2h0PSIyMyIgdmlld0JveD0iMCAwIDIyIDIzIj48cmVjdCB3aWR0aD0iMTAwJSIgaGVpZ2h0PSIxMDAlIiBzdHlsZT0iZmlsbDojY2ZkNGRiO2ZpbGwtb3BhY2l0eTogMC4xOyIvPjwvc3ZnPg==) menu -> Settings
menu -> Settings  -> Devices -> Touchpad.

However, on some Windows 10 laptops there is no option to turn off or to deactivate touchpad, and many users are looking for a solution to this issue.
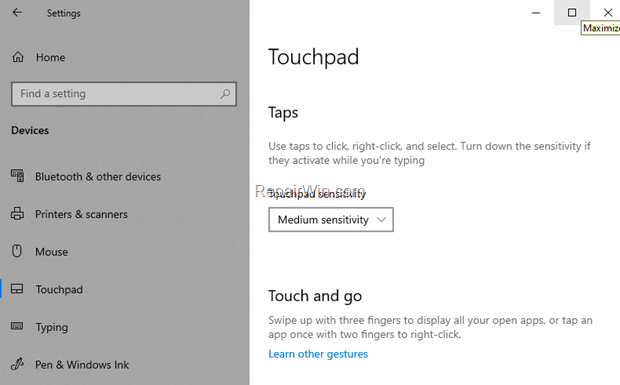
In this tutorial, you will find step-by-step instructions on how to disable touchpad in Windows 10, if the “Turn ON/OFF” touchpad switch and the “Leave touchpad on when a mouse is connected” options are missing.
How to FIX: No Option to Disable Touchpad on Windows 10.
Method 1. Disable Touchpad from Mouse settings in Control Panel on Windows 10.
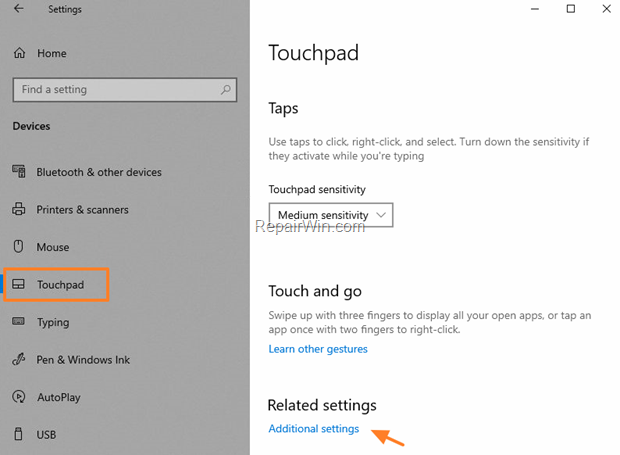
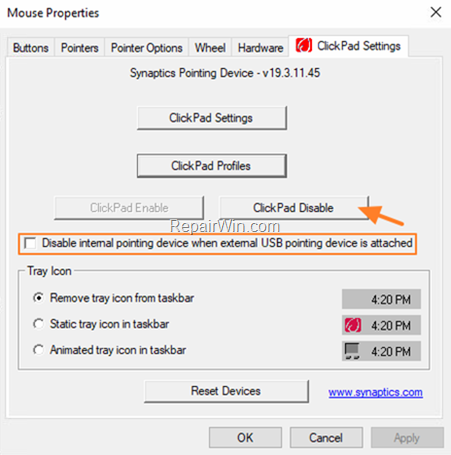
1. In Touchpad settings scroll little down and click Additional Settings under the ‘Related Settings’ section.
* Alternatively, navigate to Control Panel and open the Mouse properties.
2. In Touchpad/ClickPad Settings tab:
a. Click ClickPad Disable to completely disable the Touchpad,* or…
* Note: Apply this setting only if you are always using an external USB mouse.
b. Check the checkbox Disable internal pointing device when external USB pointing device is attached, to turn off the touchpad when you connect your mouse.
Method 2. Enable All Touchpad Features in Windows 10 by Installing Microsoft’s Precision Touchpad Drivers.
If you want to take advantage of all the available Windows 10 Touchpad features, you can install Microsoft’s Precision Touchpad Drivers. *
* Notes (Important): Before continuing to the steps below, its advised to:
1. Create a Restore Point, in order to restore Windows 10 if something goes wrong.
2. Have an external USB mouse in case the Touchpad does not after installing the Precision Touchpad drivers.
How to install Microsoft’s Precision Touchpad Drivers in Windows 10.
Step 1. Download Precision Touchpad Drivers.
1. Download the Precision Touchpad drivers on your PC, from one of the following locations:
- From the laptop’s manufacturer support site.
- If you own a Synaptics TouchPad device, download the Synaptics driver from Lenovo.
- If you own a an ELAN TouchPad device, download the ELAN driver from Softpedia.
2. When the download is completed, extract the downloaded .zip file.
Step 2 Install the Precision Touchpad Drivers in Windows 10.
1. Open Device Manager. To do that:
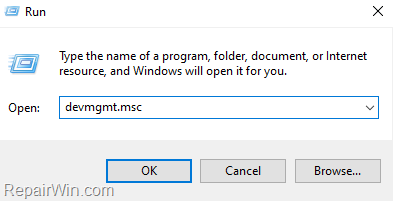
1. Press Windows
+ R keys to open the run command box.
2. In the “Open” box, type: devmgmt.msc & click OK.
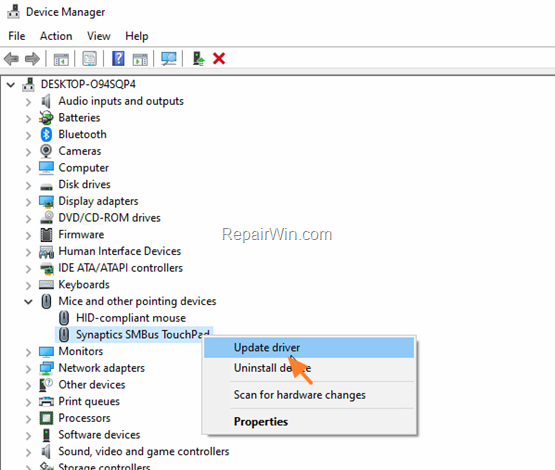
2. Expand the Mice and other pointing devices.
3. Right-click on the TouchPad device and choose Update Driver.
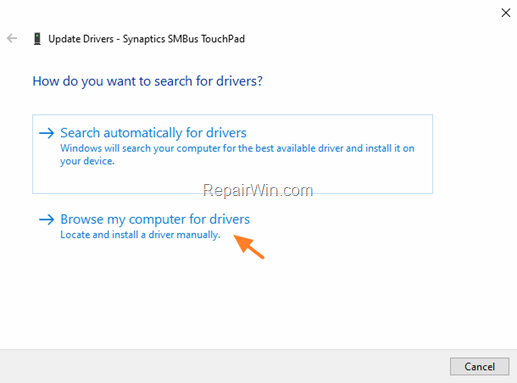
4. Click Browse my computer for drivers.
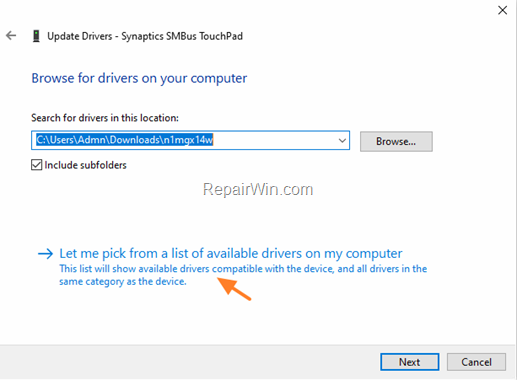
5. At next screen, click Let me pick from a list of available drivers on my computer.
6. Click Have Disk.
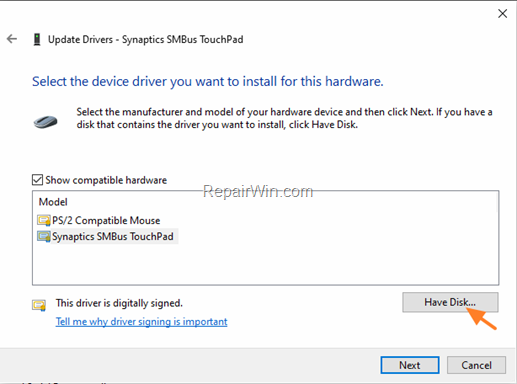
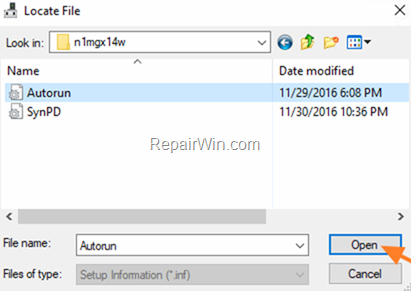
7. Browse to the folder where you extracted the downloaded zip file in step-1.
8. Select the Autorun file and click Open and then click OK.
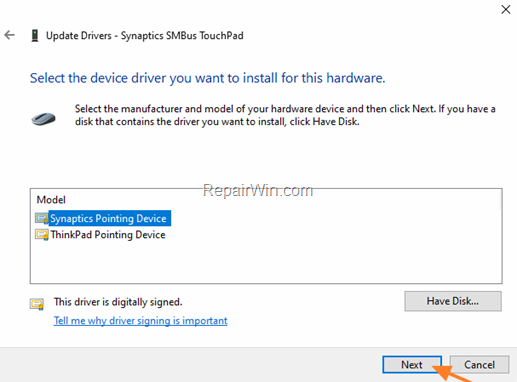
9. Select the Synaptics Pointing Device (or the ‘ELAN Pointing Device’), from the list of models, and click Next.
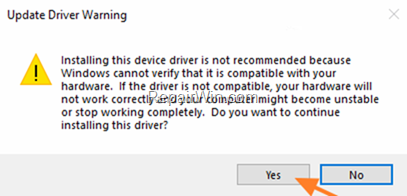
10. At Update Driver warning message, click Yes.
11. Let Windows to install the new drivers and then click Close.
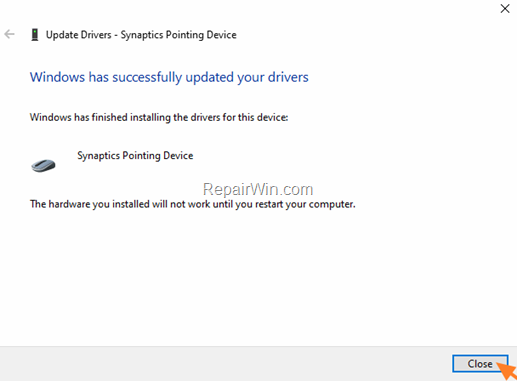
12. Reboot your PC.
13. After booting to Windows 10, navigate to Start ![]() menu -> Settings
menu -> Settings ![]() -> Devices -> Touchpad.
-> Devices -> Touchpad.
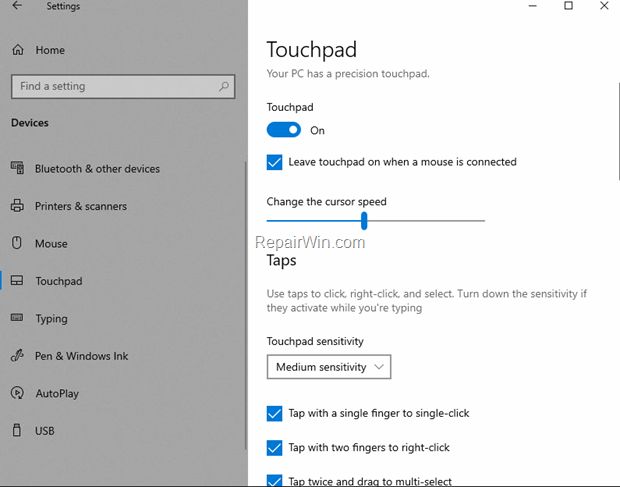
14. If everything has gone smoothly, you should see all the available Touchpad settings in Windows 10.
That’s all folks! Please leave a comment in the comment section below or even better: like and share this blog post in the social networks to help spread the word about this solution.

