The following problem may appear on a Windows 10 based computer, while other clients are connected to it, through RDP (Remote Desktop Connection): The “DWM.EXE” process, causes high CPU utilization on the remote host, or crashes and terminates the remote desktop session. The problem commonly appears if the remote desktop host machine, runs Windows 10 v1903 and owns an Intel based display adapter (GPU).

Problem in details: When a client machine is connected through RDP to a Windows 10 host machine (target), the host machine disconnects the remote desktop client because the Desktop Windows Manager (dwm.exe) process, goes to 100% CPU usage. When the problem occurs, the following event is recorded in Event Viewer:
“Faulting application name: dwm.exe, version: 10.0.17134.1, time stamp: 0xf5178e97
Faulting module name: unknown, version: 0.0.0.0, time stamp: 0x00000000
Exception code: 0x8898009b
Fault offset: 0x0000000000000000
Faulting process id: 0x3a8
Faulting application start time: 0x01d51ae025b941b3
Faulting application path: C:WINDOWSsystem32dwm.exe
Faulting module path: unknown
Report Id: fba8573a-ee4e-4430-b40c-3627888dbfd9″
This tutorial contains instructions to resolve the DWM.EXE High CPU usage on a remote host Windows 10 machine, after connecting with remote desktop (RDP).
How to fix DWM.EXE High CPU Utilization on Remote Desktop Windows 10 host.
To resolve the DWM.EXE high CPUusage, apply the instructions on the following methods to the Windows 10 computer to which you connect via the remote desktop connection (Host PC):
Method 1. Force Remote Desktop Connections to use the XDDM graphics display driver.
1. Press simultaneously the Windows ![]() + R keys to open the run command box.
+ R keys to open the run command box.
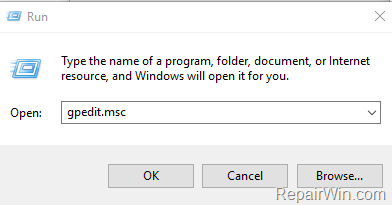
2. Type gpedit.msc & Press Enter.
3. At the left pane navigate to:
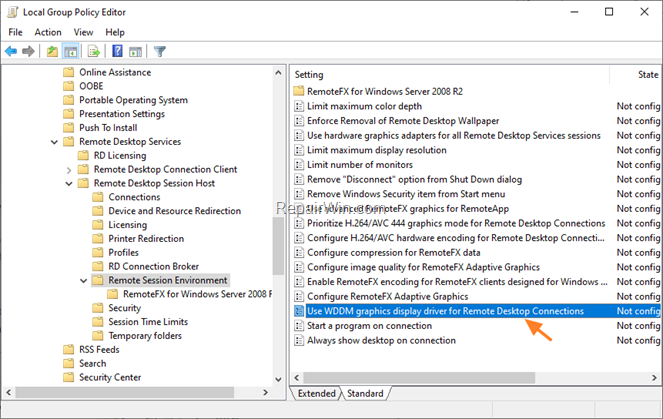
- Computer Configuration > Administrative Templates > Windows Components > Remote Desktop Services > Remote Desktop Session Host > Remote Session Environment
4. At the right pane, double click at Use WDDM graphics display driver for Remote Desktop Connections
5. Set the polity setting to Disabled and click OK.
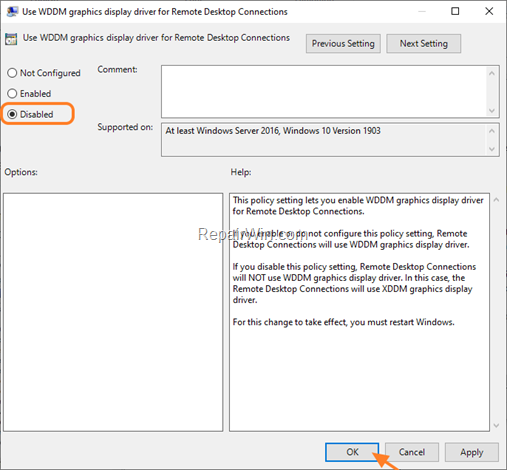
6. Close the group policy editor and reboot the computer.
Method 2. Install the Microsoft Basic Display Driver.
1. Navigate to Device Manager. To do that:
1. Press Windows
+ R keys to open the run command box.
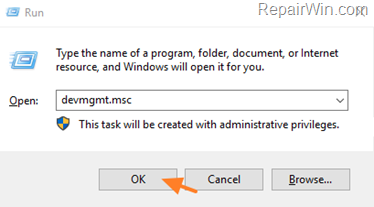
2. Type: devmgmt.msc & click OK.
2. Expand Display Adapters.
3. Right click at the installed display adapter and select Properties.
4. Select the Driver tab and then click Update Driver.
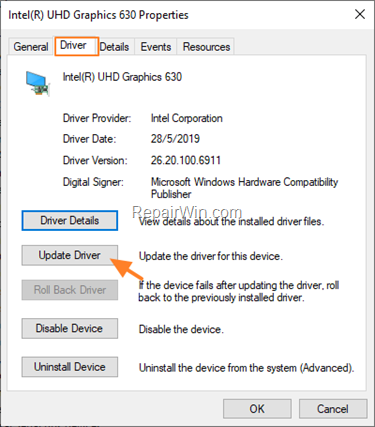
5. Click Browse my computer for driver software.
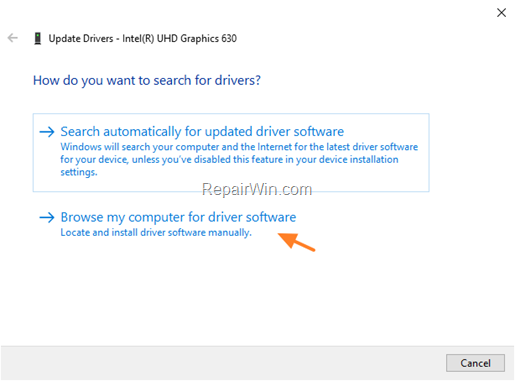
6. Choose Let me pick from a list of available drivers on my computer.
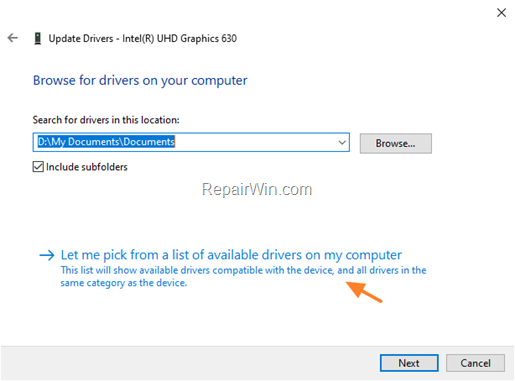
7. Choose the Microsoft Basic Display Adapter and click Next.
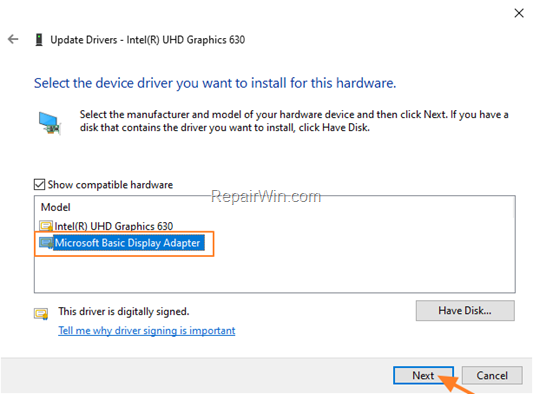
8. When the installation is complete, close all open windows and you ‘re done.
That’s all folks! Did it work for you?
Please leave a comment in the comment section below or even better: like and share this blog post in the social networks to help spread the word about this problem.

