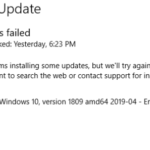
On a Windows 10-based computer, you may receive the following error message when you try to install Updates: “There were some problems installing updates, but we “ll try again later. If you keep seeing this and want to search the web or contact support for information, this may help: (0x80248007)”. The Windows 10 update error 0x80248007 commonly appears if the Windows Update files are corrupted or if Windows cannot receive updates due to network issues.

This tutorial contains instructions to troubleshoot the error 0x80248007 while installing updates in Windows 10.
How to Solve Error 0x80248007 in Windows 10 Update.
Step 1. Scan your computer for viruses.
Important: Many viruses or malicious programs can cause problems with Windows update. So before you continue to the troubleshooting steps below, use this Malware Scan and Removal Guide to check and remove viruses or/and malicious programs that may be running on your computer.
Step 2. Run the Windows Update Troubleshooter.
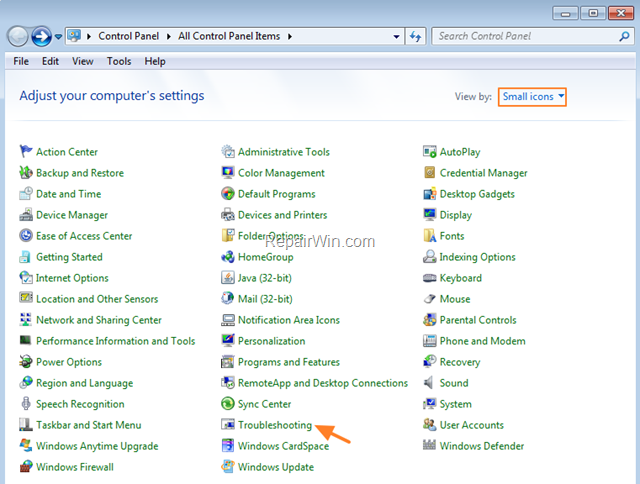
1. Navigate to Windows Control Panel, set the ‘View By’ to Small icons and open Troubleshooting.

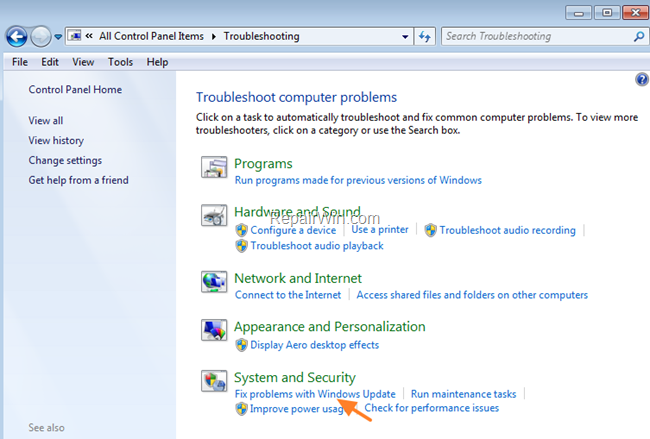
2. In Troubleshooting options, click Fix problems with Windows Update.

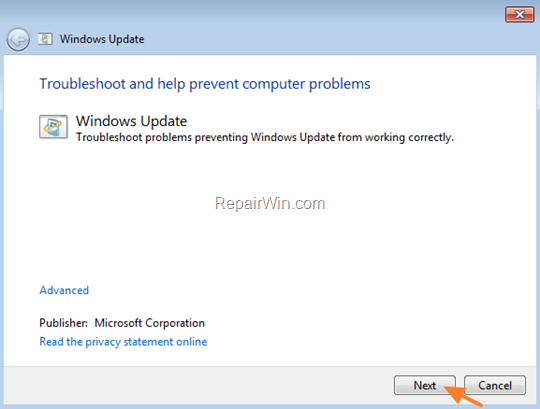
3. Click Next to troubleshoot Windows update problems.

5. When the troubleshooting process is complete, close the troubleshooter and restart your PC.
6. Check for updates.
Step 3. “Rebuild” the SoftwareDistribution folder.
The “SoftwareDistribution” folder (C:WindowsSoftwareDistribution), is the location where Windows store the Windows Updates. Some times this folder is corrupted and you have to re-create it, in order to download and install updates from scratch. To rebuild (re-create) the “SoftwareDistribution” folder follow the steps below:
1. Open Windows Services control panel: To do that:
- Press Windows
 + R keys to open the Run command box.
 - In the Search box, type: services.msc & click OK.
- (Accept the UAC warning if appears).
![image_thumb[14]_thumb image_thumb[14]_thumb](https://qnet88.com/wp-content/uploads/2021/12/image_thumb14_thumb_thumb.png)
2. In Services control panel locate the Windows Update service.
3. Right-click on Windows Update service and select Stop.
![image_thumb[7]_thumb image_thumb[7]_thumb](https://qnet88.com/wp-content/uploads/2021/12/image_thumb7_thumb_thumb.png)
4. Open Windows Explorer and navigate to: C:Windows folder.
5. Find and Delete the SoftwareDistribution folder.
![image_thumb[9]_thumb image_thumb[9]_thumb](https://qnet88.com/wp-content/uploads/2021/12/image_thumb9_thumb_thumb.png)
6. Restart your computer and check for updates.
That’s all folks! Did it work for you?
Please leave a comment in the comment section below or even better: like and share this blog post in the social networks to help spread the word about this solution.


