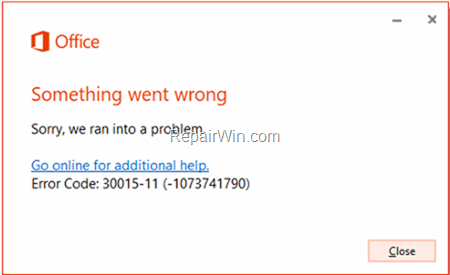
If you are trying to install Microsoft Office 2019 or Office 2016 on your Windows 10 PC and the Office installation fail with error “Something went wrong, Error Code: 30015-11 (-1073741790) or 30015-11 (3221225506), then continue below to fix the problem.
Problem in details: When you try to install or to re-install Microsoft Office 2019, 2016 or 2013, the installation fails with error: “Something went wrong. Sorry, we ran into a problem. Go online for additional help. Error Code: 30015-11 (3221225506) or Error Code: 30015-11 (-1073741790).
How to FIX: Office Setup Error Code 30015-11 (-1073741790) & 30015-11 (3221225506)
Before continuing below to resolve the Office installation problems, try the following:
1. Temporarily disable any third-party Antivirus or Firewall program before starting the Office installation.
2. Install all available Windows 10 Updates.
3. Update Windows 10 to its latest version.
Method 1. FIX Error 30015-11 by Uninstalling all Office versions from your PC.
The first method to solve the error codes 30015-11 (-1073741790) & 30015-11 (3221225506) in Office installation is to remove all Office installations, by following the steps below:
1. Download the Microsoft Support and Recovery Assistant (SARA) utility.
2. When the download is completed double click to run the SetupProd_OffScrub.exe application.
3. Click Install to install the SARA utility.
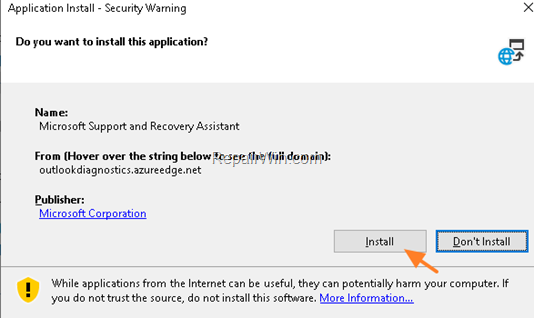
4. When the installation is completed, click Agree and then click Yes.
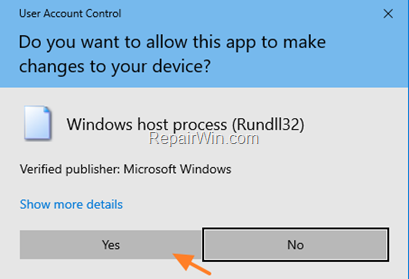
5. Wait until the ‘Microsoft Support and Recovery Assistant’ troubleshooting the issue.
6. Select the checkbox, at the left of the Office product name to select all the installed Office products and click Next.
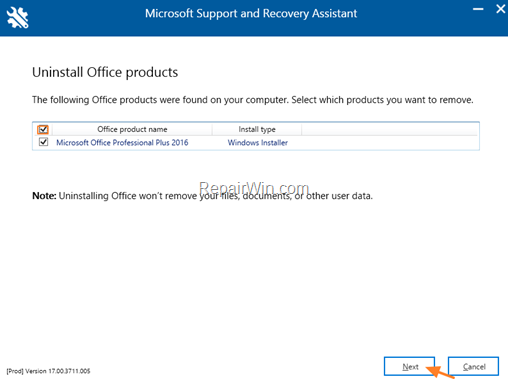
7. Now wait until the Office removal process is complete and when this is done, restart your computer.
8. After restart, proceed and reinstall Office by following the instructions from these links:
- Office 365
- Office 2019
- Office 2016
- Office 2013
Method 2. Repair Windows Component Store & System Files.
1. Open Command Prompt as Administrator.
2. In command prompt give the following command and press Enter:
- DISM /Online /Cleanup-Image /StartComponentCleanup

3. When the process is completed, give the following command:
- DISM.exe /Online /Cleanup-image /Restorehealth

4. When the DISM operation is completed, type the following command and hit Enter:
- sfc /scannow

5. Now wait until the System File Checker repairs the Windows System Files.
6. When the repair is completed, restart your PC and check if the problem has resolved.
Method 3. Check if the Software Protection service can Start.
1. Open Windows Services control panel: To do that:
- Press Windows
 + R keys to open the run command box.
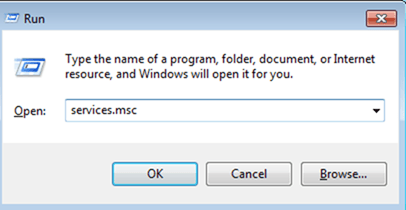
 - In the Search box, type: services.msc & click OK.
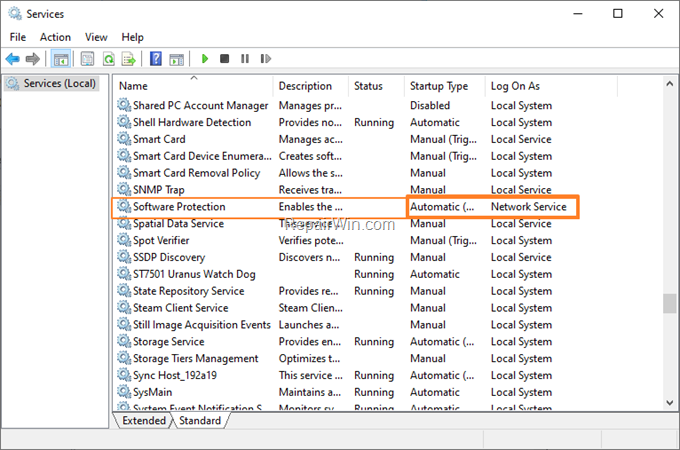
2. In the right pane, make sure that the Startup Type of the Software Protection service is set to Automatic and the Log On As is Network Service.
3. Now try to start the Software Protection service manually, by right-clicking on the service and choosing Start.
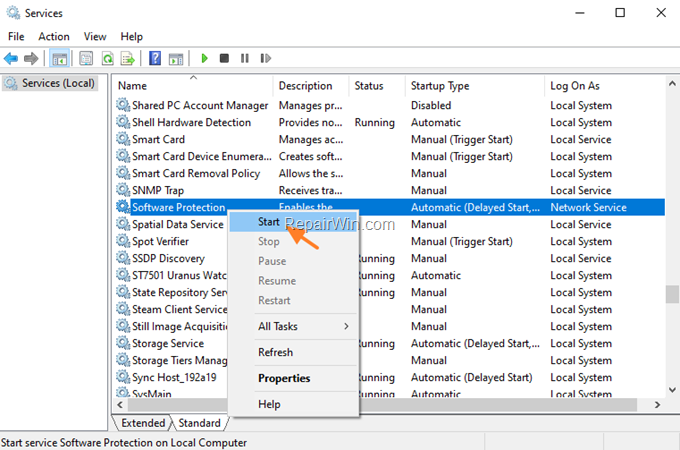
4. Now according to your situation, proceed as follows:
A. If the service can start without errors (Status: Running), try again to install Office again.
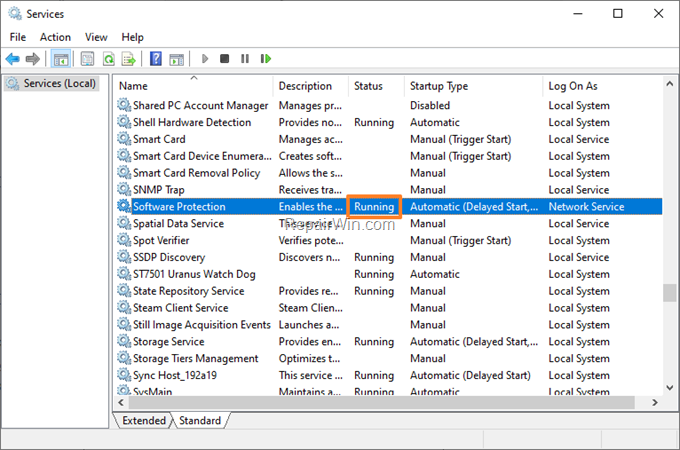
B. If the service cannot be started for any reason or if you got an “access denied” error:
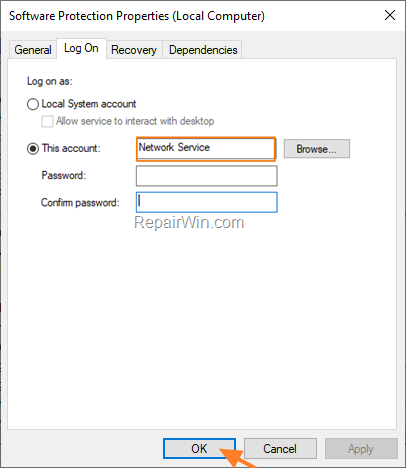
a. Right-click on the Software Protection service and choose Properties.
b. At Log On tab, choose This account and type Network Service. Then clear the password fields and click OK twice to save the changes.
5. Restart your computer and perform the steps 1-3 above to ensure that the Software Protection can be started without errors. If this happens, go ahead and install Office.
Method 4. Clean install Windows 10.
If after applying the above methods, you still cannot install Microsoft Office, I suggest to perform a clean Windows 10 installation.
Important: The clean Windows 10 installation means that all your files and settings will be lost during the installation process. So, proceed and backup all your important files and settings to another storage media before continue. (e.g. to an external USB drive).
That’s all folks! Did it work for you?
Please leave a comment in the comment section below or even better: like and share this blog post in the social networks to help spread the word about this solution.

