If your printer keeps printing the same page over and over, or if it prints bank pages, or other random pages with unintelligible characters and won’t stop printing even after you cancel the printing process, continue reading below to learn how to fix the problem.
There can be several reasons why your printer does not stop printing and some of these reasons are listed below.
- Queued Print Jobs: If there are previous print jobs that have not completed due to an error, the printer may not stop printing.
- Driver/Software problem: If the installed printer driver has an error or is out of date, the printer may continuously print pages with unintelligible characters or the same page over and over again.
- Invalid Printer Settings: If the printer settings are incorrect, such as the number of copies to print or an incorrect paper size, this can cause the mentioned issues.
- Printer problem: If a part of the printer (e.g. a sensor), is damaged or malfunctioning it can causing the printer to repeat printing the same page.
This tutorial several methods to stop a printer from printing pages repeatedly on Windows 10/11.
How to fix: Printer Continuously Prints Blank Pages or the Same Page on Windows 11/10/8 or 7 OS.
Method 1. Cancel Printer Jobs & Unplug Printer.
1. Go to Control Panel > Device and Printers.
2. Right-click on your printer and select See what’s printing.


3. Select all the pending jobs and from the Document menu choose Cancel.


4. Then, turn off the printer and unplug it from its power source and from your PC from 1 minute.
5. Restart your PC.
6. Finally reconnect the printer on your PC, power it on and try to print.
Method 2. Reset Print Spooler Service (Print Queue).
The second method to stop the printer from printing pages is to reset the print spooler service. To do that:
1. Press Windows ![]()
![]() + R keys to open the run command box.
+ R keys to open the run command box.
2. In the Search box, type: services.msc & click OK.


3. In Services panel, right-click on Print Spooler service and click Stop.


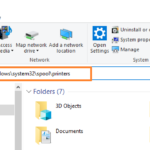
4a. Without closing the Services window, open File Explorer, copy – paste the following address in the address bar and press Enter.
- C:Windowssystem32spoolprinters


4b. Press CTRL + A to select all files and then press Delete to remove all of them.
5. When done, go to Services panel, right-click on Print Spooler service and click Start.


6. Then navigate to Windows Control Panel > Device and Printers.
7. Right-click on your printer and select Printer properties.


8. Finally, Print a Test Page and see if the problem persists. If yes, continue to method-3.


Method 3. Reset Printer Settings.
1. Navigate to Windows Control Panel > Device and Printers.
2. Right-click on your printer and select Printer properties.
3. On General tab, select Preferences


3. At Main & More Options tabs, click the Restore Defaults button and then click Apply.


4. After that, ensure that the Document Size is A4 and click OK


5. Print a test page and see if the problem persists. If yes, open the Printer Properties again and at the Ports tab, disable the bidirectional support. Then click OK and print a test page again. If the problem persists or if the printer doesn’t print, cancel the pending job, re-Enable the bidirectional support and continue to next method.


Method 4. Remove and re-install the Printer Drivers.
1. Navigate to Control Panel > Programs and Features and Uninstall printer’s software. After uninstall, restart your PC and continue below.


2. Navigate to Control Panel > Device and Printers.
3a. Right-click on your printer and select Remove Device.


3b. Click Yes to confirm your decision.


4. When the removal is completed, click on any other Printer device (e.g. on “Microsoft Print to PDF”), and then click Print server properties in the menu bar.


5. In Print server properties window select the Drivers tab and then select and Remove all the drivers associated with the printer.


6. When done, unplug or power off your printer and restart your PC.
7. Finally, go to your printer manufacturer’s support site to download the latest driver/software for your printer, then install it!
That’s all folks! Which method worked for you?
Please leave a comment in the comment section below or even better: like and share this blog post in the social networks to help spread the word about this solution.


