If you receive the following error message when you try to check for new updates on Windows 10: “There were some problems installing updates, but we”ll try again later. Error: 0x8e5e03fa”, continue reading below to fix the problem.
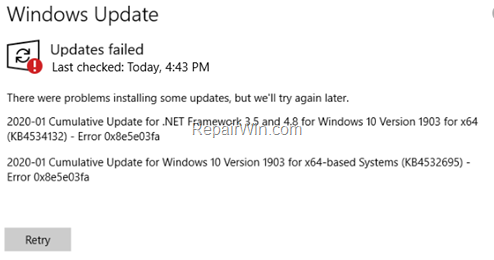
This tutorial contains instructions to resolve the Windows 10 Update problem 0x8e5e03fa: “There were some problems installing updates, but we”ll try again later. Error 0x80070424”.
How to Solve Error 0x80070424 in Windows 10 Update.
Nội dung
Method 1. Scan your computer for viruses.
Important: Many viruses or malicious programs can cause problems with Windows update. So before you continue to the troubleshooting steps below, use this Malware Scan and Removal Guide to check and remove viruses or/and malicious programs that may be running on your computer.
Method 2. Check if the Windows Update Service is Running.
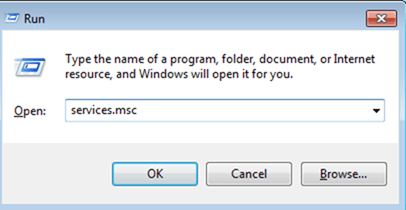
1. Open Windows Services control panel: To do that:
- Press Windows
 + R keys to open the run command box.
 - In the Search box, type: services.msc & click OK.
- (Accept the UAC warning if appears).
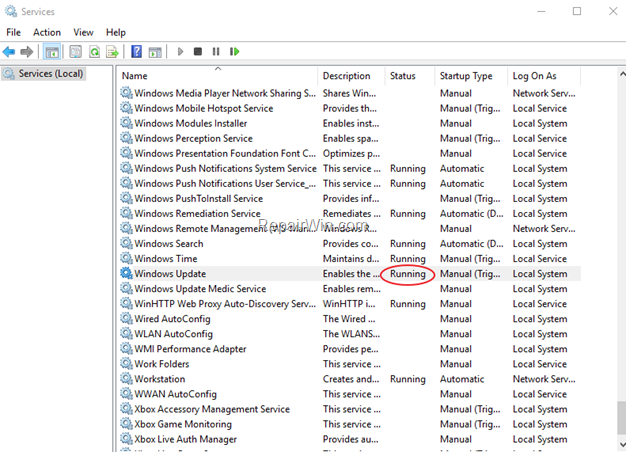
2. At the right-pane make sure that the ‘Status’ of following services is Running. *
- Background Intelligent Transfer Service (BITS)
- DCOM Server Process Launcher
- Remote Procedure Call (RPC)
- Windows Defender Firewall
- Windows Update
* Note: If any of the above services is not running then:
a. Right-click on the service and choose Properties.
b. At General tab, set the Startup type to Automatic.
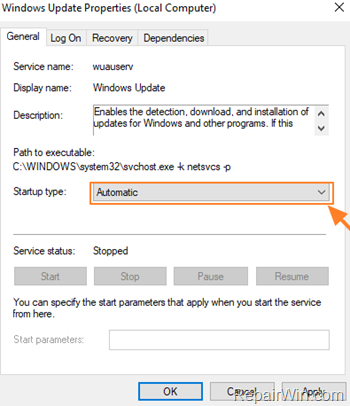
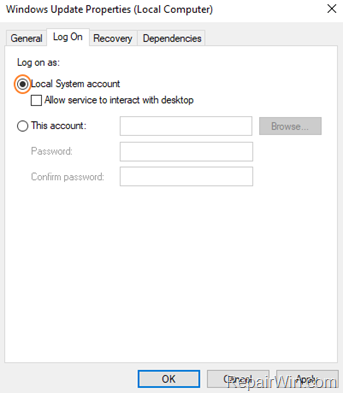
c. At Log On tab make sure that the Local System Account is checked.
d. Hit OK to apply changes.
3. Restart your computer.
8. After restart, check that the above mentioned services are up and running.
8. Proceed and Check for Updates. If you still receive the error 0x80070424 on Windows Update, then continue to the next step.
Method 3. Delete the SoftwareDistribution Folder.
Step 1: Stop Windows Update Service.
1. Open Windows Services control panel: To do that:
- Press Windows
 + R keys to open the run command box.
 - In the Search box, type: services.msc & click OK.
- (Accept the UAC warning if appears).

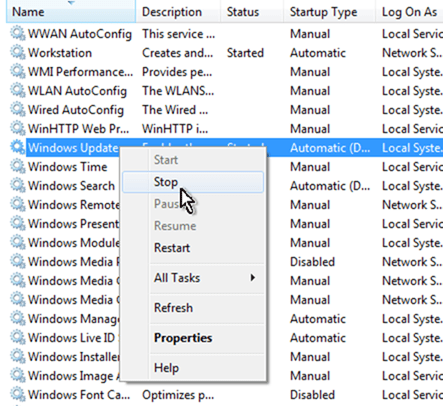
2. In Services control panel locate the Windows Update service.
3. Right-click on Windows Update service and select “Stop”.
Step 2: Delete the SoftwareDistribution folder.
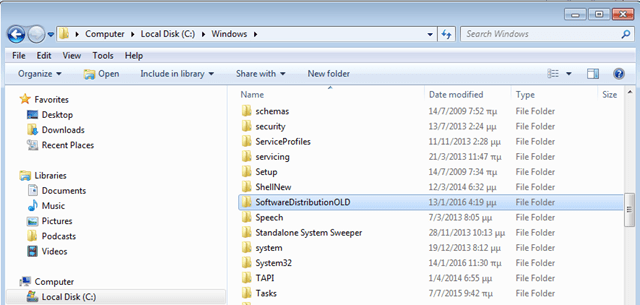
1. Open Windows Explorer and navigate to: C:Windows folder.
2. Find and Delete the “SoftwareDistribution” folder (or rename it. e.g. to “SoftwareDistributionOLD”) .
Step 3: Start Windows Update Service.
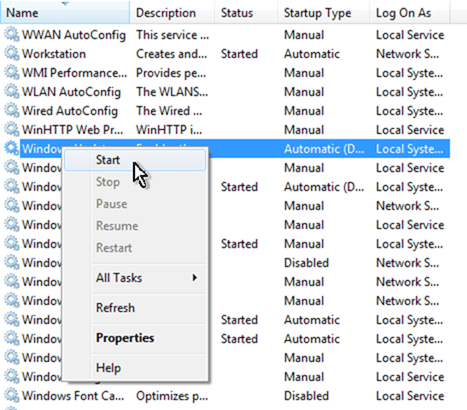
1. Now go back to Windows Services control panel:
2. Right-click on Windows Update service and select “Start”.
3. Try to check for Updates again.
Method 4. Repair Windows Component Store & System Files.
1. Open Command Prompt as Administrator.
2. In command prompt give the following command and press Enter:
- DISM /Online /Cleanup-Image /StartComponentCleanup
![image_thumb[6] image_thumb[6]](https://qnet88.com/wp-content/uploads/2021/12/image_thumb6_thumb-9.png)
3. When the process is completed, give the following command:
- DISM.exe /Online /Cleanup-image /Restorehealth

4. When the DISM operation is completed, type the following command and hit Enter:
- sfc /scannow

5. Now wait until the System File Checker repairs the Windows System Files.
6. When this done, restart your computer and check for updates.
* Note: If the Windows Update Error 0x8e5e03fa still persists:
- Ensure that you have the correct Date/Time on your PC.
- Ensure that you have enough free space on your disk. Run Disk Cleanup and delete all the useless files.
- Download and install latest Servicing Stack update according your Windows 10 version.
- Temporarily uninstall any non-Microsoft Antivirus/Security software and try to re-download the update(s)
That’s all folks! Which method worked for you? Please leave a comment in the comment section below or even better: like and share this blog post in the social networks to help spread the word about this solution.
Bài liên quan
- FIX: Error 0x81000203 in System Restore. (Solved)
- Cannot Access Shared folder. User has not been granted the requested logon type at this computer. (Solved)
- FIX: Cannot clear TPM – 0x80284001, 0x80290300 or 0x80290304.
- Unable to Schedule Teams Meeting in 15 or 10 minutes slots (Solved)
- How to Share Folder without Username/Password on Windows 10/11.
- FIX: Thunderbird High CPU or Memory Usage issues.

