In a previous tutorial I mentioned the way to backup your personal files with File History in Windows 10. In this tutorial I will show how to automatically create Shadow Copies of your personal files by using the Task Scheduler. The Shadow Copies of your files, will allow you to revert a specific file or folder to an earlier version (point in time).
The Shadow Copy feature first introduced in Windows Server 2003 and then added to Windows Vista and 7 versions, as a part of the System Restore feature. The ‘Shadow copy’ process, can take backup copies and snapshots of the current system state and personal files, even if in use. The process of recovering files from the Shadow Copies is more commonly known as “Restore previous versions”.
How to Daily Create a Shadow Copy of your Files in Windows 10. *
* Notes:
1. By using the instructions below, you will be able to create daily Shadow Copies (snapshots) of the entire volume “C:”. (Windows System Files and personal data)
2. The Shadow Copies can be used to restore your files to an earlier point in time, by using the ‘Restore previous version’ feature, or by using a third-party utility that can access the Shadow Copies, like the ShadowExplorer or the ShadowCopyView.
3. The Shadow copies cannot be used to restore your system to an earlier point in time, by using the System Restore tool. If you want to be able to restore your system by using the System Restore, then proceed and Turn on the System Restore protection.
4. Finally, keep in mind, that the created Shadow Copies, it is not a reliable backup, because the ‘Shadow Copies’ are stored on your main drive C:, and if the drive fails you ‘ll lose all your data. To create a reliable backup of your data, read the instructions in this article: How to Backup Personal Files with File History in Windows 10.
To Create Previous Versions of your Personal Files by Using Shadow Copies:
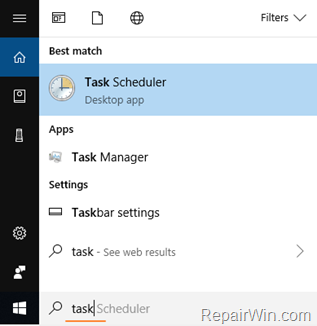
1. Open Task Scheduler. If you don’t know how to do that, then…
1. At the search box type Task or Task Scheduler.
2. Open the ‘Task Scheduler’ from the search results.
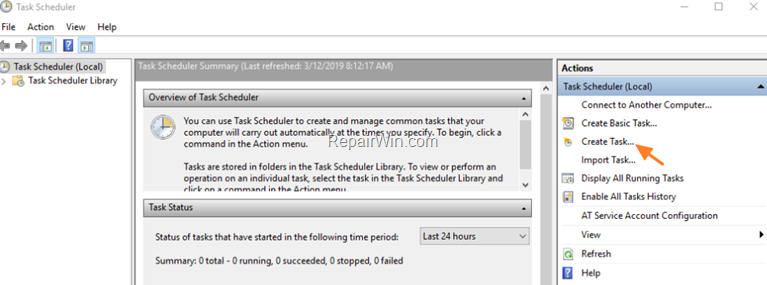
2. At Task Scheduler click Create Task.
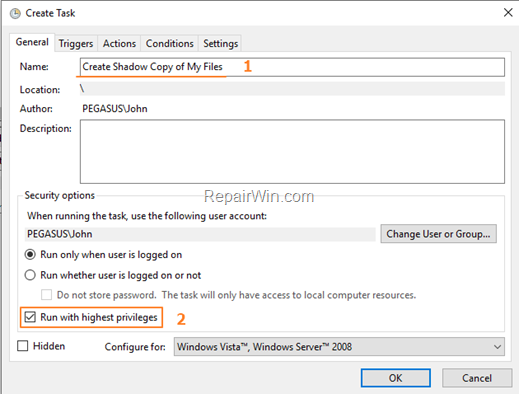
3. At General tab:
1. Type “Create Shadow Copy of My Files” as the name of the task.
2. Check the Run with highest privileges box.
Note: If you want to start the task in the background then place a dot at Run whether user is logged on or not option and then type your login password.
4. Then select the Triggers tab and click New.
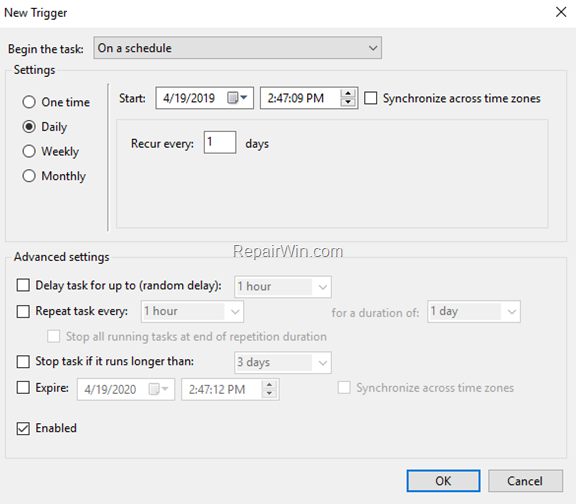
4a. At ‘New Trigger’ window, specify how often to create a snapshot of your files and click OK.
5. Then select the Actions tab and click New.
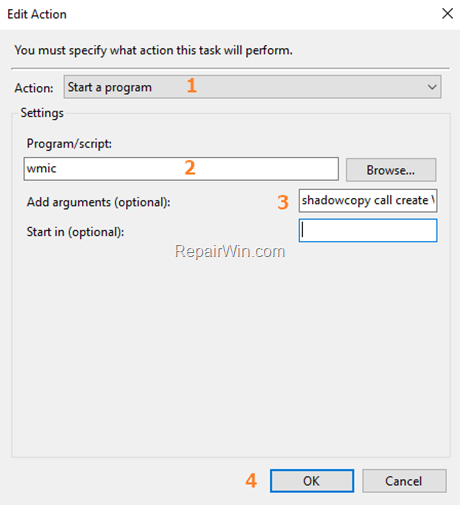
5a. At the ‘New Action’ window:
1. Select Start a program.
2. At ‘Program/script’, type: wmic
3. At ‘Add arguments (optional)’ filed type:
- shadowcopy call create Volume=C:
4. When done, click OK.
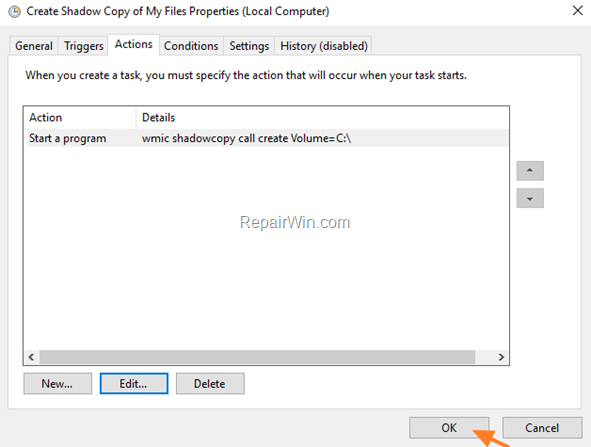
6. Click OK again to close the Scheduled task’s properties.
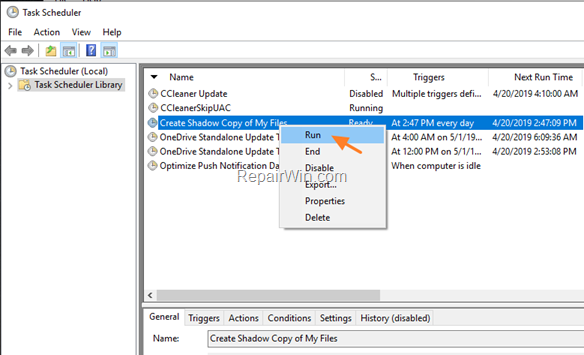
7. To create your first backup, right click on the task and select Run.
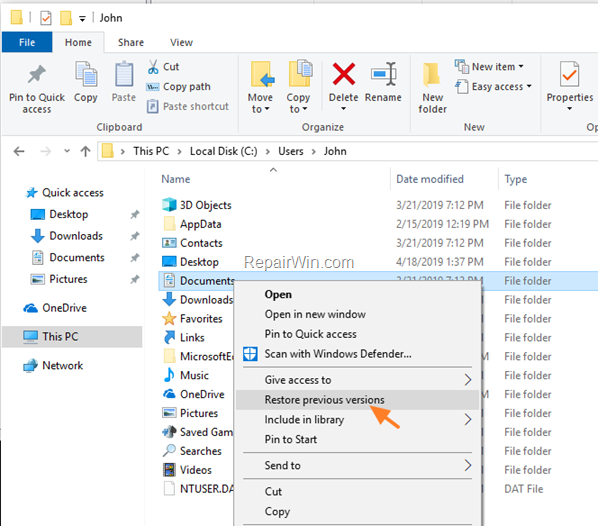
8. You ‘re done! From now on, whenever you want to restore a file/folder to its previous version, right click on it and select Restore previous versions.
Useful info:
1. The maximum allocated space that can be used to store the shadow copies is the amount of space that System Restore might use to store to Restore Points.
2. To find out the used and the maximum allocated storage space for the Shadow copies, give this command in Command Prompt (Admin):
- vssadmin list shadowstorage
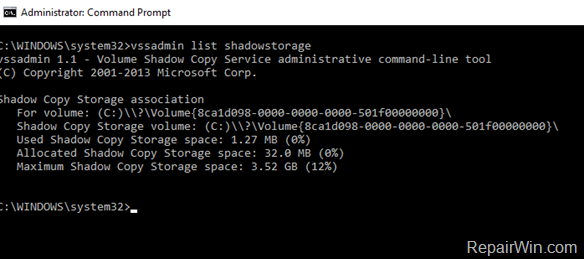
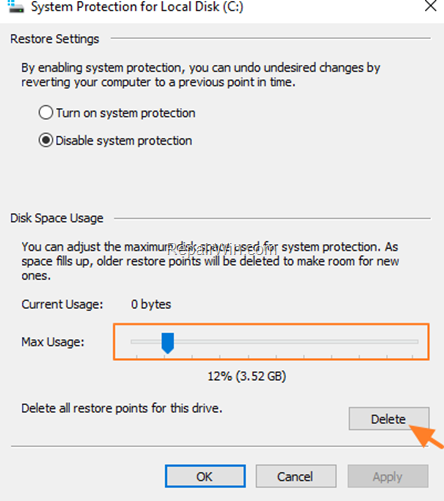
3. To modify the max allocated space for the Shadow Copies and the System Restore Points, navigate to the System Protection settings for the Local Disk (C:)
4. If you want to delete all the saved shadow copies, you have to erase also the saved restore points. If you want to do that, click the Delete all restore points button in System protection settings.
That’s all! Did it work for you?
Please leave a comment in the comment section below or even better: like and share this blog post in the social networks to help spread the word about this solution.

