.single .post-author, .post-date {
text-transform: none;
}
,
Last updated: November 22nd, 2023
Like Windows 10, S mode in Windows 11 (also known as “Windows 11 S”), is a special version of Windows that aims to “keep” your computer more secure by not allowing you to run third-party applications that they’re not verified from the Microsoft Store or to open critical Windows tools such as the Registry Editor or the Command Prompt.
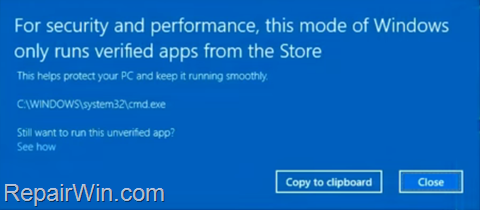

More specifically, when you run Windows 11 in S Mode, you will receive the following message when you try to install a third-party application or when you try to open the registry editor (regedit.exe): “For security and performance, this mode of Windows only runs verified apps from the Store“.
Because running Windows in S Mode makes the life of users difficult due to the above limitation, in this guide will show you how to disable Windows 11 S Mode so that you can run and install any application without restrictions.
How to Exit from S Mode in Windows 11.
There are two (2) methods you can use to disable S Mode in Windows 11. The first method requires the use of a Microsoft account and the second does not. Both are listed below:
- Exit from Windows 11 S Mode with a Microsoft Account.
- Turn Off Windows 11 S Mode without a Microsoft Account.
Method 1 Switch Out of Windows 11 S Mode with a Microsoft Account.
The first method to switch from Windows 11 S to Windows 11 Home, is to use a Microsoft Account* in order to get an small app from Microsoft Store, that disables the S mode on your device.
* Note: If you don’t own an MS account, proceed and create one from here.
1. From the Start menu, open Settings.
2. Select System on the left and click Activation on the right.
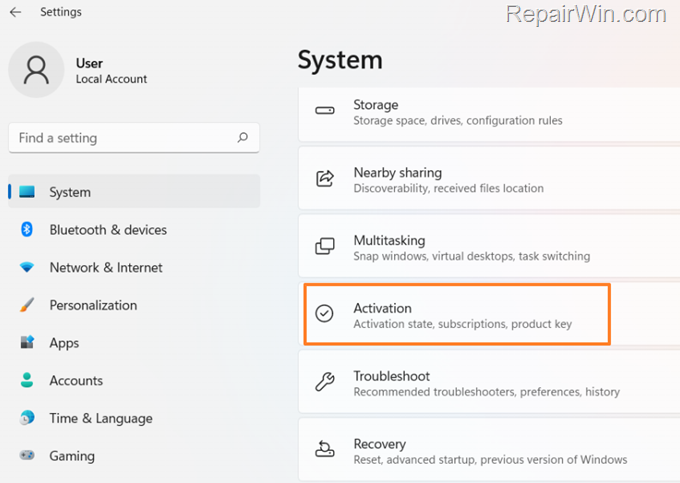

3. Click S mode and then click Open Store.
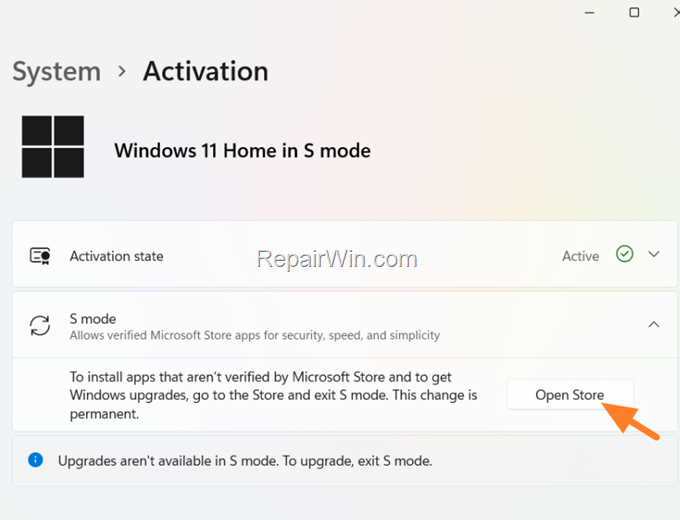

4. Click the Get button.


5a. Now type your Microsoft Account username (email) and click Next.
5b. Then, type the password for your Microsoft Account and click Next.
6. After a few seconds you’ll be informed that “you have switched out from S Mode and can now install apps from outside the Store”. Close the window and you done!


Method 2. Disable Windows 11 S without a Microsoft Account.
If you don’t want to use or to create an MS account to exit from Windows 11 Home in S mode, then just disable “Secure Boot” in BIOS to switch to Windows 11 Home. To do that:
1. From the Start menu, open Settings.
2. Select Windows Update on the left and click Advanced Options on the right.
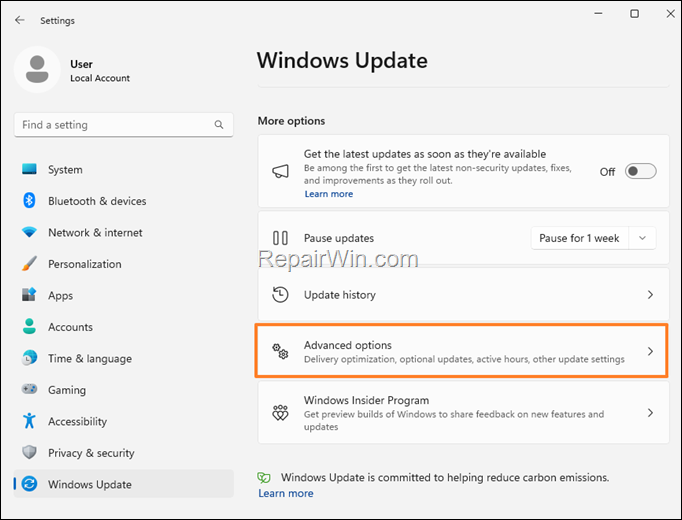

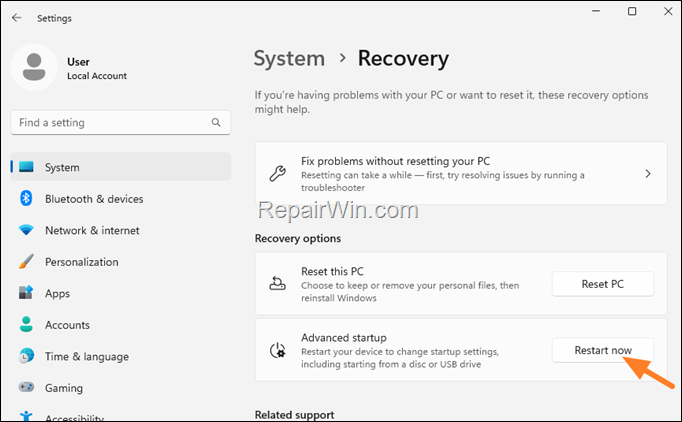
3. Now, click Recovery and then Restart now.

4. After reboot, click Troubleshoot > Advanced Options > UEFI Firmware Settings.
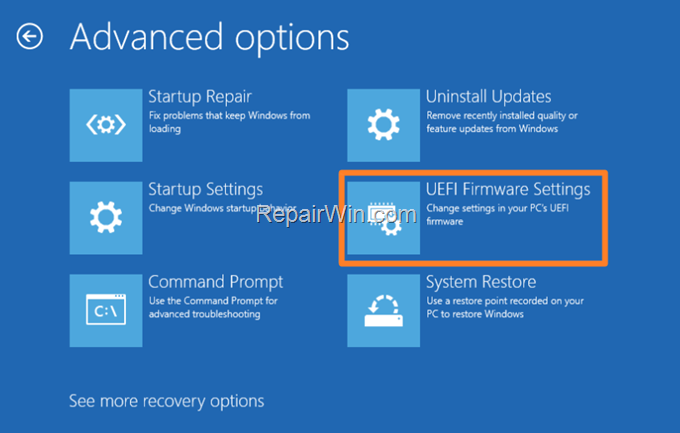

5. After a few seconds, you’ll enter in BIOS setup menu. *
* Note: On some laptops, you will be prompted to press a corresponding key on your keyboard to enter in the BIOS (e.g. DEL or F1 or F2 or F10). If so, press the related key.
6. In BIOS menu, go to Security or in Advanced Settings or in Boot Options menu to find the Secure Boot option ad set it to Disabled.
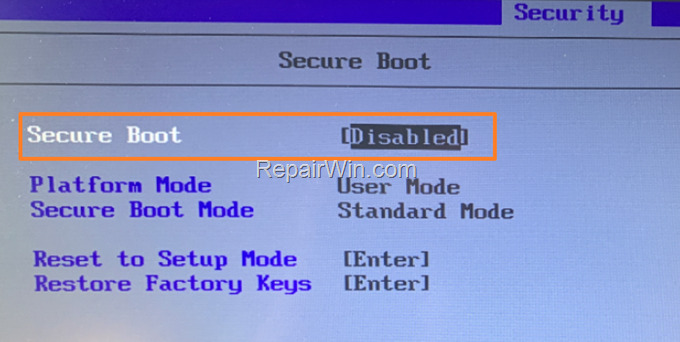

7. When done, Save and exit from BIOS settings.
8. After entering in Windows the S Mode will be disabled.
That’s all folks! Did it work for you? If so, by what method?
Please leave a comment in the comment section below or even better: like and share this blog post in the social networks to help spread the word about this problem.

- Author
- Recent Posts
- How to Disable Windows 11 S Mode with or without a Microsoft Account. – November 22, 2023
- FIX: KB5031354 fails to install – 0x800F081F on Windows 11 (Solved) – November 20, 2023
- How to Stop Adobe Acrobat DC Updates. – November 15, 2023


