Sometimes Microsoft Word may not work properly due to user modifications or changes made by other programs. In these cases, the easiest way to restore Word functionality is to reset it to the factory default settings.
In this tutorial, you will find detailed instructions on how to reset Word to default settings in order to remove any modifications made by you or others.
How to Restore Word Default Settings.
Step 1. Delete the “Normal” Template.
The first method to restore the word settings is to delete all the modifications that have been made and stored in the Normal.dot template.
1. Close Microsoft Word.
2. Press Windows ![]() + R keys to open the run command box.
+ R keys to open the run command box.
3. Type %appdata%MicrosoftTemplates and press Enter.

4. Find and delete the Normal.dotm file.
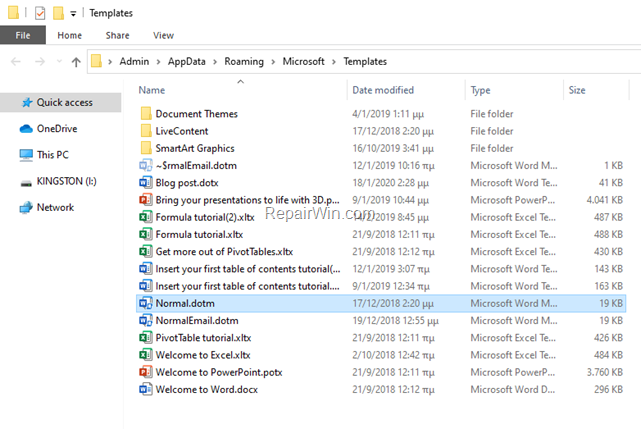
5. Now open Word and check if the problem, is solved. If not, continue to step 2.
Step 2. Reset Word settings in Registry.
Like many programs, Word saves all settings and modifications made in the registry. To remove the stored Word Settings from Registry in order to force Word to load with the default settings, proceed as follows:
1. Close Word.
2. Press Windows ![]() + R keys to open the run command box.
+ R keys to open the run command box.
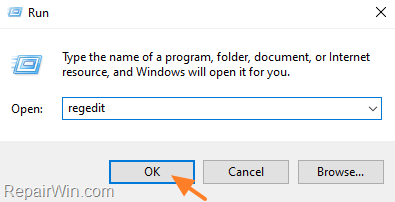
3. Type regedit and press Enter.
4. In Registry Editor navigate to the following key, according your Office version:
- Word 2007: HKEY_CURRENT_USERSoftwareMicrosoftOffice12.0Word
- Word 2010: HKEY_CURRENT_USERSoftwareMicrosoftOffice14.0Word
- Word 2013: HKEY_CURRENT_USERSoftwareMicrosoftOffice15.0Word
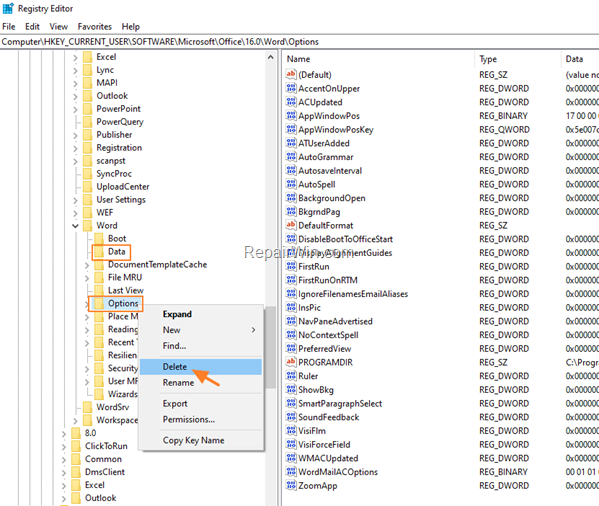
- Word 2016, 2019 & Office 365: HKEY_CURRENT_USERSoftwareMicrosoftOffice16.0Word
5. Finally, expand the Word key and select and delete these subkeys:
- Data
- Options
* Note: When prompted click Yes to confirm your decision. (this will force Word to recreate the “Options” registry key at the next run with the default settings)
6. Close the Registry Editor.
7. Open Word and you’re done.
Step 3. Uninstall & Re-Install Microsoft Office.
The final method, to fix Word problems is to completely uninstall and reinstall Office on your PC.
1. Download the Microsoft Support and Recovery Assistant (SARA) utility.
2. When the download is completed double click to run the SetupProd_OffScrub.exe application.
3. Click Install to install the SARA utility.
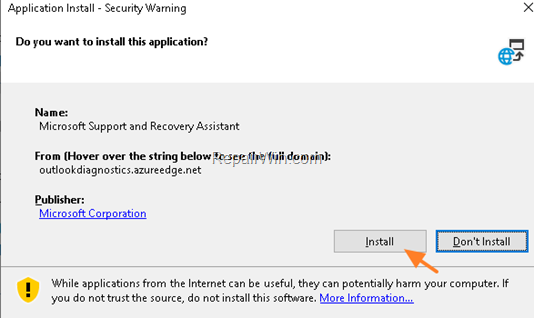
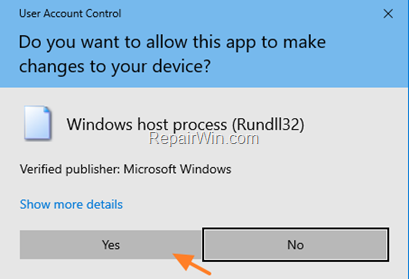
4. When the installation is completed, click Agree and then click Yes.
5. Wait until the ‘Microsoft Support and Recovery Assistant’ troubleshooting the issue.
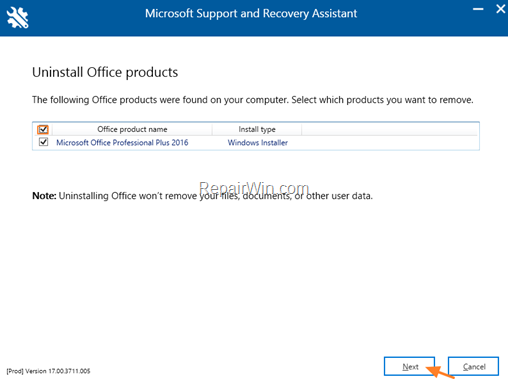
6. Select the checkbox, at the left of the Office product name to select all the installed Office products and click Next.
7. Now wait until the Office removal process is complete and when this is done, restart your computer.
8. After restart, proceed and reinstall Office by following the instructions from these links:
- Office 365
- Office 2019
- Office 2016
- Office 2013
That’s all folks! Did it work for you?
Please leave a comment in the comment section below or even better: like and share this blog post in the social networks to help spread the word about this problem.

