If you receive the Windows Update error 0x80070103 while trying to install updates on your Windows 10 PC, continue reading below to solve the problem.
Error 0x80070103 in Windows 10/11 usually occurs because Windows Update is trying to install a device driver that is either already installed or incompatible with the device. The error may disappear after a few days, or you can fix it immediately with the instructions on this guide.

This tutorial contains instructions to solve Windows Update install error 0x80070103 on Windows 10/11.
How to FIX: Windows Update Error 0x80070103 in Windows 10/11.
Method 1. Prevent the Update from Installation.
The first method to resolve update error 0x80070103 is to hide the update to prevent it from installing.
1. Download the Microsoft Show or Hide Updates Troubleshooter from MajorGeeks *
* Note: The tool is no longer available from Microsoft.
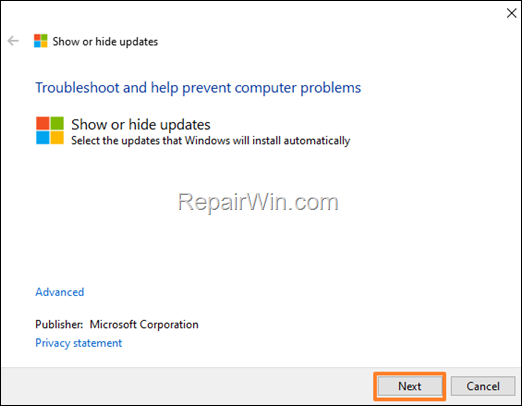
2. Run the Show or hide updates tool and select Next at first screen.
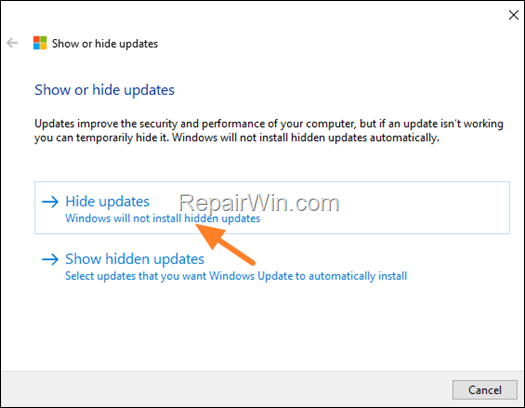
3. At the next screen choose Hide Updates.
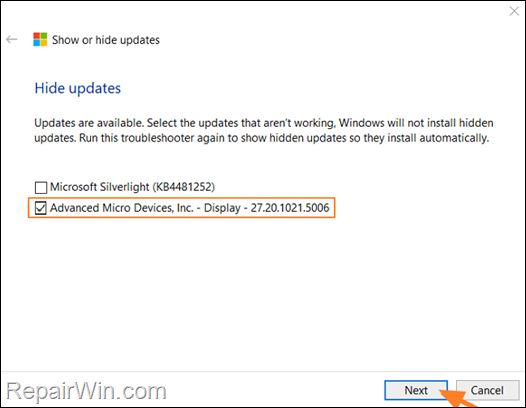
4. Select the driver update that causes the error 0x80070103 and click Next.
5. Wait until the troubleshooter applies the appropriate changes on your system and then click Close.
6. Navigate to Windows Update options and click Check for Updates.
Method 2. Re-Download the Windows Update(s).
Another effective solution the Windows 10/11 update install error 0x80070103, is to force Windows to download the updates from scratch. To do that:
Step 1: STOP the Windows Update Service.
1. Open Windows Services control panel: To do that:
- Press Windows
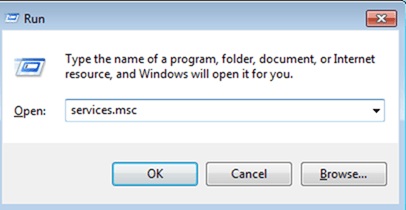
 + R keys to open the run command box.
 - In the Search box, type: services.msc & click OK.
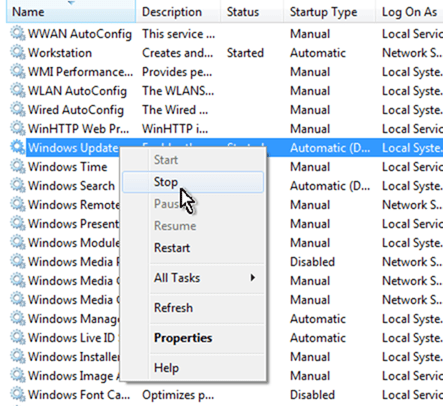
2. In Services control panel locate the “Windows Update” service.
3. Right-click on Windows Update service and select “Stop“.
Step 2: Delete the SoftwareDistribution folder.
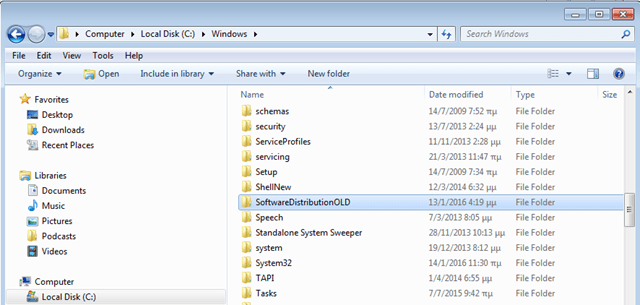
1. Open Windows Explorer and navigate to: C:Windows folder.
2. Find and Delete the “SoftwareDistribution” folder (or rename it. e.g. to “SoftwareDistributionOLD”) . *
* Note: If you cannot delete the folder, start Windows in Safe Mode.
Step 3: START the Windows Update Service.
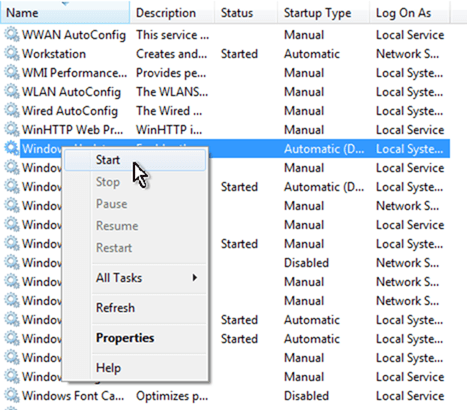
1. Open Windows Services control panel.
2. Right-click on Windows Update service and select “Start“.
Step 4. Check & Install Updates.
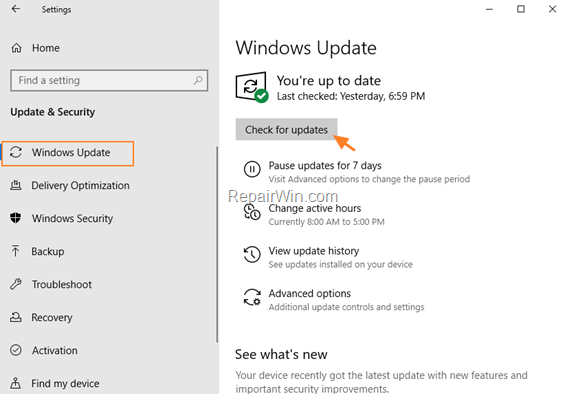
1. Go to Settings -> Update and Security -> and click Check for Updates.
Method 3. Update Windows 10 by using the Update Assistant
1. Navigate to Windows 10 download site and click the Update now button.
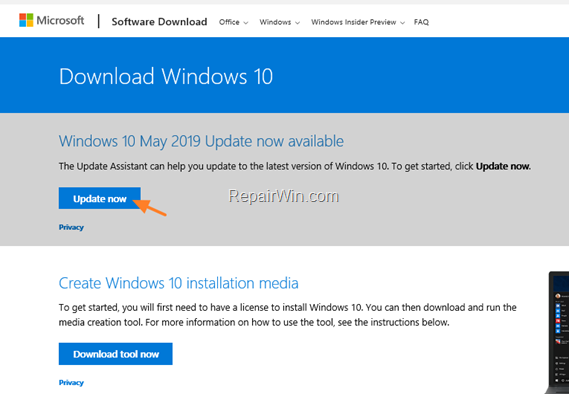
2. Save the “Windows10Upgrade9252.exe” file on your desktop.
3. Double click at the downloaded file to open the Windows Upgrade Assistant.
4. Click Update Now to start the update.
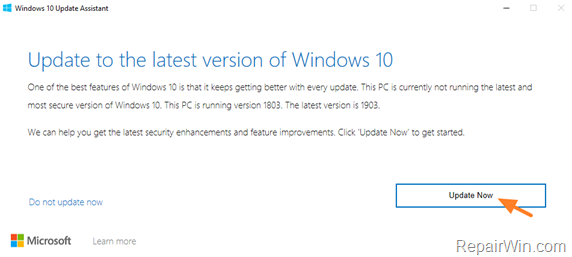
5. Let Windows to finish the downloading and the verification.
6. When the verification is reaches 100%, disconnect your computer from the Internet, (or set it to “Airplane mode” if you own a laptop).
7. Wait until Windows updating your system.
8. When prompted, restart your system to install the update.
That’s all! Did it work for you?
Please leave a comment in the comment section below or even better: like and share this blog post in the social networks to help spread the word about this solution.


