If you receive the error 0x800CCC78 in Outlook Send/Receive progress, continue reading below to fix the problem. Outlook 0x800CCC78 sending error usually occurs when the SMTP server authentication is invalid or occurs due to an invalid character in the recipient address.
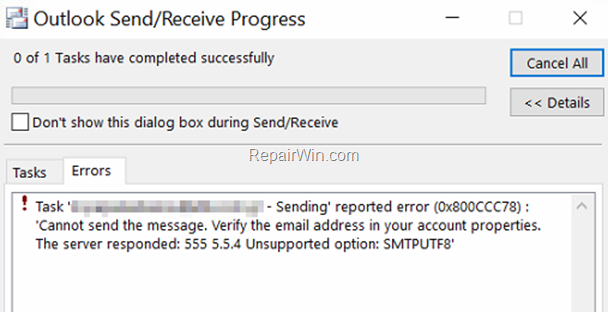
This tutorial contains instructions to fix the Outlook Sending reported error 0x800CCC78:
- Cannot send the message. Verify the email address in your account properties. The server responded: 5.0.0. Access denied, or…
- Cannot send the message. Verify the email address in your account properties. The server responded: 555 5.5.4 Unsupported option: SMTPUTF8 (parameter unrecognized).
How to FIX: Send/Receive error 0x800CCC78 in Outlook.
Method 1. Check Recipient’s Address.
First of all, ensure that the recipient’s email address is correct and doesn’t contain any special or unrecognized characters. Even better, delete and re-type the email address and try to send the email again. If the 0x800CCC78 error in send/receive persists, then continue reading below.
Method 2. Change SMTP Server’s Connection & Authentication Settings.
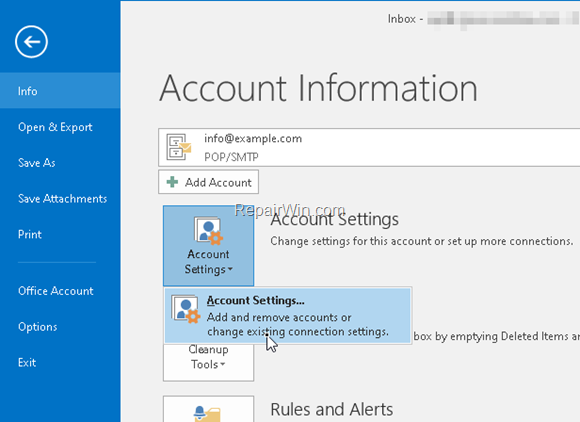
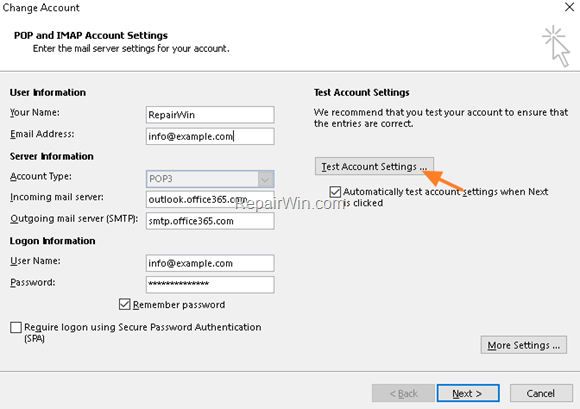
1. From the File menu, go to Account > Account Settings.
2. Double click on your email account and click More Settings.

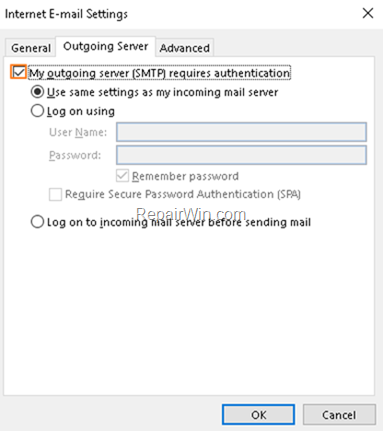
3. Click on the Outgoing Server tab and select My outgoing server (SMTP) requires authentication with the circle-box Use same settings as my incoming mail server selected.
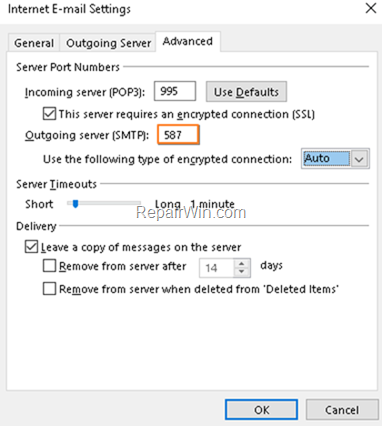
4. Now select the Advanced tab, and type the port number 587 for the SMTP server and select the Auto or the TLS encryption. When done, click OK. *
* Note: If the port is already 587, then change it to 465 and the encryption to SSL.
5. Finally, test the account settings and if the test is successful and error free, continue working.
Method 3. Repair Outlook PST File.
Proceed and repair the OUTLOOK.PST file, by using the instructions on this article: How to Repair Outlook Data files.
That’s all! Which solution worked for you?
Please leave a comment in the comment section below or even better: like and share this blog post in the social networks to help spread the word about this solution.
Bài liên quan
- FIX: Error 0x81000203 in System Restore. (Solved)
- Cannot Access Shared folder. User has not been granted the requested logon type at this computer. (Solved)
- FIX: Cannot clear TPM – 0x80284001, 0x80290300 or 0x80290304.
- Unable to Schedule Teams Meeting in 15 or 10 minutes slots (Solved)
- How to Share Folder without Username/Password on Windows 10/11.
- FIX: Thunderbird High CPU or Memory Usage issues.