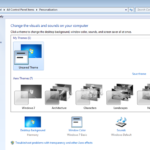
The following issue has occurred in a Windows 7 based computer: Windows changed to the basic theme and the user cannot change the theme because, when the personalization settings are opened, all of aero themes are greyed out. Instead of that, all the other settings in the personalization panel are enabled (Desktop Background, Windows Color, Screen Saver, etc.), expect to select a different theme.
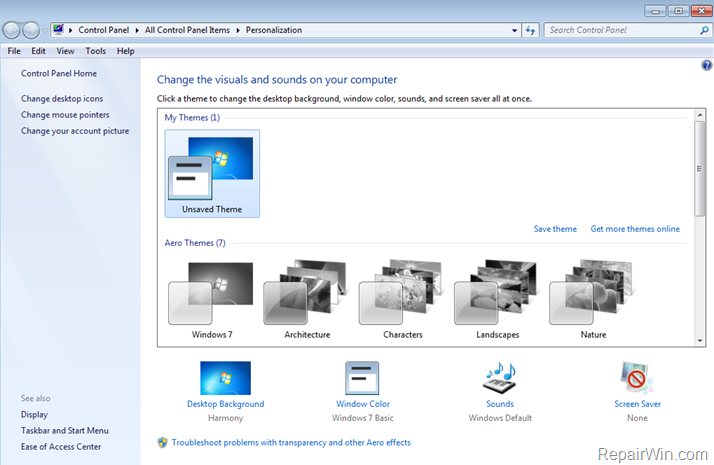
This tutorial contains instructions to fix the following problem in Windows 7: Theme cannot be changed – Themes Greyed Out.
How to FIX: Cannot Change Theme – Aero Themes are Greyed Out.
Method 1. Scan your system for Viruses and Malware.
The first step to resolve the problem “cannot change basic theme”, is to ensure that your system is virus/malware free. For that task follow the instructions in this guide: How To Scan Your Computer for Viruses and other Malicious Programs.
Method 2. Restart the Theme Service.
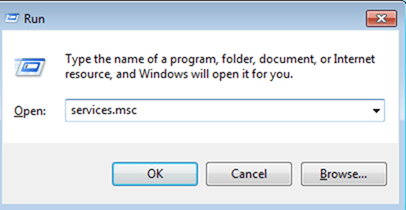
1. Open Windows Services control panel: To do that:
- Press Windows
 + R keys to open the run command box.
 - In the Search box, type: services.msc & click OK.
- (Accept the UAC warning if appears).
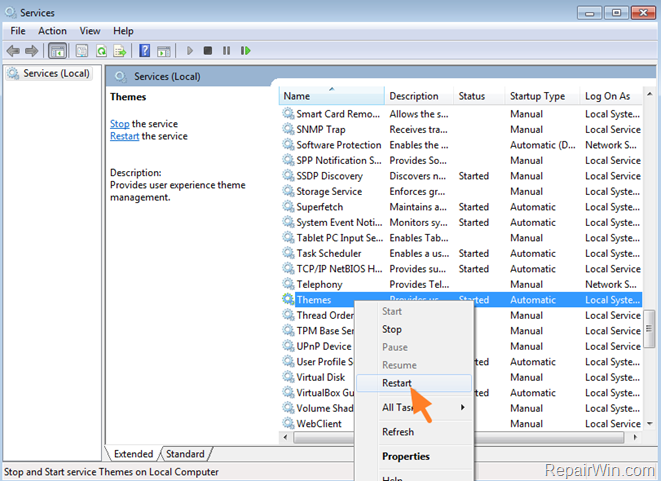
2. In Services control panel right click at the Themes service and choose Restart. *
* Note: If the service is Stopped then click Start.
Method 3. Enable Visual Styles on windows and buttons.
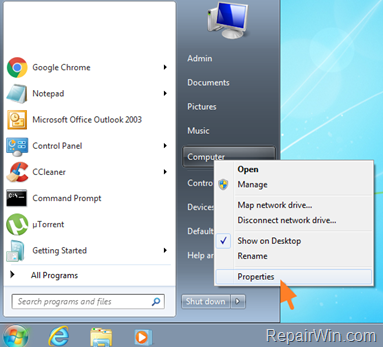
1. Click the Start button, right click on Computer and select Properties.
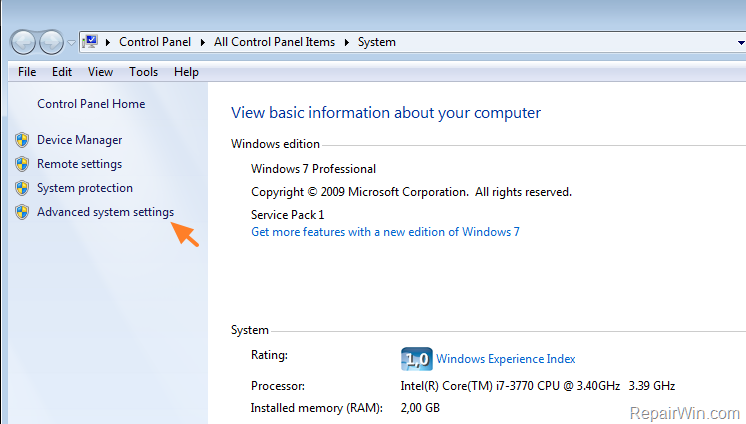
2. Click Advanced system settings on the left.
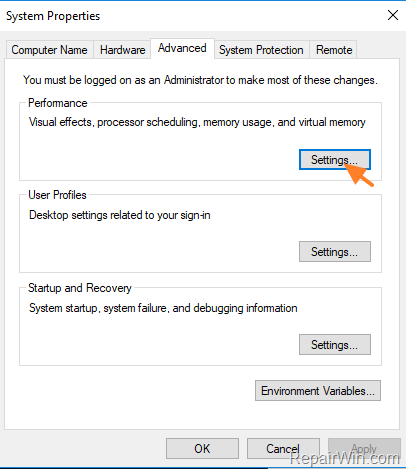
3. At ‘Advanced’ tab click Settings at ‘Performance’ section.
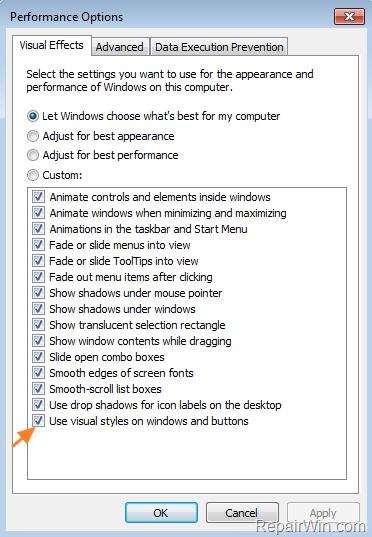
4. At Visual Effects tab, check the “Use visual styles on windows and buttons” option and click OK.
Method 4. Install the latest Display Drivers.
1. Navigate to Control Panel > Programs and Features and uninstall the currently installed VGA driver.
2. When the uninstall operation is completed restart your computer.
3. After restart navigate to your computer manufacturer’s support site to download and install the latest drivers for your graphics card. If you own a desktop or laptop* computer with an AMD/ATI or an NVIDIA VGA card, then follow the steps below to find, download and install the latest driver version for your display card.
* Note: If you cannot find the drivers from the below links, then navigate to your computer manufacturer support site.
For NVIDIA based GPU’s.
- Go to NVIDIA advanced driver search page and search for the corresponding driver for your display adapter.
- In the search results page download a previous driver version.
- Install the driver you downloaded and restart your computer.
For AMD based GPU’s.
- Go to AMD (ATI) Driver Download and search for the corresponding driver for your display adapter.
- In the search results page, press the Previous Drivers and Software link at the right.
- Install the driver you downloaded and restart your computer.
That’s all folks! Did it work for you?
Please leave a comment in the comment section below or even better: like and share this blog post in the social networks to help spread the word about this solution.

