The following issue may appear if you try to perform a clean installation or a repair upgrade of Windows 10 from an installation media: “It looks like you started an upgrade and booted from installation media. If you want to continue with the upgrade, remove the media from your PC and click Yes. If you want to perform a clean installation instead, click No”.
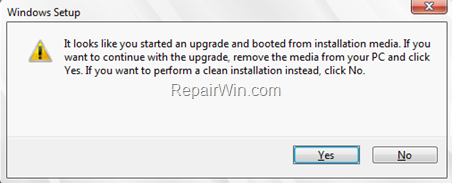
The above error message means that you have interrupted the Windows 10 upgrade once its started. As the message indicates, if you want to perform a clean installation of Windows 10, you have to select “No” to continue, otherwise, remove the installation media and click “Yes” to continue the Windows 10 upgrade.
In general, the above message isn’t a problem, but becomes a big problem if the Windows update fails to install or if Windows 10 stuck on loop after trying to install updates, and you want to repair the Windows 10 by booting from an installation media.
In this tutorial you ‘ll find detailed instructions, on how to bypass the “It looks like you started an upgrade and booted from installation media” message, by canceling the currently running update process of Windows 10, in order to perform a Windows 10 repair upgrade from the installation media.
How to Cancel Windows 10 Update in Progress if Windows Cannot Boot *
* Important: If you can boot to Windows 10, but you cannot install the update from the Windows environment, apply the following actions first:
1. Navigate to Start > Settings > Update and security and click “Restart Now”, to start the update process.
2. After the first restart, leave the “Working on updates” progress to go to 1-2%.
3. When this done, press the Power button for 10-15 seconds, to fully shut down your PC.
4. Plug the Windows installation media and Power On you PC.
5. Follow the rest steps below to cancel the update in progress.
Step 1. Cancel the Windows Update Pending Actions.
1. Boot your system from a Windows installation media.
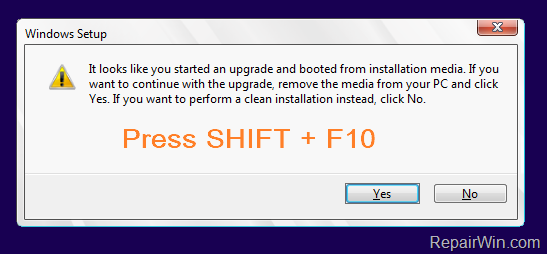
2. When the “It looks like you started an upgrade and booted from installation media…” message appears, press the SHIFT + F10 keys to launch command prompt.
3. At command prompt, get a list of all drives, on your system with this command:
- wmic logicaldisk get name
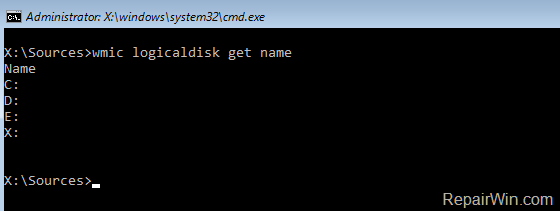
4. Then find out which drive contains the “Windows” folder, by typing this command: *
- dir DriveLetter:
* e.g. To see the contents of the C: drive, type: “dir C:” (without quotes). If you cannot see the “Windows” folder on the C: drive, then continue to the next drive letter (e.g. “dir D:”, “dir E:”, etc.), until you see the “Windows” folder on one of the listed drives (from the above command).
e.g.: As you can see at the screenshot below, the Windows folder (at this example) is located at the D: drive.]
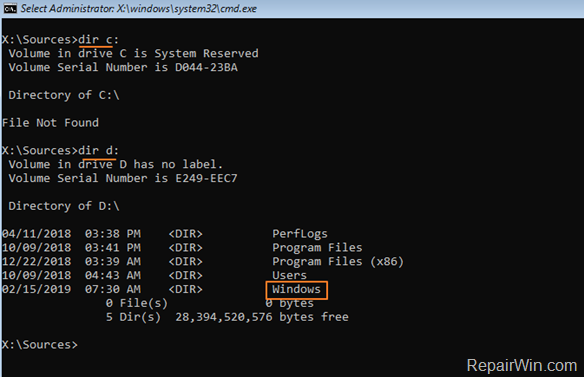
5. Once you find on which drive the “Windows” drive is located (e.g. at drive “D:” in this example), navigate to that drive by typing DriveLetter: + Enter.
6. Then create a scratch folder on the Windows drive by typing this command:
- mkdir D:Scratch

7. Then give the below command to revert the pending actions of the update in progress:
- DISM /Image:D: /ScratchDir:D:Scratch /Cleanup-Image /RevertPendingActions
* Note: Change the drive letter D according to your case.
8. Once the above DISM command is executed, you should receive the following message on screen:
“Reverting pending actions from the image….
The operation completed. Revert of pending actions will be attempted after the reboot.
The operation completed successfully.”

9. Close the command prompt window, remove the installation media and let Windows to boot normally.
10. After reboot, you should see the following message on your screen: “Undoing changes made to your computer.” When this process is end, Windows should start normally.

Step 2. Remove the Upgrade Files with Disk Cleanup.
After booting in Windows 10, you must prepare Windows 10 for the USB repair/upgrade, by deleting the already downloaded updates with the Disk Cleanup tool. To do that:
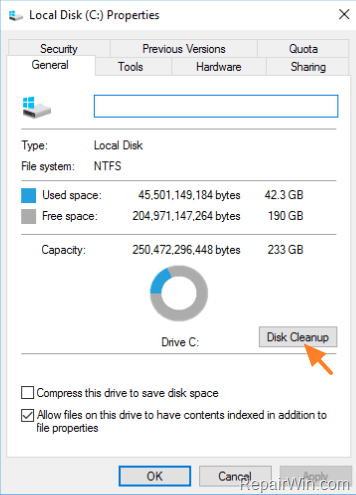
1. Open File explorer, right click on drive C: and select Properties.
2. Click the Disk Cleanup button.
3. Then click Clean up system files.
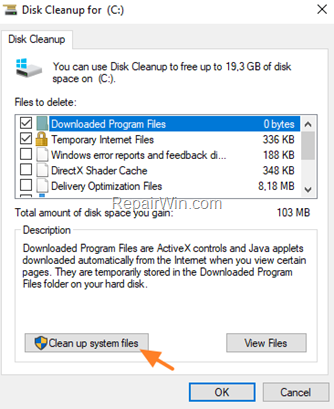
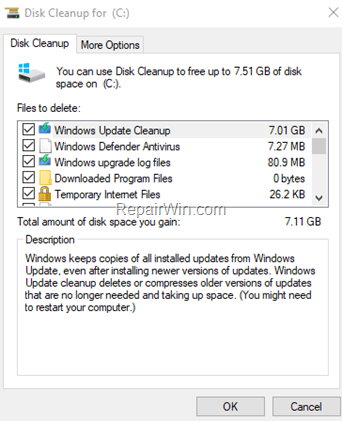
4. Now check to remove the following files and click OK:
- Windows Update Cleanup.
- Windows Defender Antivirus.
- Downloaded Program Files.
- Temporary Internet files.
- Previous Windows Installations.
- Recycle bin.
- Temporary Files.
- Temporary Windows Installation files
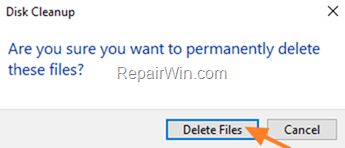
5. When asked, Delete files.
6. When the cleanup, is completed, close the disk properties and continue to the next step.
Step 3. Delete the ‘SoftwareDistribution’ Folder.
The “C:WindowsSoftwareDistribution” folder, is the location where Windows store the Windows Updates. Many times, this folder becomes corrupted and you must re-create it in order to re-download the updates from scratch. So, proceed as follows:
1. Stop the Windows Update Service: To do that:
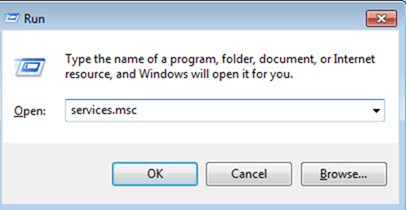
a. Press Windows
+ R keys to open the run command box.
b. In the Search box, type: services.msc & click OK.
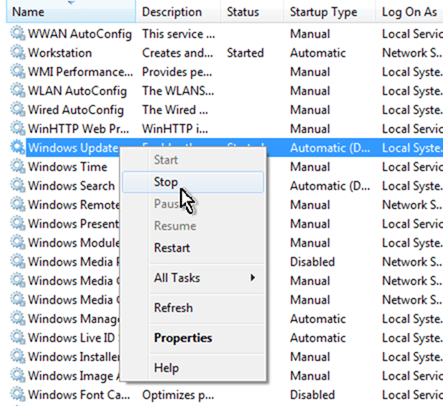
c. In Services control panel locate the “Windows Update” service.
d. Right-click on Windows Update service and select “Stop“.
2. Delete the SoftwareDistribution folder.
a. Open Windows Explorer and navigate to: C:Windows folder.
b. Find and Delete the “SoftwareDistribution” folder (or rename it. e.g. to “SoftwareDistributionOLD”) .
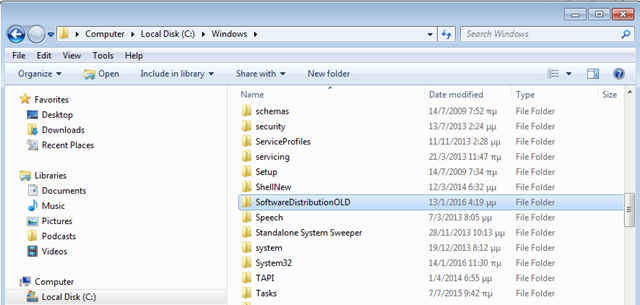
3. Restart your computer to apply changes.
Step 4. Upgrade Windows 10 from the installation media.
Now, you ‘re ready to repair-upgrade Windows 10 from an installation media. To do that:
1. Reboot your computer and boot from the Windows USB (or DVD) installation media.
2. At Windows Setup wizard, press Next and then click Install Now.
3. Accept the ‘License agreement’.
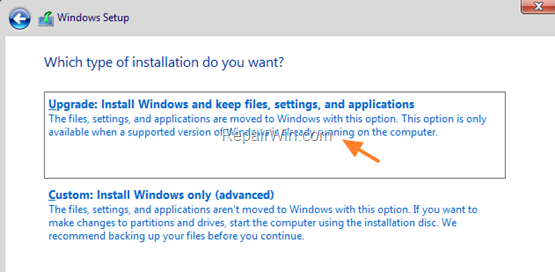
4. When asked, select Upgrade: Install Windows and keep files, settings, and applications.
5. Then follow the on-screen instructions to upgrade Windows 10.
That’s all folks! Did it work for you? Please leave a comment in the comment section below or even better: like and share this blog post in the social networks to help spread the word about this solution.

