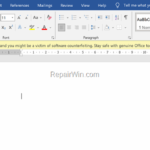
If you installed Microsoft Office 2019 or Office 2016 with a legit Office license and you receive the error “Office isn’t licensed properly and you might be a victim of software counterfeiting. Stay Safe with genuine Office today”, continue below to fix the issue.
The Office messages/errors “Cannot Verify License” & “Office isn’t licensed properly and you might be a victim of software counterfeiting”, commonly appears on computers without a legitimate Office License, or with a Office license obtained from a third-party seller and not Microsoft.
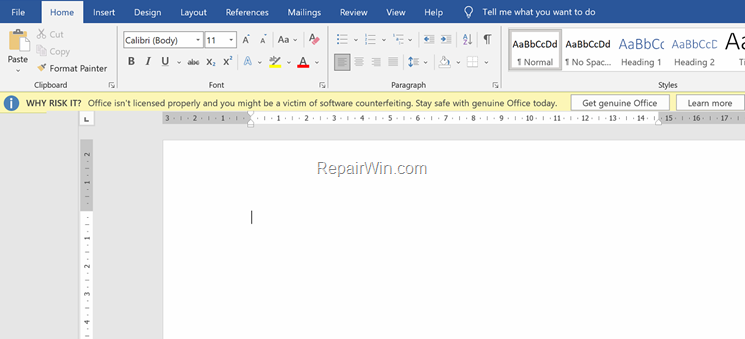
How to FIX: Cannot Verify License – Office isn’t licensed properly in Office 2016/2019.
If you have a valid Office 2016/2019 license obtained from Microsoft that was activated and working fine before, but now you see the message “Get Genuine Office” or “Cannot verify license for this product”, in any Office application (Word, Excel, Outlook, etc.), continue below to fix the problem.
Method 1. Run Office Applications in Compatibility Mode.
1. Close all Office applications.
2. Open Explorer and according your Office installation type, navigate to the corresponding folder below:
Office MSI-Based installation type:
- C:Program FilesMicrosoft OfficeOffice16
- C:Program Files(x86)Microsoft OfficeOffice16
Office Click-to-Run installation type:
- C:Program FilesMicrosoft OfficerootOffice16
- C:Program Files(x86)Microsoft OfficerootOffice16
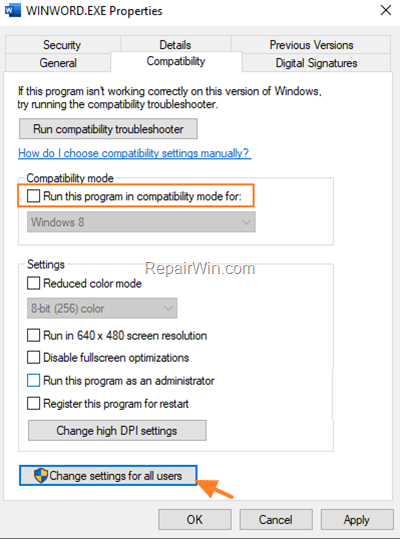
3. Locate and right click at the Office application displays the License error (e.g. Word > “WINWORD.EXE”) and choose Properties.
4. At Compatibility tab:
a. Uncheck the option Run this program in compatibility mode for
b. Click Change settings for all users.
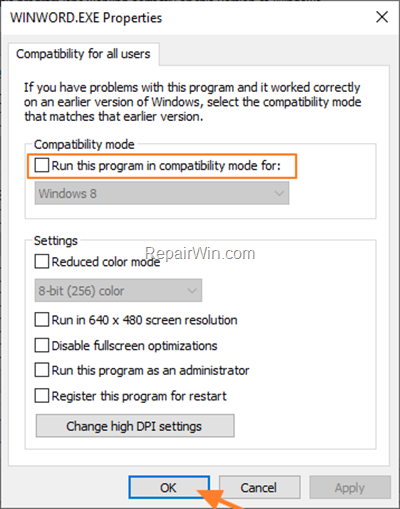
c. In Compatibility for all users options, uncheck the option Run this program in compatibility mode and click OK twice.
5. Now open the Office application and check if the problem persists.
Method 2. Repair Office Installation.
The second method to problems with MS Office’s license, is to repair Microsoft Office. To do that:
1. Close all Office applications.
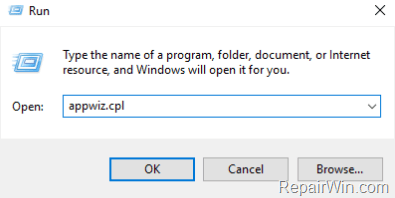
2. Navigate to Programs and Features. To do that:
1. Press simultaneously the Windows
+ R keys to open the run command box.
2. Type: appwiz.cpl and click OK.
3. In Programs and Features, select the Microsoft Office product that installed on your system and click Change.
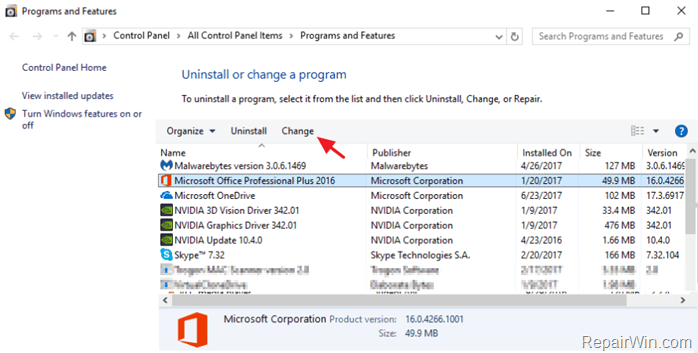
4. Finally click Repair and follow the rest steps to repair Microsoft Office. *
* Notice: If after clicking ‘Repair’, you receive the “How would you like to repair your Office Programs” screen, select the Quick Repair option, which checks and replaces the missing or corrupted files. If after the “Quick Repair”, the problems doesn’t fixed, then choose the Online Repair option to reinstall your Office product. (requires an Internet connection).
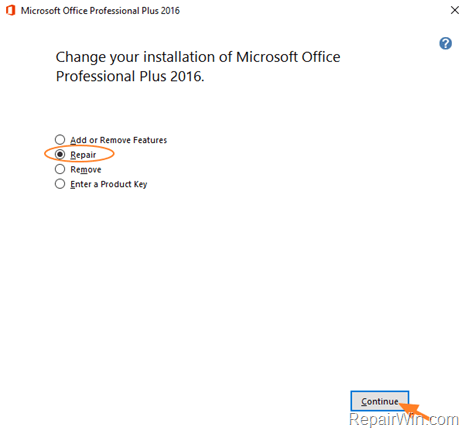
5. When the repair is completed, launch Office applications and check if the problem solved.
Method 3. Restore MS Office to Previous Version.
If the Office license problem, appears after updating MS Office, try the following:
1. Close all Office applications.
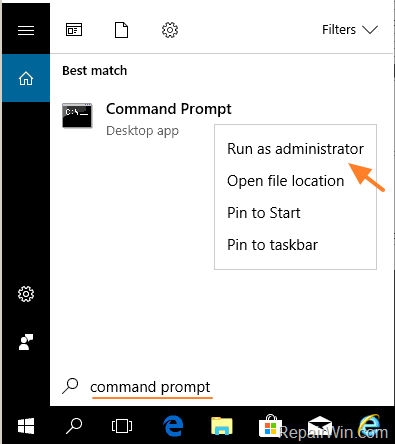
2. Open Command Prompt as Administrator. To do that:
- At the search box type: command prompt or cmd
- Right-click at cmd or Command Prompt result and select Run As Administrator.
3. At command prompt, type these commands in order (press Enter after typing each command)
- cd
- cd C:Program FilesCommon Filesmicrosoft sharedClickToRun
- officec2rclient.exe /update user updatetoversion=16.0.13628.20274

4. Wait 4-5 minutes for “Office Setup” process to update the required files.
5. When this is done, open any Office application and check if the licensed issue has been resolved. If yes, proceed and turn off the Office Updates, by doing the following:
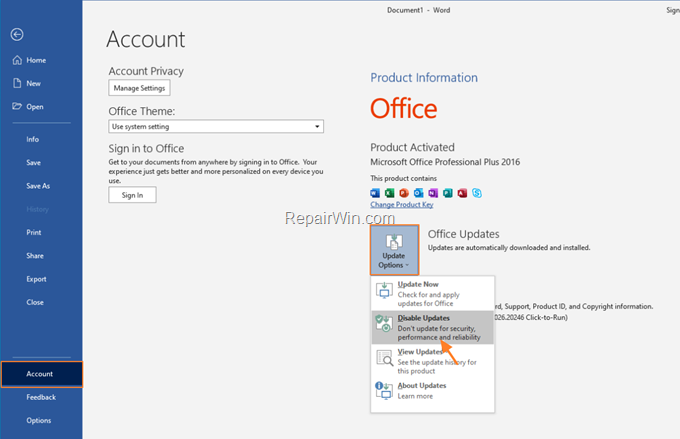
1. Open any Office application and go to File menu -> Account.
2. Click Update Options and Disable Updates.
Method 4. Remove & Reinstall Microsoft Office.
The final method to fix Office license issues, it completely uninstall all the installed versions of MS Office from your PC, and then to reinstall MS Office:
1. Download the Microsoft Support and Recovery Assistant (SARA) utility.
2. When the download is completed double click to run the SetupProd_OffScrub.exe application.
3. Click Install to install the SARA utility.
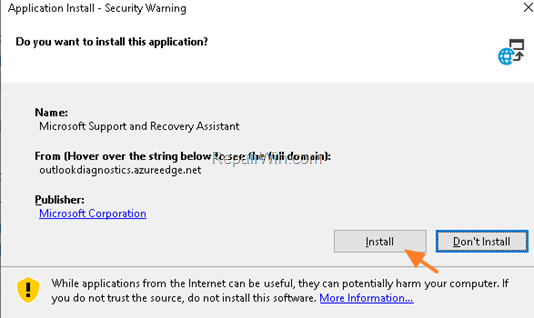
4. When the installation is completed, click Agree and then click Yes.
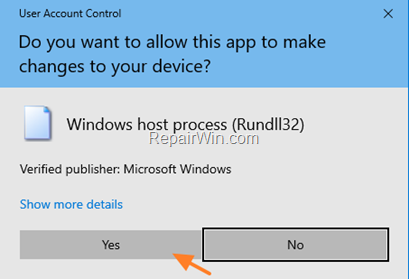
5. Wait until the ‘Microsoft Support and Recovery Assistant’ troubleshooting the issue.
6. Select the checkbox, at the left of the Office product name to select all the installed Office products and click Next.
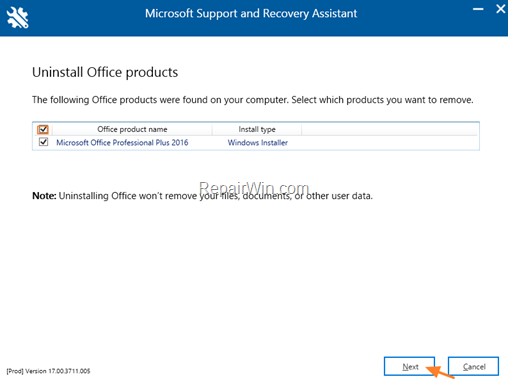
7. Now wait until the Office removal process is complete and when this is done, restart your computer.
8. After restart, proceed and reinstall Office by following the instructions from these links:
- Office 365
- Office 2019
- Office 2016
- Office 2013
That’s all folks! Did it work for you?
Please leave a comment in the comment section below or even better: like and share this blog post in the social networks to help spread the word about this solution.

