This article contains two methods, to get a list of all installed Programs and Store apps in Windows 10/11 on a CSV/TXT file.
Sometimes there is a need to note down all the installed programs and apps on your Windows 10/11 computer in order to reinstall them (e.g. after performing a clean installation of the operating system).
In Windows 10/11, you can see all installed programs in the Programs and Features section of the Control Panel, or in the Settings -> Apps -> Apps and Features section which also contains the Apps downloaded and installed from the Windows Store (also known as “Windows Store Apps ).


But, unfortunately, after all these years, Microsoft doesn’t offer an easy way to save to a list (e.g. to TXT/CSV file), all the installed programs and apps, so, I decided to write this tutorial to accomplish this task.
How to Generate a List of Installed Programs and Apps on Windows 10/11.
Nội dung
To export a list of all installed programs and Windows Store Apps, use any of the methods below. (If you don’t want to mess with PowerShell commands, use method two).
- PowerShell.
- Geek Uninstaller.
Method 1. View or Save a List of All Programs and Apps from PowerShell.
The first method to save a list of all programs and Storage Apps on your Windows 10/11 PC is by using PowerShell commands.
However, this method is a bit “complex” because Windows stores information* for each installed application in a different location in the registry depending on the program’s architecture (32 or 64-bit) or if it is an application from Windows Store. More specifically:
* Note: That information, contains the name of the program, the installation path, the publisher’s name, etc.
The information for 32-bit applications, is stored at the following location in Registry:
- HKEY_LOCAL_MACHINESOFTWAREMicrosoftWindowsCurrentVersionUninstall
The information for 64-bit applications is stored at the following location in Registry:
- HKEY_LOCAL_MACHINESOFTWAREWOW6432NodeMicrosoftWindowsCurrentVersionUninstall
Finally, the information for the Windows Store Apps is stored at the following registry location:
- HKEY_CURRENT_USERSOFTWAREClassesLocal SettingsSoftwareMicrosoftWindowsCurrentVersionAppModelRepositoryPackages
As you can understand from the above, to list all the installed Programs (32 & 64bit) and the Windows Store Apps, you need to run three (3) different PowerShell commands which are mentioned in the steps below
Step 1. Get a list of all the 32-bit programs listed in Programs and Features.
If you want to view or save a list of all 32 bit applications installed on your Windows system, proceed as follows:
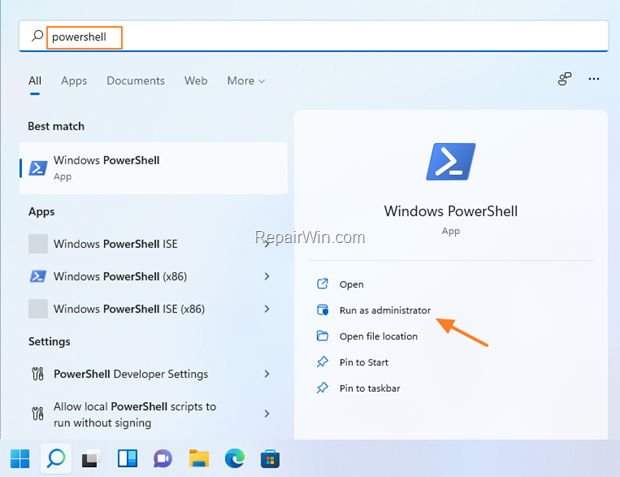
1. Open PowerShell as Administrator. To do that:
- Click the Start menu and type powershell in the search box
- Click Run as administrator.

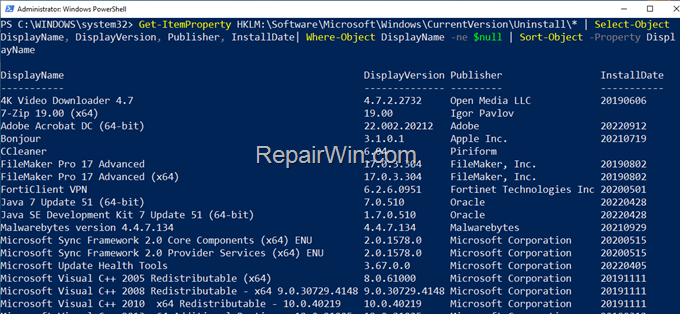
2. To view all 32-bit installed programs give the following PowerShell command:
- Get-ItemProperty HKLM:SoftwareMicrosoftWindowsCurrentVersionUninstall* | Select-Object DisplayName, DisplayVersion, Publisher, InstallDate| Where-Object DisplayName -ne $null | Sort-Object -Property DisplayName

3. To get a list of all installed 32-bit programs in a CSV/TXT file, issue the following command in PowerShell: *
* Info: The below command will generate a CSV in the user’s Desktop folder called 32BitProgramsInstalled.csv with the 32-bit installed programs, sorted by name, version, publisher and the installed date.
- Get-ItemProperty HKLM:SoftwareMicrosoftWindowsCurrentVersionUninstall* | Select-Object DisplayName, DisplayVersion, Publisher, InstallDate| Where-Object DisplayName -ne $null | Sort-Object -Property DisplayName | Export-Csv “$($env:USERPROFILE)Desktop32BitProgramsInstalled.csv” -NoTypeInformation


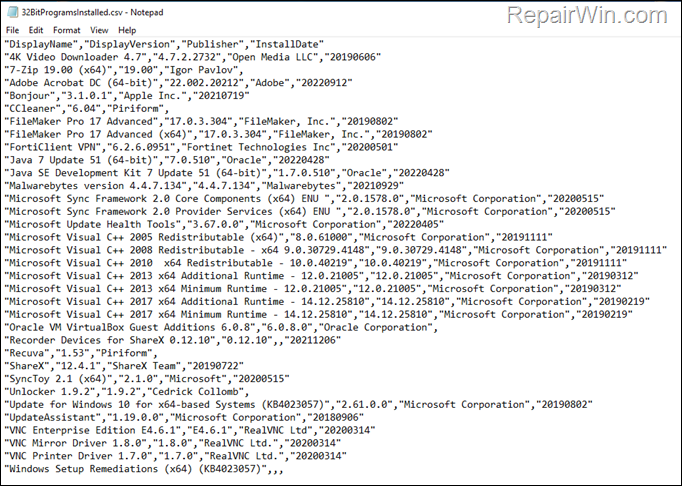
4. After executing the above command, navigate to your desktop. There you’ll find a new CSV file called “32BitProgramsInstalled.csv”. Open this file in Excel or with Notepad to view a list of the installed 32-bit programs.

Step 2. Get a list of all 64-bit programs listed in Programs and Features.
To view or save a list of all installed 64-bit applications on your Windows 10/11 system:
1. Open PowerShell as Administrator.
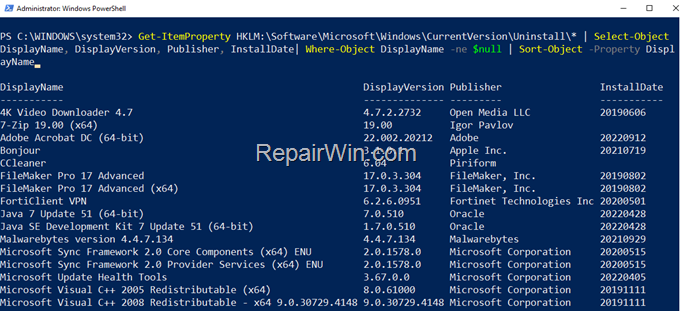
2. Give the following PowerShell command to view a list of all 64-bit programs:
- Get-ItemProperty HKLM:SoftwareMicrosoftWindowsCurrentVersionUninstall* | Select-Object DisplayName, DisplayVersion, Publisher, InstallDate| Where-Object DisplayName -ne $null | Sort-Object -Property DisplayName

3. To save the list of all installed 64-bit programs in a TXT file, give the below command in PowerShell: *
* Info: The below command will generate a CSV in the user’s Desktop folder called 64BitProgramsInstalled.csv with the 64-bit installed programs, sorted by name, version, Publisher and the installed date.
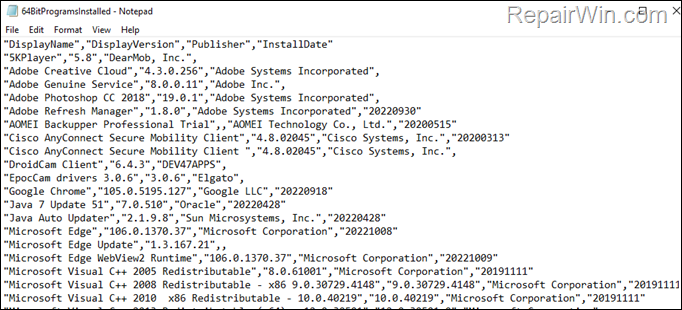
- Get-ItemProperty HKLM:SoftwareWow6432NodeMicrosoftWindowsCurrentVersionUninstall* | Select-Object DisplayName, DisplayVersion, Publisher, InstallDate| Where-Object DisplayName -ne $null | Sort-Object -Property DisplayName | Export-Csv “$($env:USERPROFILE)Desktop64BitProgramsInstalled.csv” -NoTypeInformation


4. After executing the above command, navigate to your desktop. There you’ll find a new CSV file called “64BitProgramsInstalled.csv“. Open this file in Excel or in Notepad to view a list of the installed 64-bit programs.

Step 3. Get a List of All Installed Windows Store Apps in Windows 10/11.
1. To view a list of all installed Windows Store apps in PowerShell, open PowerShell as Administrator and give the following command:
- Get-AppxPackage | Select Name, PackageFullName


2. To save a list of all installed Windows Store Apps in a TXT/CSV file, give the following PowerShell command:
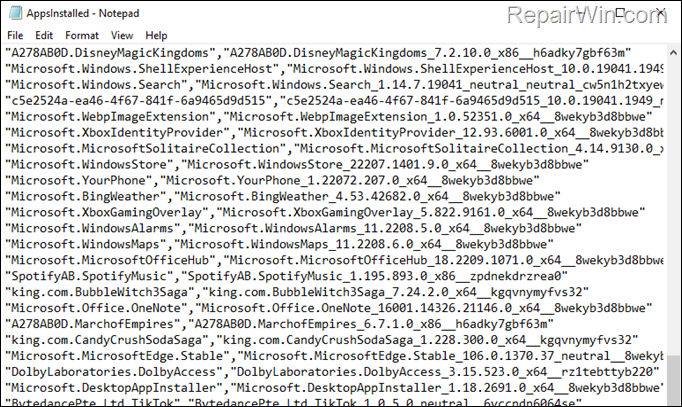
* Info: The below command will generate a CSV in the user’s Desktop folder called AppsInstalled.csv with all the Windows Modern Apps.
- Get-AppxPackage | Select Name, PackageFullName | Export-Csv “$($env:USERPROFILE)DesktopAppsInstalled.csv” -NoTypeInformation


3. After the command execution, navigate to your desktop and open the “AppsInstalled.csv” file with Excel or Notepad, to view the list of all installed Windows Store apps.

Method 2. Export a List of Installed Programs & Windows Apps in HTML file with Geek Uninstaller.
The easiest way to get a list of the installed Programs and Store Apps in Windows 10/11 is by using a free third-party program called Geek Uninstaller. To view or save a list of the installed programs and Store apps with Geek Uninstaller:
1. Download Geek Uninstaller Free in a ZIP file.
2. When the download is completed, right-click on the downloaded file, choose Extract All and extract the compressed file.
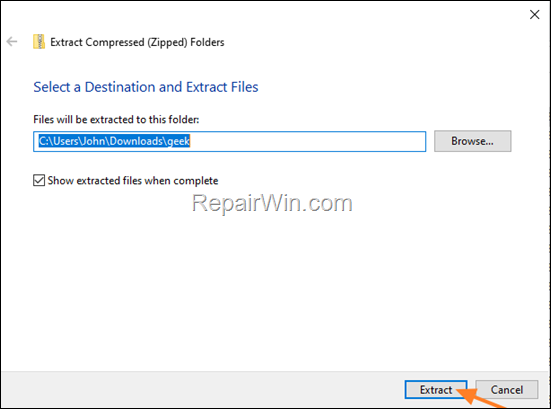

3. Navigate to the extracted folder and open the geek application.
4. At Geek Uninstaller window, you’ll see a list of all installed programs on your machine. To save this list to a file, click the File menu and choose Export to HTML.


5. Type a name for the file (e.g. “Installed Programs”), and click Save.
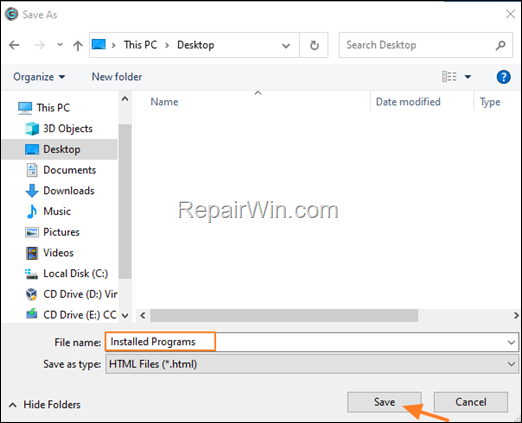

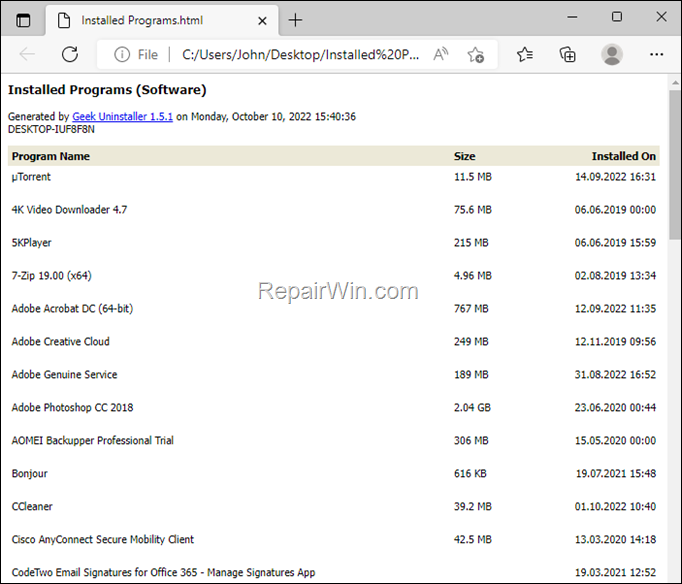
6. Finally open the created HTML file on your desktop to see a list of all the installed programs.

7. If you want to save also a list of all installed Windows Apps, click the View menu in Geek Uninstaller and choose Windows Store Apps.


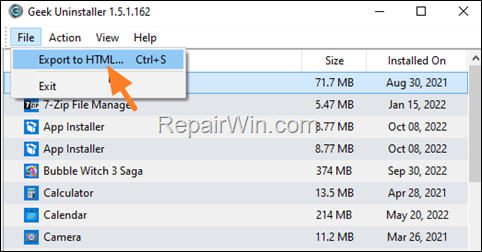
8. Now on your screen you’ll see a list of all the Windows Store Apps. To save this list to a HTML file, click on the File menu and select Export to HTML.

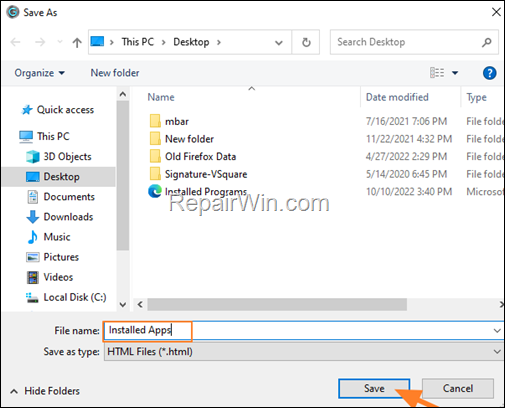
9. Give a name to the exported file (e.g. “Installed Apps”) and click Save.

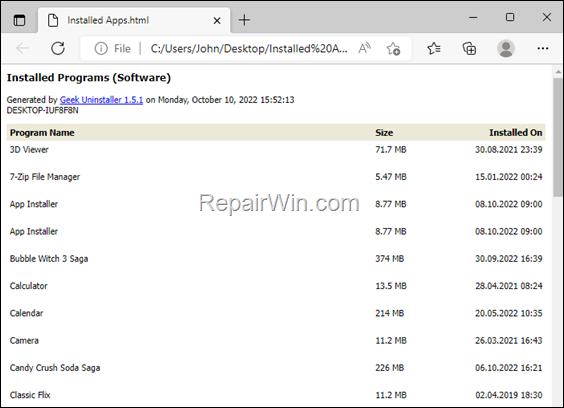
10. Now go to your desktop, open the created HTML file to see a list of all the installed Windows Apps.

That’s all folks! Did it work for you?
Please leave a comment in the comment section below or even better: like and share this blog post in the social networks to help spread the word about this solution.

Bài liên quan
- FIX: Error 0x81000203 in System Restore. (Solved)
- Cannot Access Shared folder. User has not been granted the requested logon type at this computer. (Solved)
- FIX: Cannot clear TPM – 0x80284001, 0x80290300 or 0x80290304.
- Unable to Schedule Teams Meeting in 15 or 10 minutes slots (Solved)
- How to Share Folder without Username/Password on Windows 10/11.
- FIX: Thunderbird High CPU or Memory Usage issues.