This guide contains three (3) reliable methods to install Windows 11 on your computer without using a Microsoft account, but using a local account instead.
The latest version of Windows 11 (22H2) does not allow the creation of a local account during the setup process and requires an Internet connection to set up and connect Windows 11 to a Microsoft account. (These requirements did not exist in previous versions of Windows 11 where you could proceed with the installation even offline with a local account)
More specifically, if during the installation process of Windows 11 22H2 you do not have an Internet connection, you will not be able to continue the installation of Windows 11, because there is no such option.
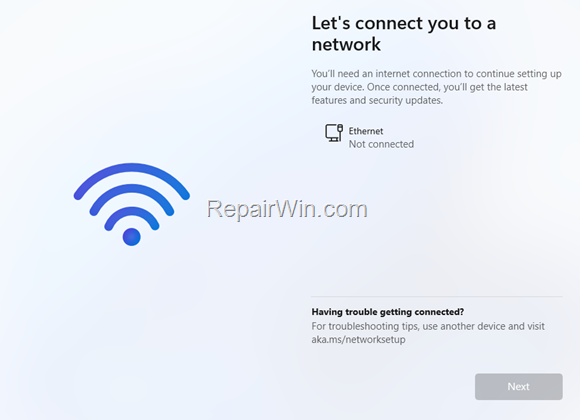

Also, in case you have Internet Connection, there is no option to proceed with Windows 11 installation without using a Microsoft Account.


As many users (including me) don’t like to use a Microsoft account with Windows 11, I decided to write this tutorial with detailed instructions to bypass the Microsoft account requirement in Windows 11 setup.
How to Set up Windows 11 with a Local Account (Windows 11 v22H2 and later versions).
To install Windows 11 22H2 and later versions with a local account, you can use any of the methods below, but I suggest to you use Method 1 or Method-2 if your PC has Windows 11 pre-installed, (OOBE/Out Of the Box Experience), and Method-3 if you want to perform a clean installation of Windows 11.
Method 1. Setup Windows 11 with a Local Account by Signign to Windows 11 using an Overused Microsoft Account.
The first method to force Windows 11 to ask you to use a local Account during setup, is to first confuse Windows by entering an email address that is used many times. To do that:
1. Click Sign in when prompted to connect Windows 11 with a Microsoft Account.


2. Now the tricky part: As an account name, type one of the following and press Next:
- user@user.com
- na@na.com
- me@me.com
- g


3. Type a random password (e.g. “12345”), and click Next.
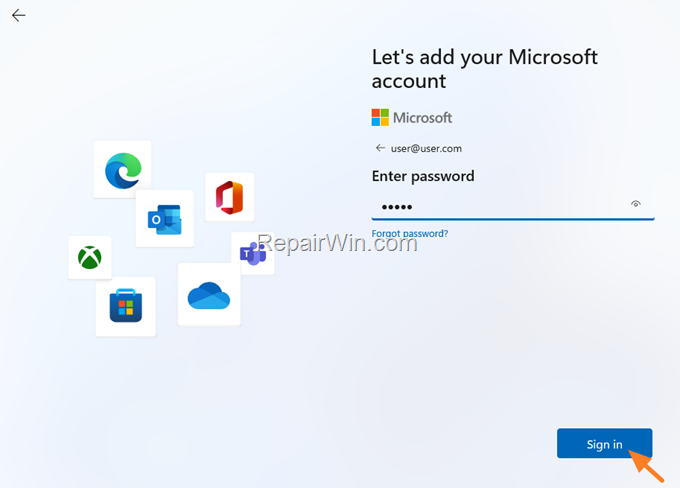

4. Normally now, you’ll receive the error “Oops something went wrong”. Click Next.


5. At next screen, type a username for the Local Account and click Next.
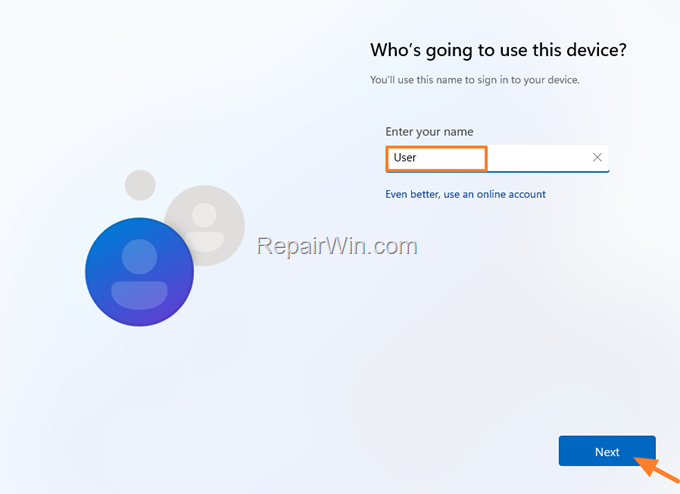

6. Continue to the rest steps of Windows 11 setup.
Method 2. Install Windows 11 22H2 without a Microsoft Account by forcing it to install with a Local Account.
The next method to setup Windows 11 with a local account, is to disable the network connection and to force it to ask for a local account.
Step 1. Disable the Network Connection.
If you are already connected to network/internet, proceed and disconnect you PC for the network, by following one of the ways below, according your case: *
* Note: If you are not yet connected to the network/internet, skip to step-2.
A. If you are connecting to the network using an ethernet cable, disconnect it.
B. If you are connecting to the network using a USB Wi-Fi (wireless) adapter, remove it.
C. If you have a laptop, see if there is a switch on your laptop keyboard that turns off the Wi-Fi adapter,and press it once to deactivate it.
D. If you cannot disconnect from the network using the above instructions, proceed to disable the network adapter as instructed below:
1. At “Sign in with a Microsoft account” screen, press SHIFT + F10 to open a command prompt window.
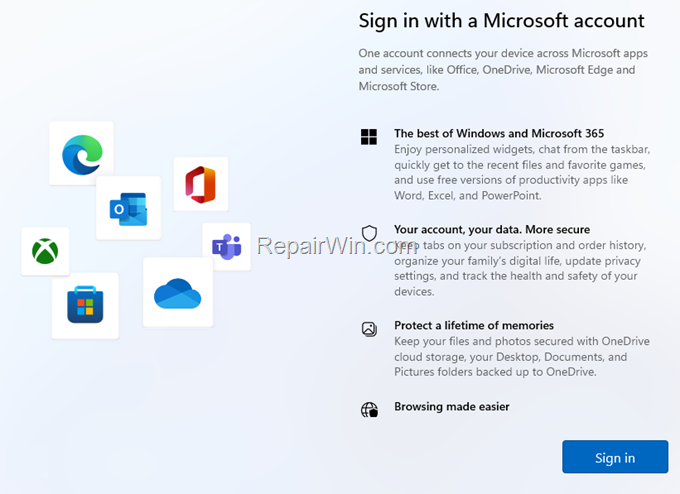

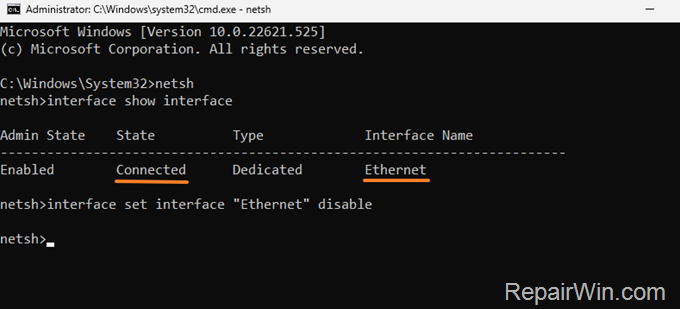
2. In command prompt, give the following commands:
- netsh
- interface show interface
3. Now notice the Interface Name of the connected interface and give the following command to disable it: *
- interface set interface “Interface Name” disable
* Note: Replace the Interface Name with the name of the connected interface. e.g. At this example, the connected interface is the “Ethernet”, so the command will be:
- interface set interface “Ethernet” disable”

4. Close the command window and click Sign-in.
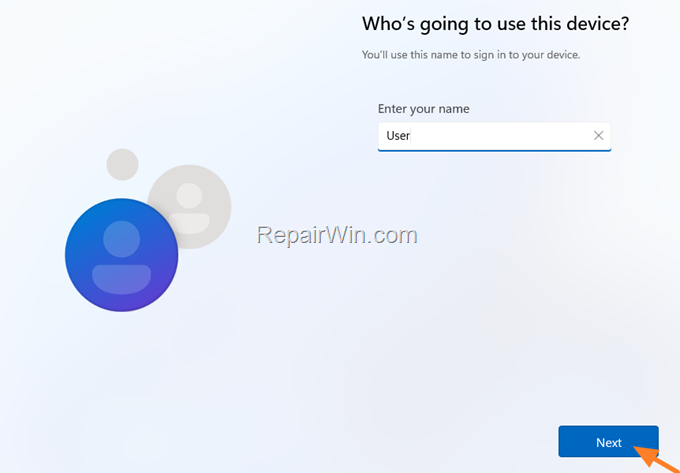
5. Normally, you’ll be prompted to type a name for a local account. If so, type a name and continue to the rest steps of the setup process. If not, continue to step.

Step 2. Force Windows 11 Setup to Continue without Network.
1. At “Let’s connect you to a network” screen, press SHIFT + F10 to open a command prompt window.


2. In Command Prompt give the following commands:
- cd oobe
- bypassnro


3. Your computer will restart. After restart, choose I don’t have internet.


4. Then choose Continue with limited setup


5. Type a username for the Local Account, click Next and continue to Windows 11 setup.


Method 3. Bypass Microsoft Account Requirement by creating a Windows 11 install disk with RUFUS.
If you want to preform a clean installation of Windows 11 without a Microsoft Account, then use the RUFUS USB Creator Utility to create a Windows 11 Installation Media on a USB disk, that bypasses the Microsoft Account sign-in requirement in Windows 11 setup. To do that:
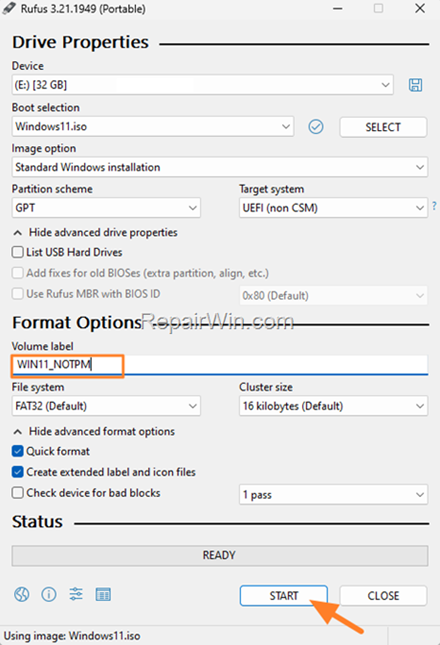
1. Download the latest version of RUFUS
2. Plug an EMPTY USB flash drive on your computer.
3. Run the “rufus-x.exe” file you downloaded.
4. Choose the empty USB drive under “Device”
5. Click Select and then open the Windows 11.iso file.
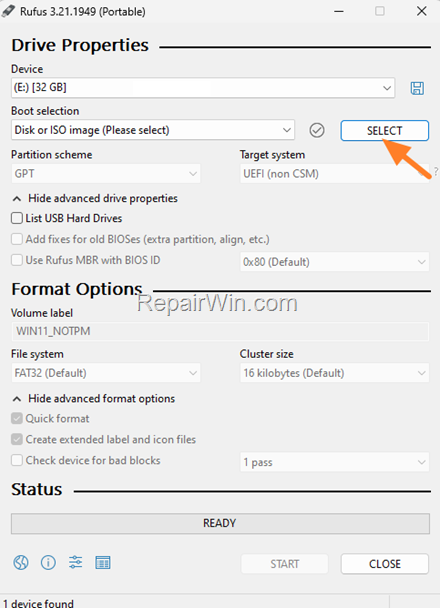

6. Type a Volume label (Optional) and then click Start to create the installation media.

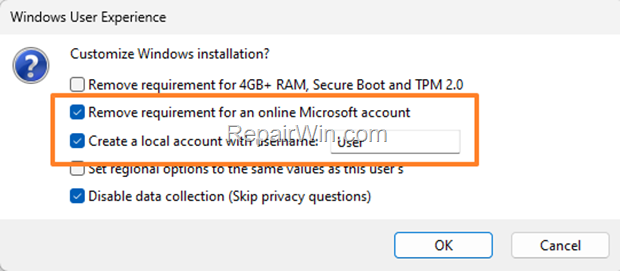
7. At Windows User Experience options, check the following option and click OK.*
- Remove requirement for an online Microsoft Account: to install Windows 11 with a local account.
- Create a local account with username…and then type a username for the account (e.g. “User”). *
* Important: If you don’t type the account name here, you must disconnect from the network during the Windows 11 installation, in order to setup a local account, otherwise you’ll be asked for a Microsoft Account.
Notes: Here you can also select the following options:
- Remove requirement for 4GB+ RAM, Secure Boot and TPM 2.0: if you want to install Windows 11 on a PC without TPM, Secure Boot or a supported Windows 11 processor.
- Set regional options to the same values as this user’s.
- Disable data collection to skip privacy questions.

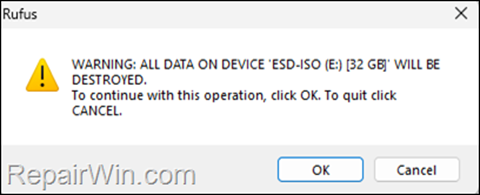
8. Read carefully the security waning and if you don’t have files you need on the USB, click OK to proceed.

9. When the Windows 11 Installation media is created, close RUFUS and use the USB disk to setup Windows 11 without using a Microsoft Account.
That’s all folks! Which method worked for you?
Please leave a comment in the comment section below or even better: like and share this blog post in the social networks to help spread the word about this solution.
![Install Windows 11 22H2 without Microsoft Account. [How To] 7 Hình ảnh thuộc sở hữu của trang web qnet88.com](https://qnet88.com/wp-content/uploads/2023/05/btn_donate_lg-2.gif)

