On Windows 10, System Restore is failed with error 0x80070091, after updating the GetOffice App. The System Restore 0x80070091 error, is faced because the “Microsoft.MicrosoftOfficeHub” App update, modifies the security permissions of %ProgramFiles%WindowsApps directory. Let’s hope that MS will find the solution for this bug soon.
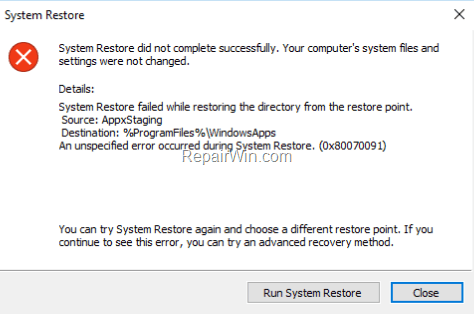
Problem description: You receive the error 80070091 in System Restore, when you try to restore your computer to a previous working state:
“System Restore did not complete successfully. Your computer’s system files and settings were not changed.
Details:
System Restore failed while restoring the directory from the restore point.
Source: AppxStaging
Destination: %ProgramFiles%WindowsApps
An unspecified error occurred during System Restore. (0x80070091)”
In this article you can find detailed instructions on how to resolve the System Restore Failure – Error 0x80070091 in Windows 10.
How to fix System Restore Failed (0x80070091) on Windows 10.
Method 1. Run System Restore from the Recovery Options.
1. Hold down the “SHIFT” key and go to Power -> Restart.
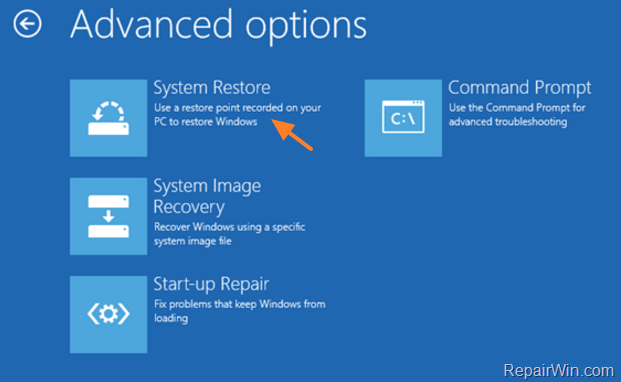
2. After PC restarts, go to: Troubleshoot -> Advanced Options –> System Restore.
– Your computer will restart again –
3. Choose an Account (with admin privileges), type the password (if any) and click Next.
4. Select a previous restore point and click Next again to restore your system to a previous state.
5. If System Restore fails again then continue to Method 2.
Method 2. Rename WindowsApps folder.
Since the System Restore error 0x80070091, indicates that the problem, is with “AppxStaging” at “%ProgramFiles%WindowsApps” folder, try to rename the “C:ProgramFilesWindowsApps” folder and then run System Restore again. To do that:
1. Hold down the “SHIFT” key and go to Power -> Restart.
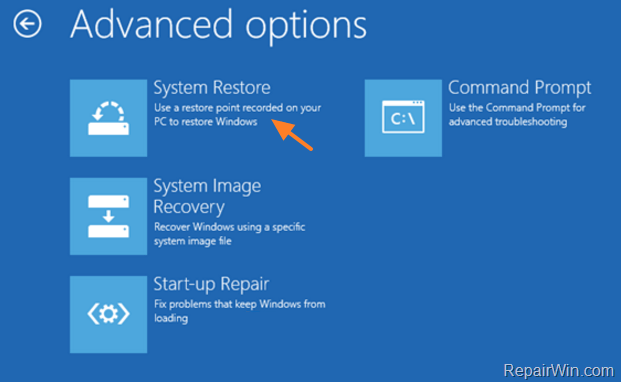
2. After PC restarts, choose: Troubleshoot -> Advanced Options –> Command Prompt.
– Your computer will restart again –
3. Choose an Account (with admin privileges), type the password (if any) and click Next.
4. At command prompt give the following commands in order (press Enter after typing each command):
- diskpart
- list volume
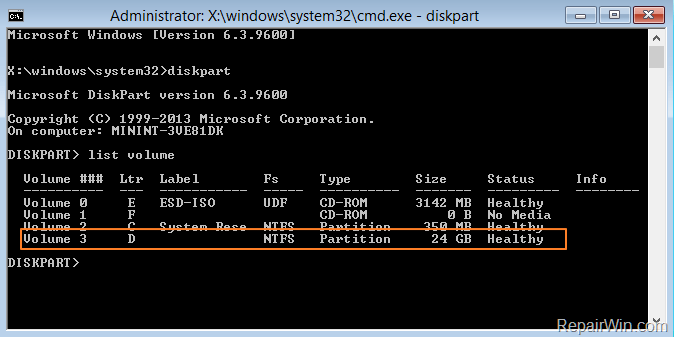
5. Now locate the Windows Drive letter. (the drive where Windows installed).
e.g. As you can see at the screenshot bellow, the Windows drive letter is D:
6. Type exit to close the DISKPART tool.
7. Now navigate to the Program Files folder on the Windows drive, by typing the following command: *
- cd /d D:Program Files
* Note: Change the letter D according to your case.

8. Give the following command to unhide the WindowsApps folder.
- attrib –h WindowsApps

9. Then rename the WindowsApps folder to WindowsAppsOLD, by giving this command:
- ren WindowsApps WindowsAppsOLD

10. Finally type rstrui to start System Restore.

11. Follow the on screen prompts to restore your system to a previous working state. *
* Note: After restore, proceed and disable the Windows Updates until Microsoft correct the problem.
Method 3. Perform a Repair Upgrade of Windows 10.
If everything fails, then perform a Windows 10 Repair – Upgrade.
Did it work for you?
Please leave a comment in the comment section below or even better: like and share this blog post in the social networks to help spread the word about this solution.

